Need additional assistance?
Check out our Omni CMS tutorials
Attend one of our Virtual Open Labs hosted once per week:
Tuesdays: 1:30 - 5 p.m.
Don't forget the Request Help Gadget!
Located in the top right of your screen inside Omni CMS.
![]()

![]()
Omni Forms can be placed inside a page using an Asset (reusable icon in your WYSIWYG toolbar). Assets are designed to be reused across multiple pages while the asset remains the same. So, if you are using a form that needs to appear in multiple places across your site, you will need to place that same Asset in multiple places. Likewise, if you wish to have a unique form across multiple pages on your site, you will need to create a unique form each page using Assets.
Check out this tutorial on how to use forms in Omni!
The following steps to create a form are as follows:
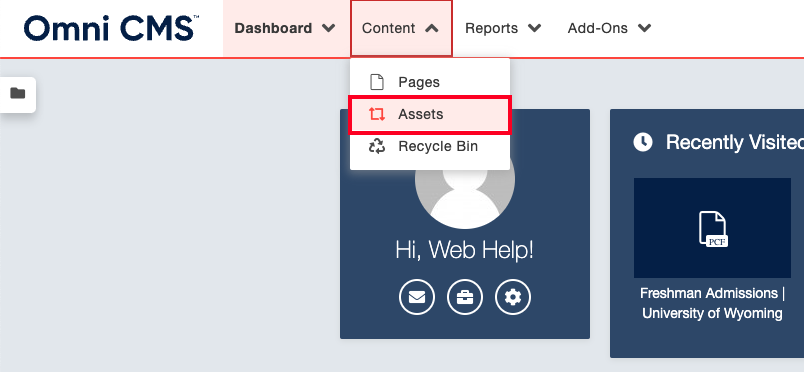
1. Select the Assets dropdown under your Content tab at the top of your page in Omni.
2. Inside Assets, select the "+New" button in the top right hand corner of the page.
3. Select the Form option.
4. Name and edit your Form fields as needed by dragging and dropping the elements
that appear in the left-hand column into your form.
Various options, included required field, can be selected in each form element.
5. IMPORTANT - Be sure to adjust your access to your form to just the directory (site) you intend
to place your form.
By default, "Everyone" is selected so if you do not wish for other site editors to
have access to your form, you must select your directory.
6. Be sure to adjsut your email setttings as needed under Email Messages. This is where submissions will be sent if you wish to receive an email when a form
is submitted.
You will be able to collect data (form subissions) by revisiting this asset at anytime
in the future.
7. Once your form has been created, be sure to Publish. Then, navigate to the page
where you wish to embed your form.
Forms typically work best on a two-column page template.
8. After checking the page out for editing, locate the editable content region where
you wish for your form to be placed. Ensure your page contains an appropriate Snippet
so your form aligns properly on your page.
For more information on how to use snippets, visit our Snippets & Components tutorial page.
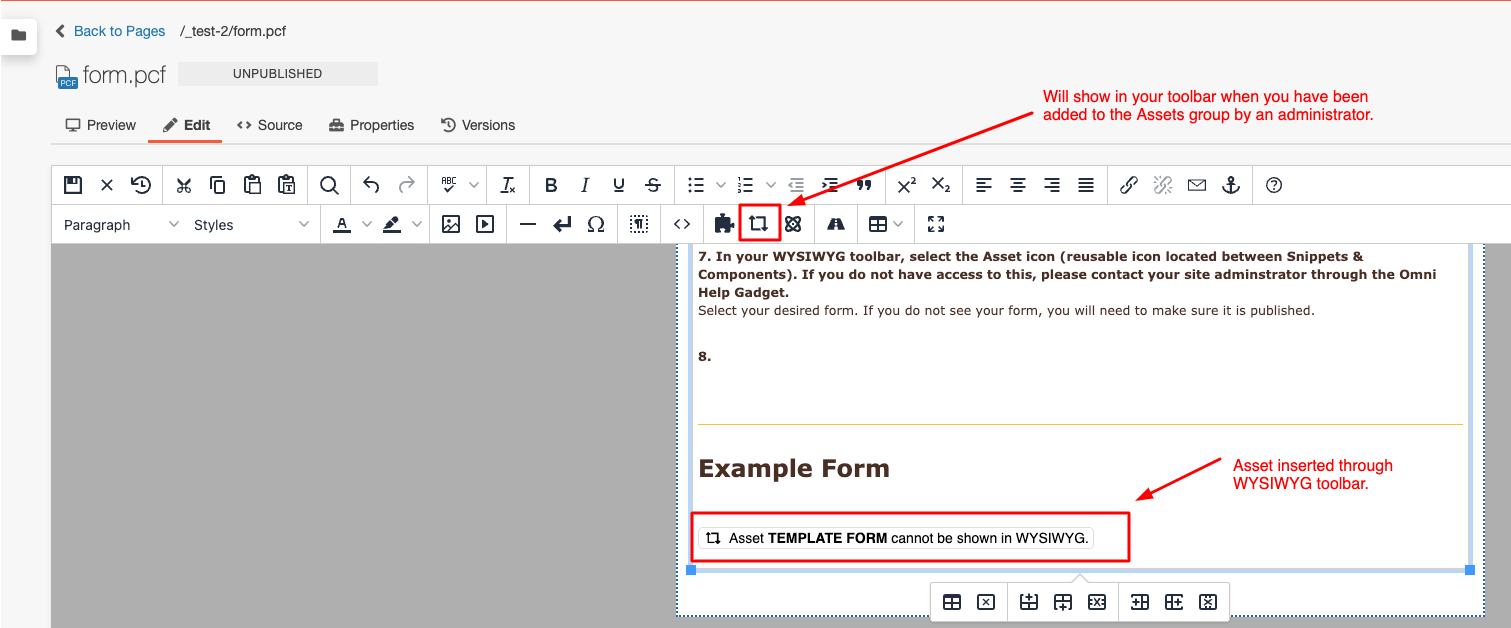
9. In your WYSIWYG toolbar, select the Asset icon(reusable icon located between Snippets
& Components). If you do not have access to this, please contact your site adminstrator
through the Omni Help Gadget.
![]()
Select your desired form. If you do not see your form, you will need to make sure
it is published.
10. Preview your form on your page, and publish!
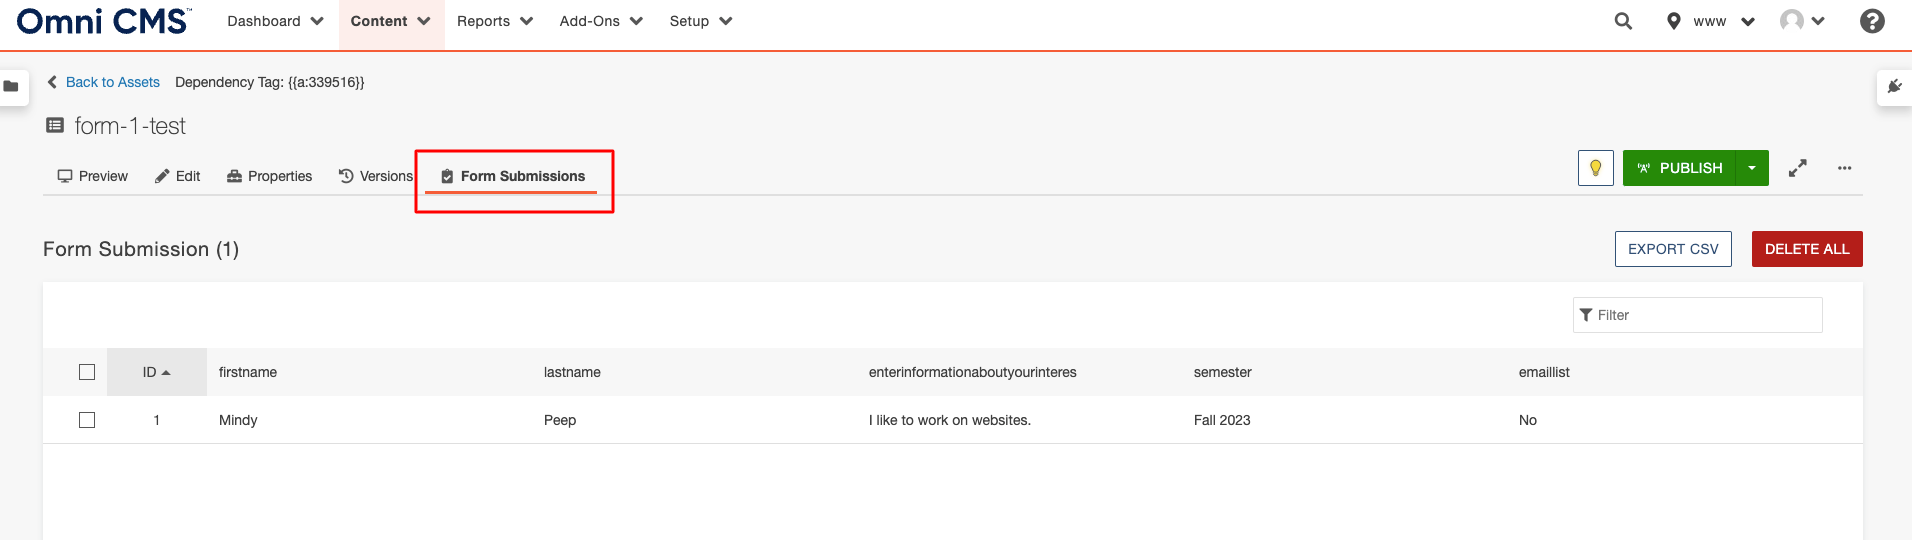
You can access your form submissions through your form Asset in the Form Submissions tab.
Need additional assistance?
Check out our Omni CMS tutorials
Attend one of our Virtual Open Labs hosted once per week:
Tuesdays: 1:30 - 5 p.m.
Don't forget the Request Help Gadget!
Located in the top right of your screen inside Omni CMS.
![]()