Editing Images
Step by Step Instructions
This guide will cover resizing and cropping an image already uploaded into your files.
Refer to this guide for uploading instructions.
Resizing an Image
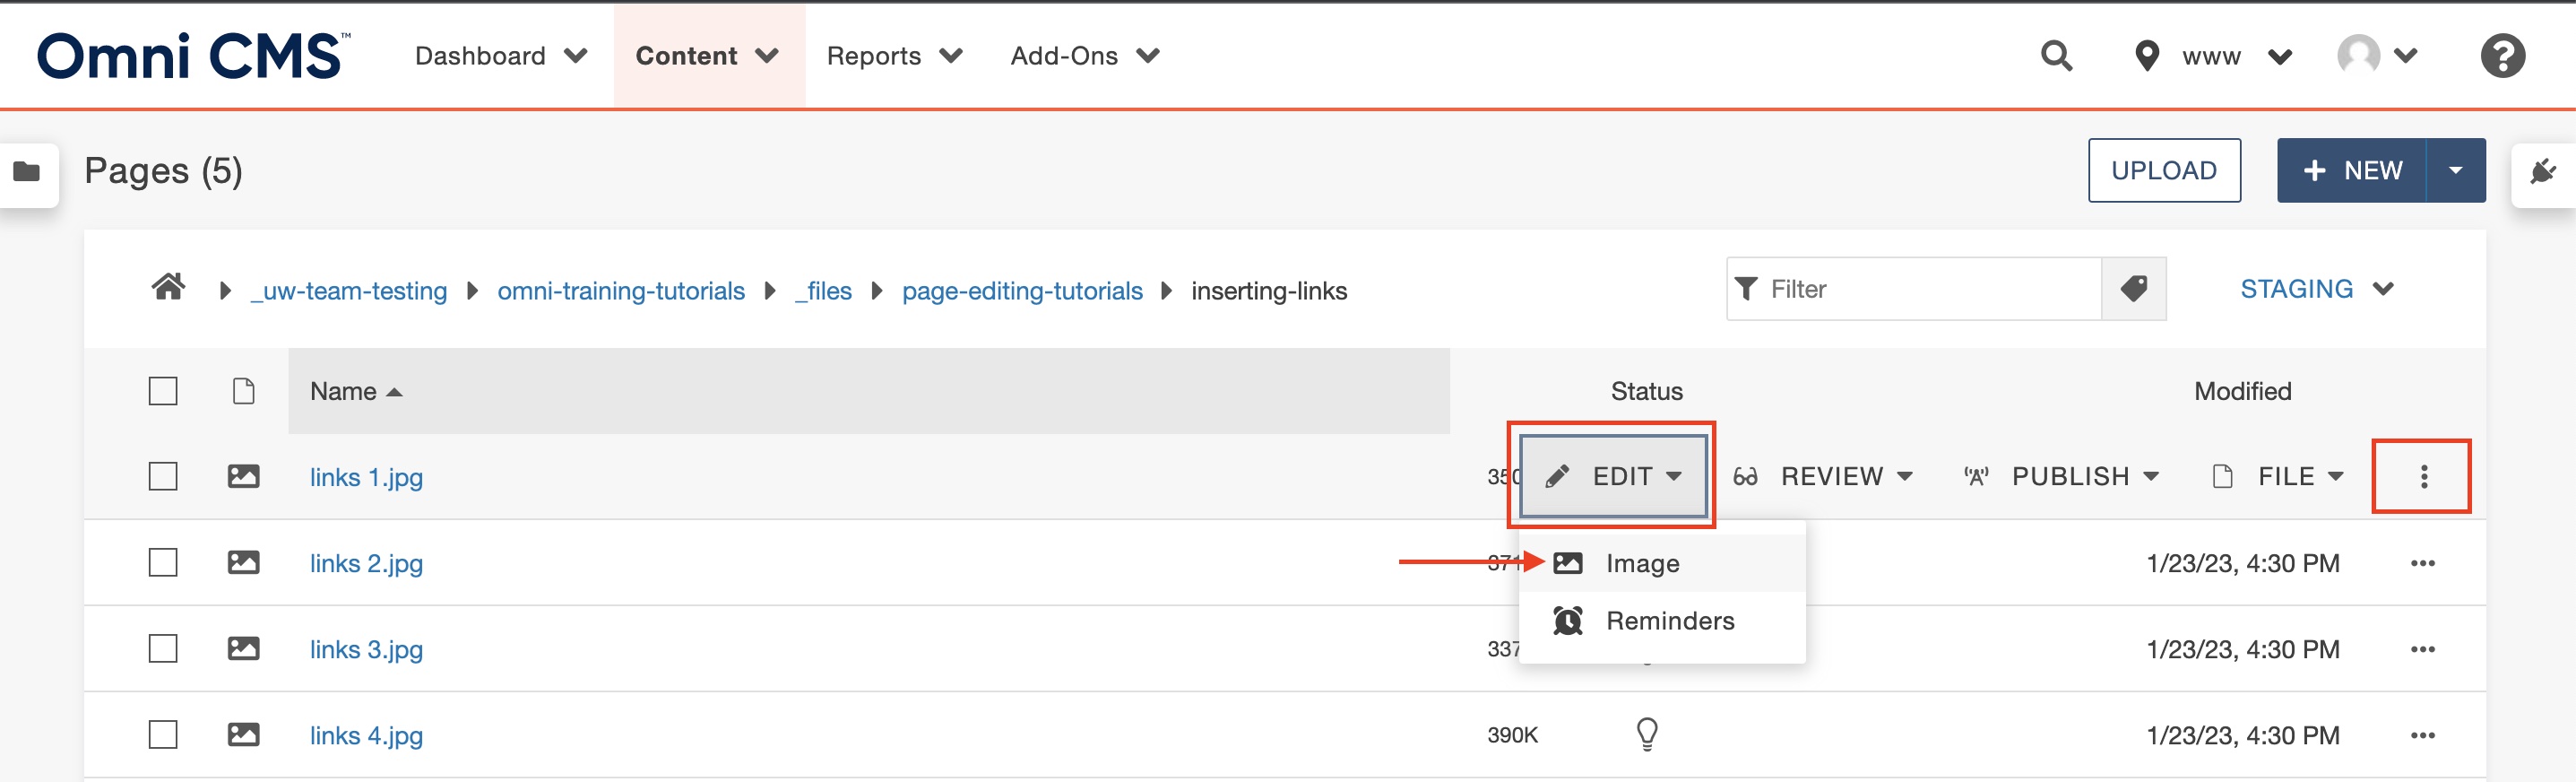
- Navigate to the file you want to edit (through folder selection not in the live page).
- Click the three dots on the right most side of the file. Select edit and then image.
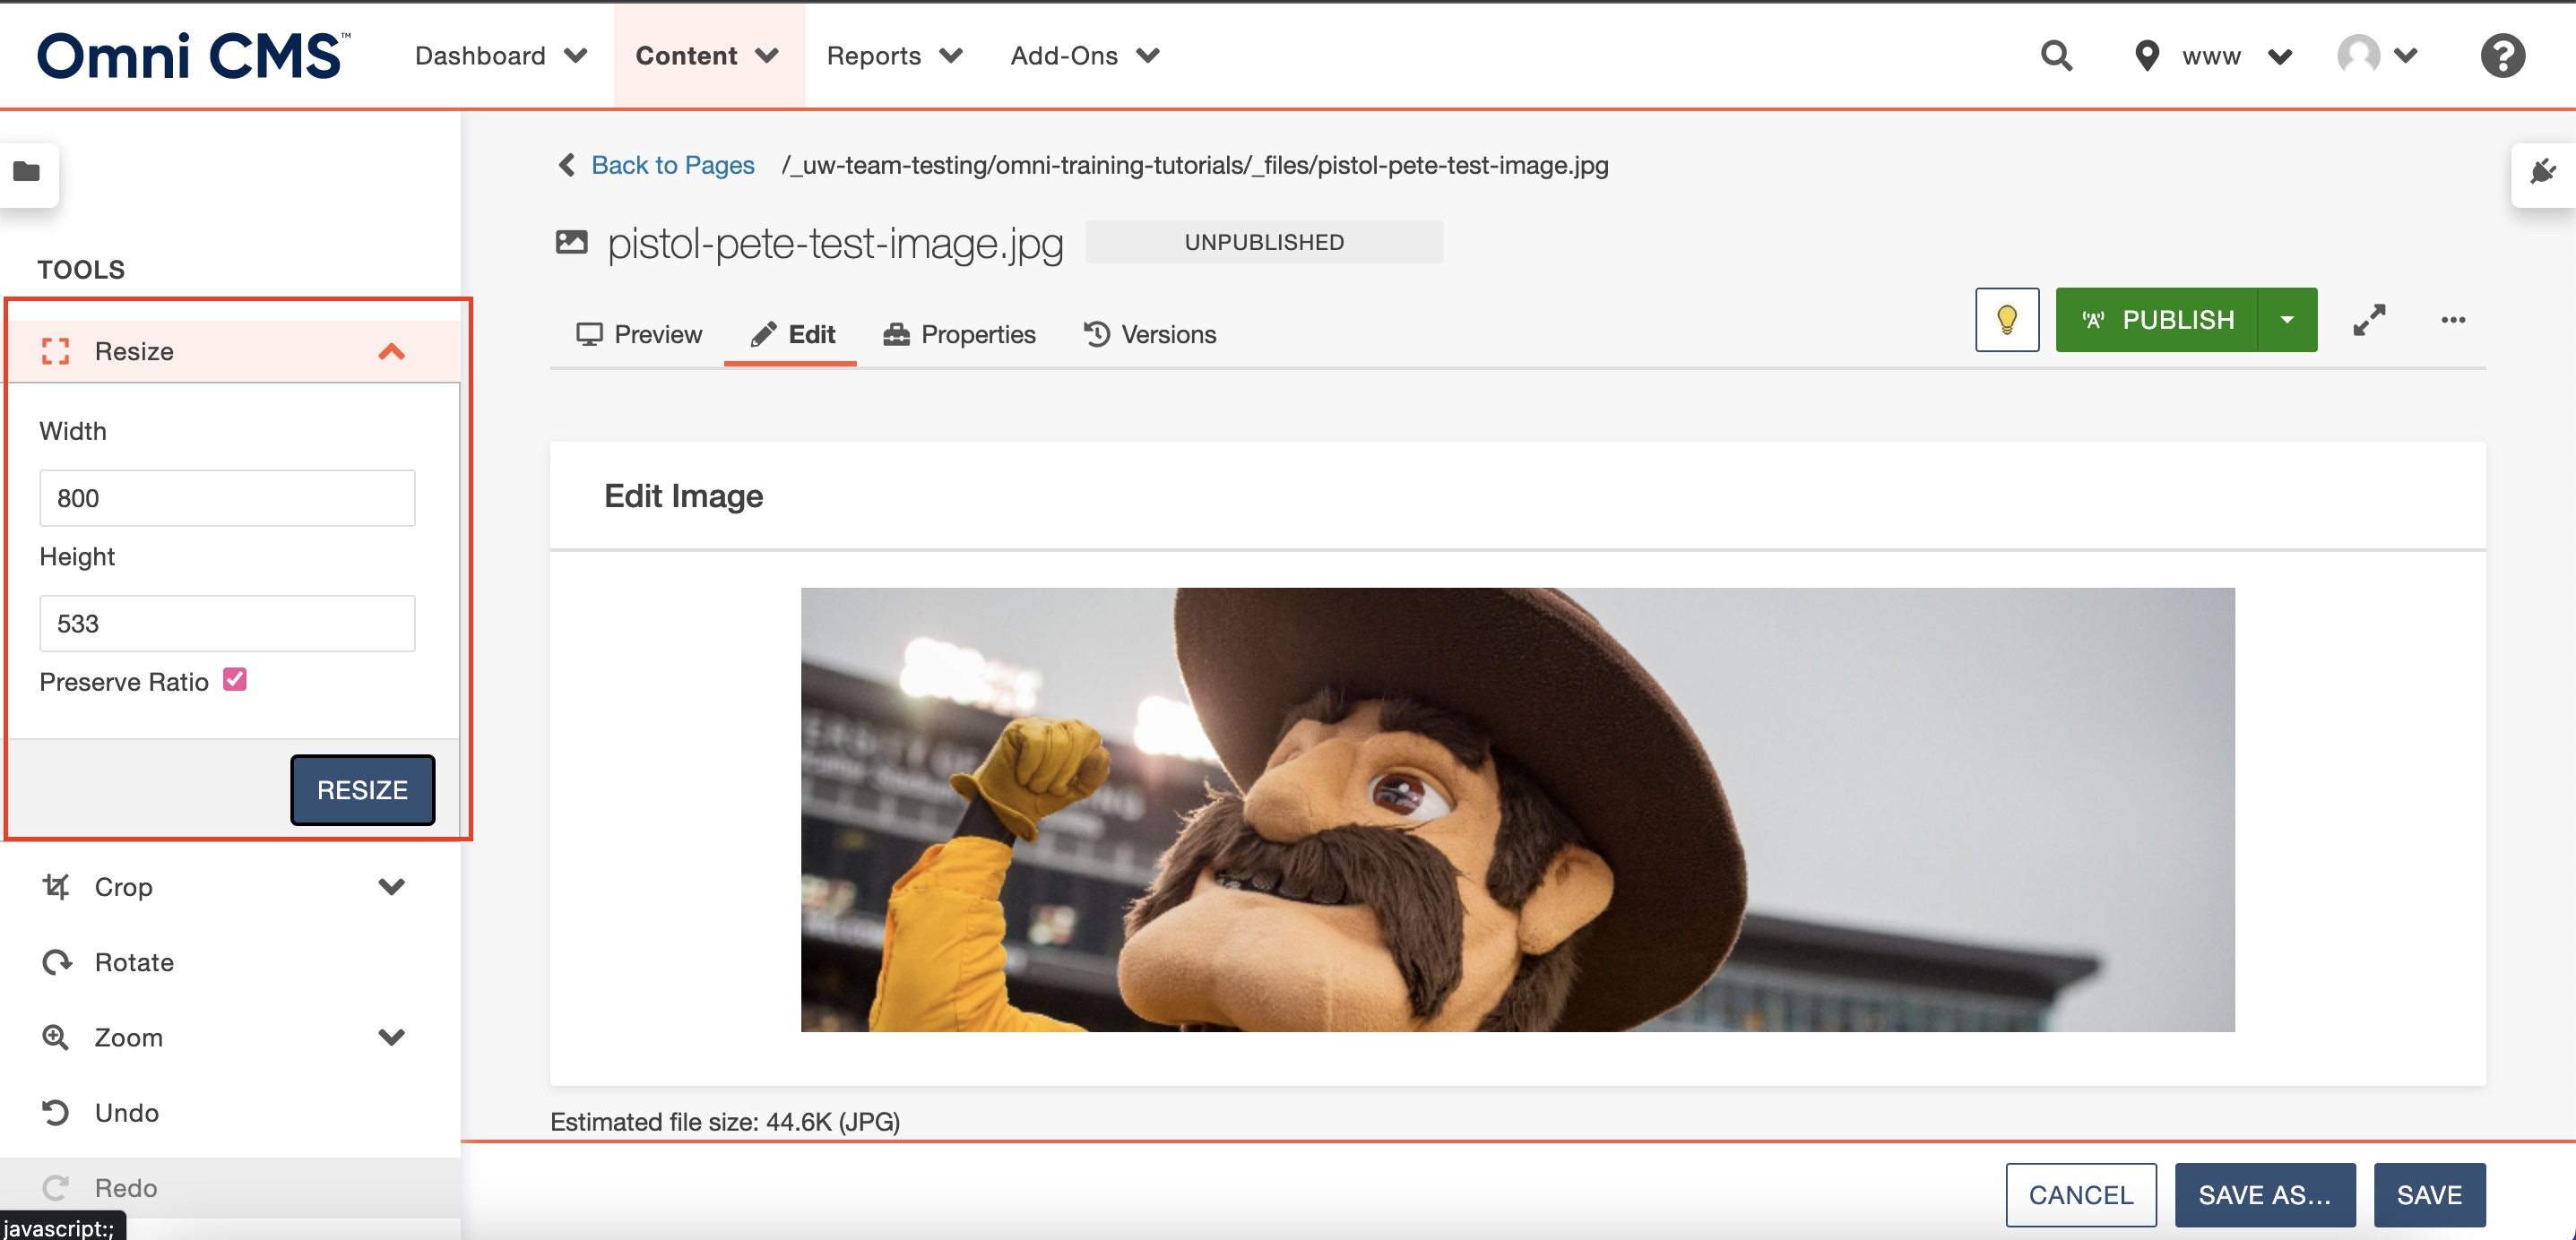
- Open the Resize section from the left side toolbar. The numbers displayed show the
dimensions of the original image.
- Enter your new width and always preserve the ratio to ensure that you do not stretch
the image. Click resize when you are finished.
Note: When inserting an image that has been previously saved to your files into a page,
you will have a chance to resize the image specifially for the page. In this instance
you can size the image in the page smaller than it is saved in the file but you can
not make it larger. For more information, refer to the inserting an image in a page guide.
- If you want to crop, go to the next section for information on how to crop. If you are done, press save at the bottom of the page and republish the image using
the publish button at the top of the page.
Note: Always remeber to publish twice once to the default also seen as www or production
and again to Dev.
Cropping an Image
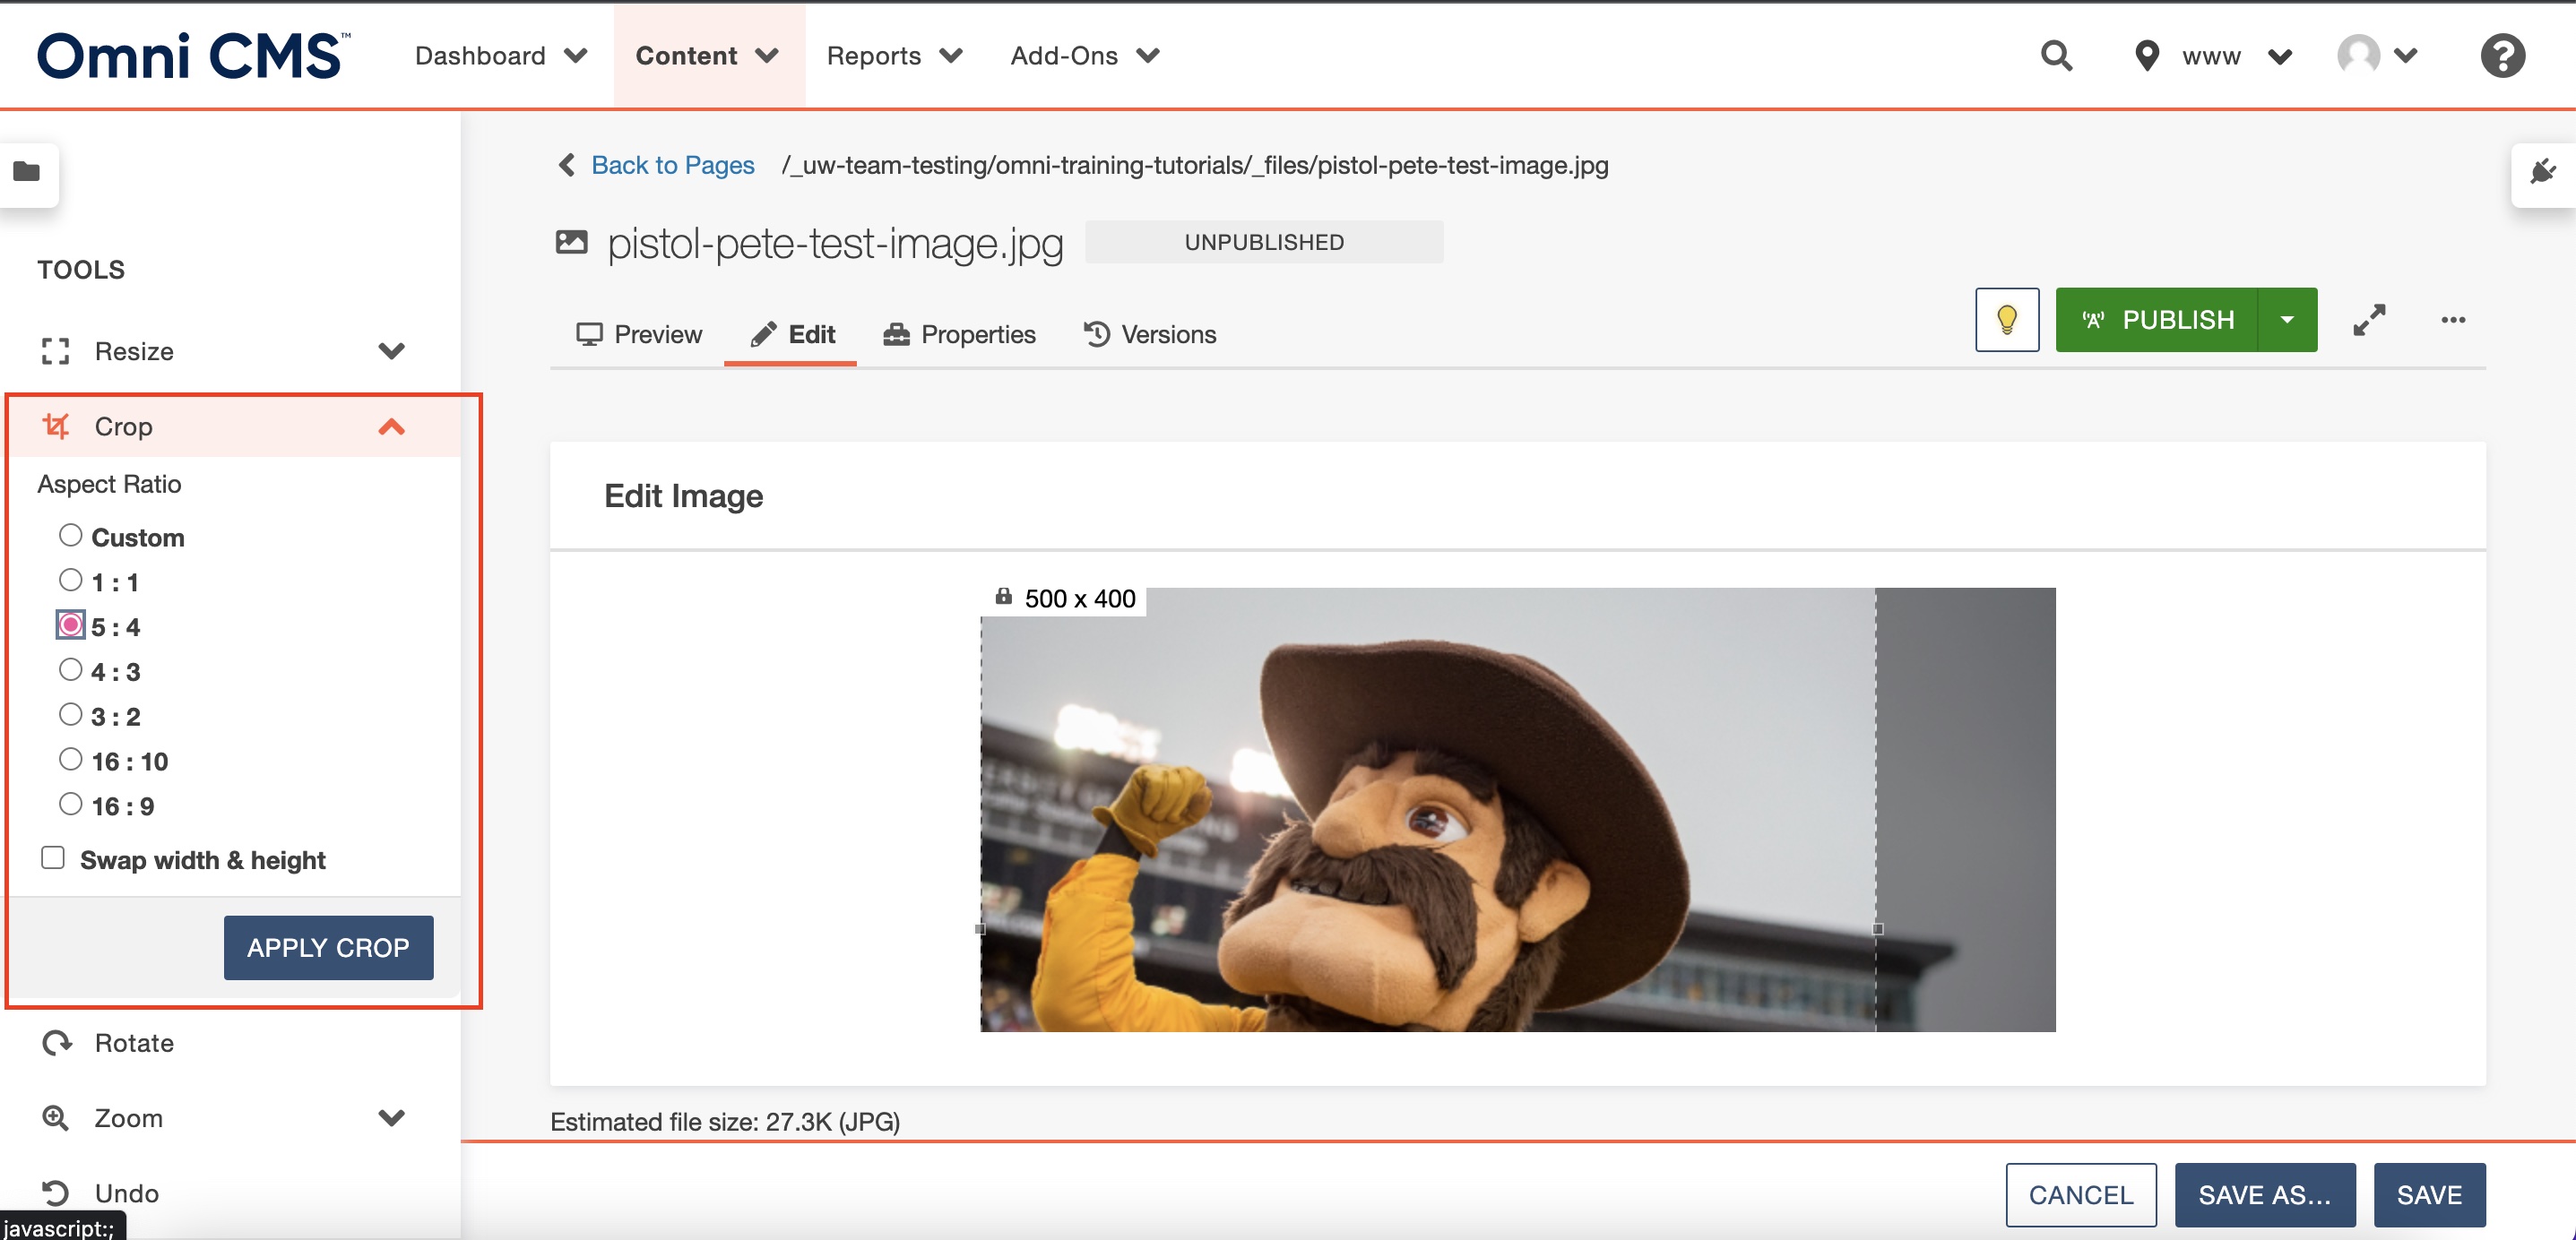
- Open the Crop section. You can choose one of the provided aspect ratios and see the
result on the right.
Note that the new size is provided in the upper left corner.
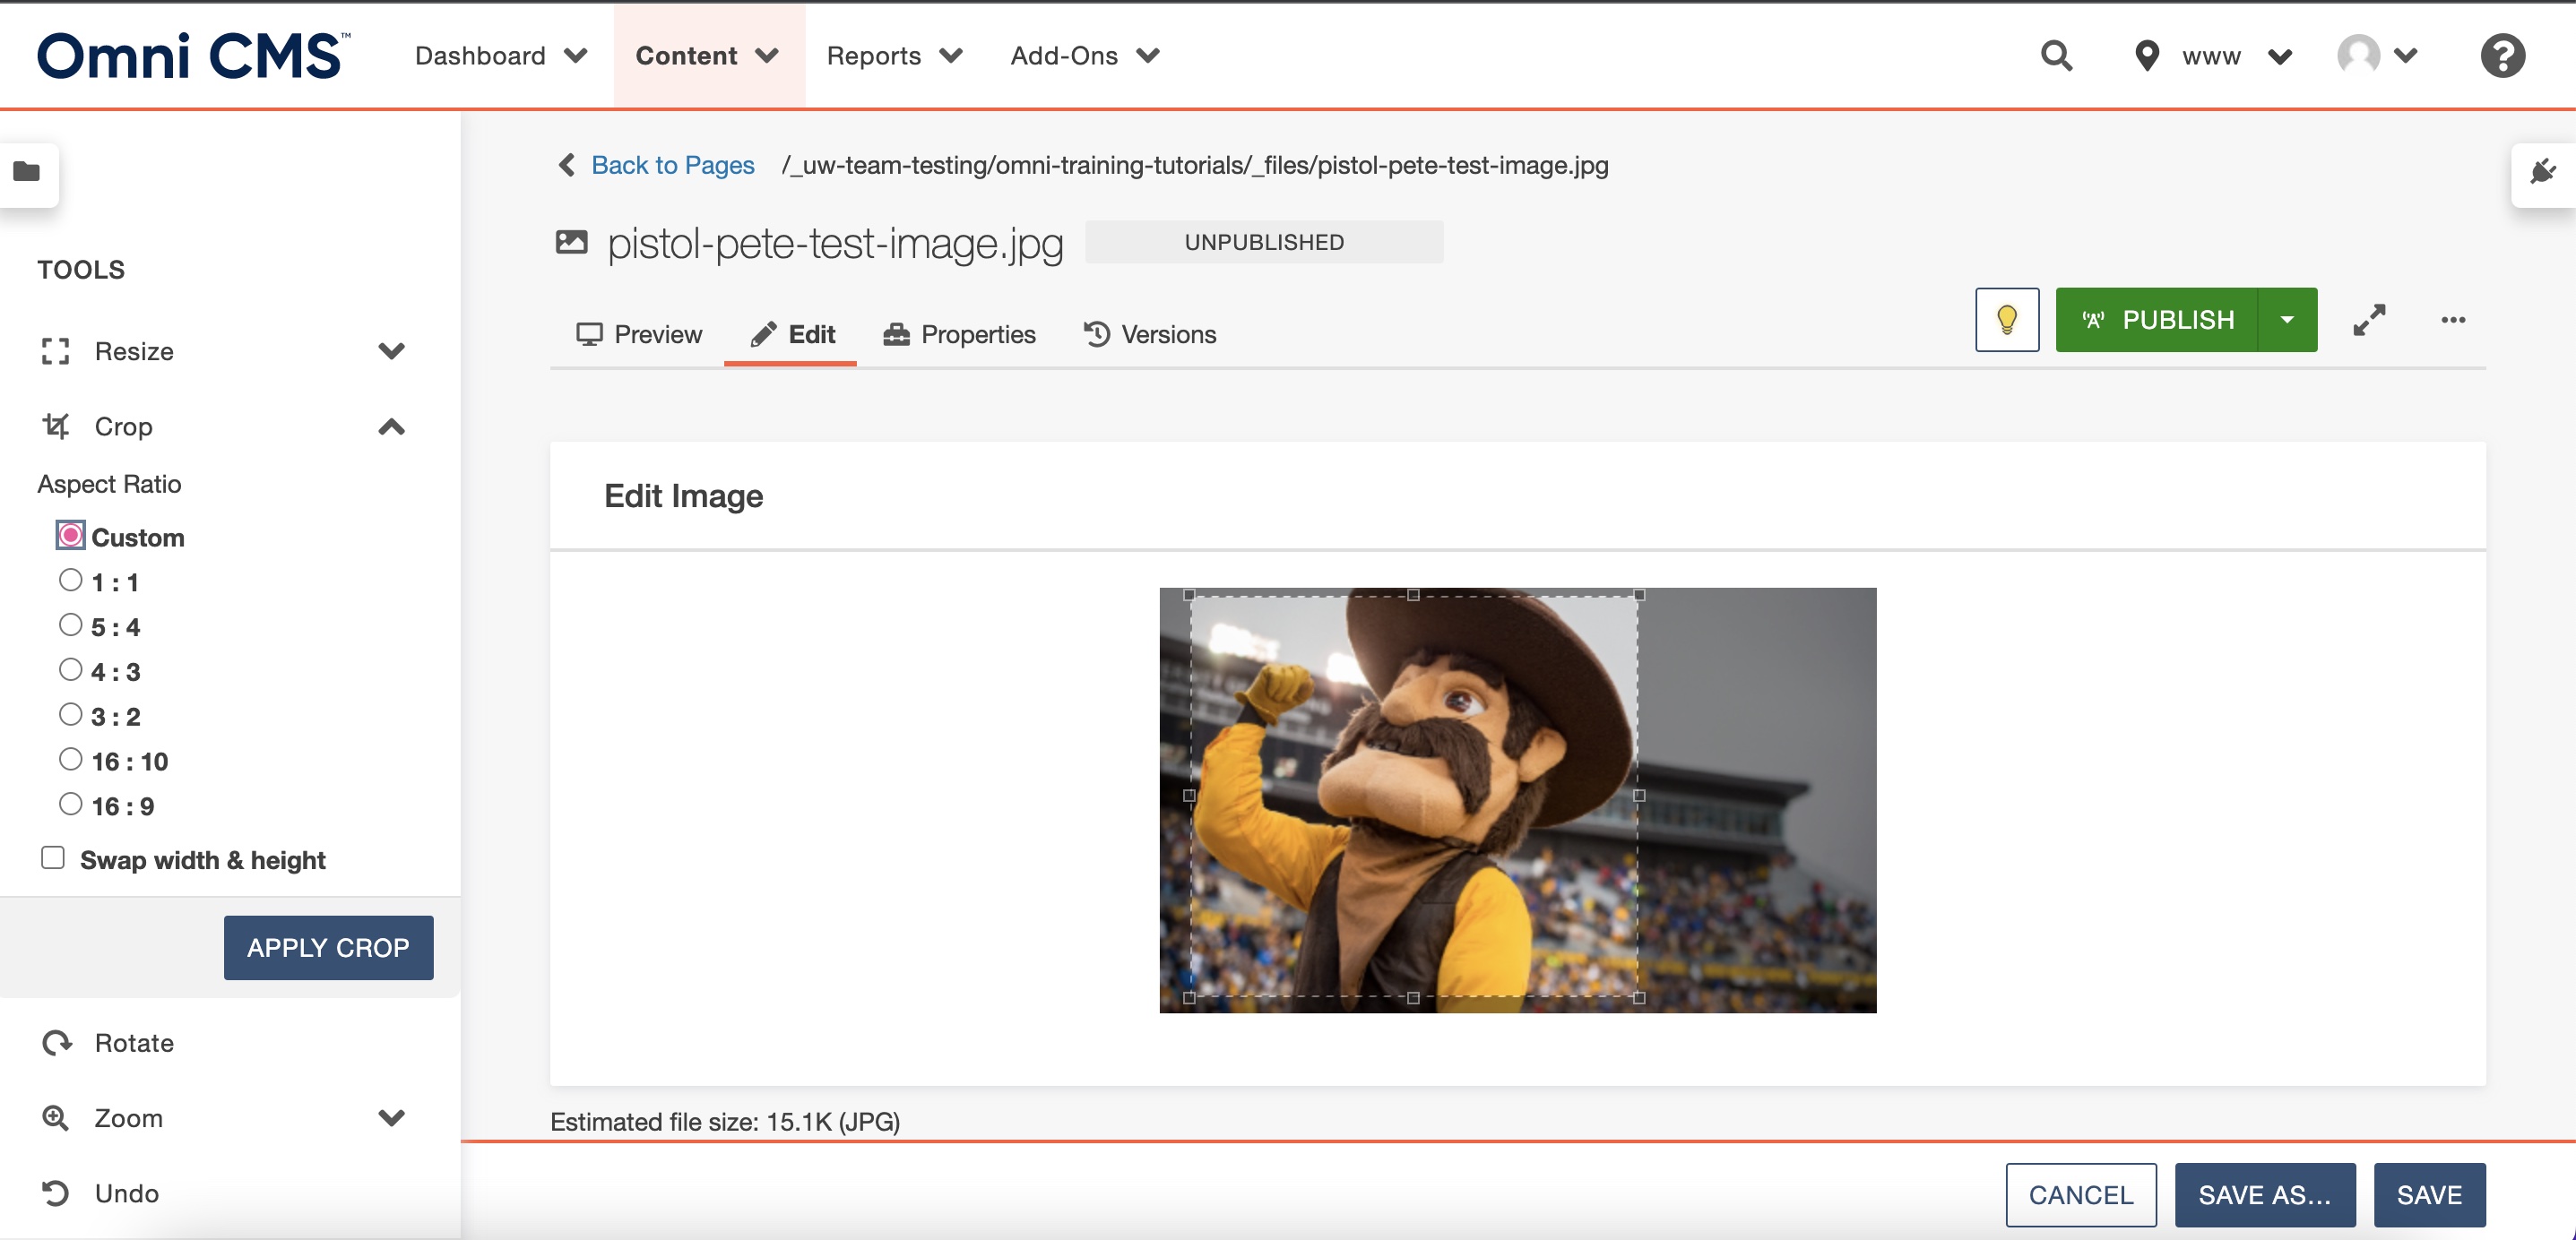
- If you want a different ratio select Custom and drag the outline to the desired size.
- When you are finished, click the Apply Crop button.
- A preview of the cropped image will appear. Keep ediitng or if finished, click save
at the bottom of the page and republish the image using the publish button at the
top of the page.
Note: Always remeber to publish twice once to the default also seen as www or production
and again to Dev.