Need additional assistance?

Check out our Omni CMS tutorials

Attend one of our Virtual Open Labs hosted once per week:
Tuesdays: 1:30 - 5 p.m.

Don't forget the Request Help Gadget!
Located in the top right of your screen inside Omni CMS.

plugin icon


Enter Alt Text
Find us on Instagram (Link opens a new window)Find us on Facebook (Link opens a new window)Find us on Twitter (Link opens a new window)Find us on LinkedIn (Link opens a new window)Find us on YouTube (Link opens a new window)

Uploading PDFs and Images

Step by Step Instructions


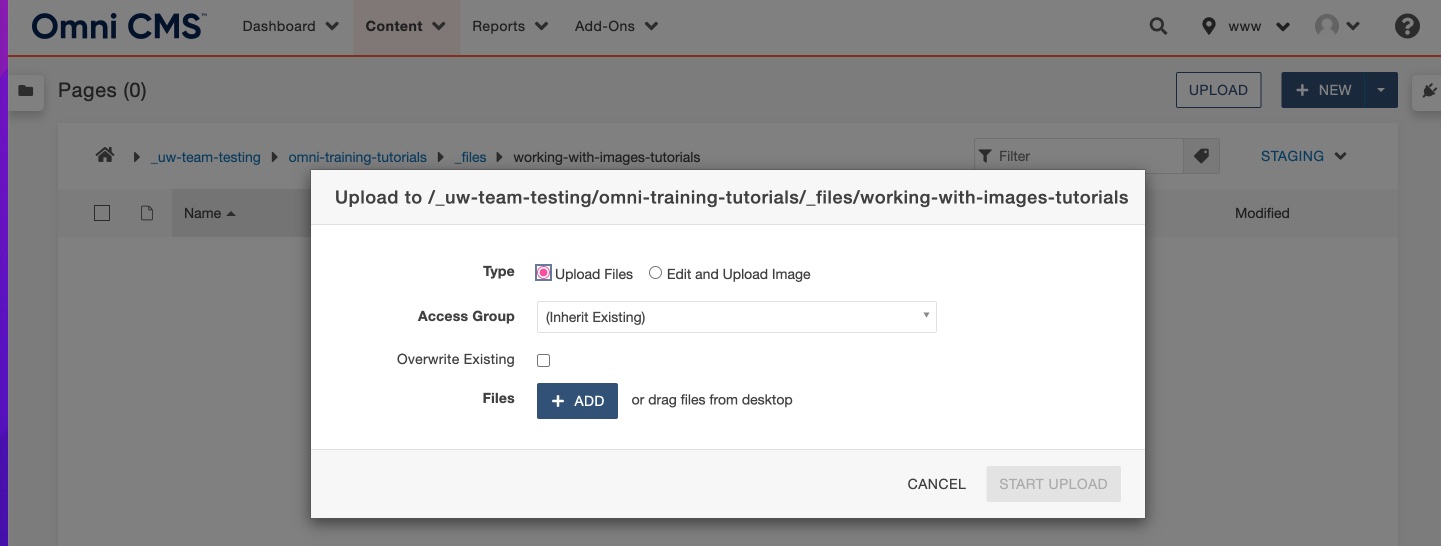
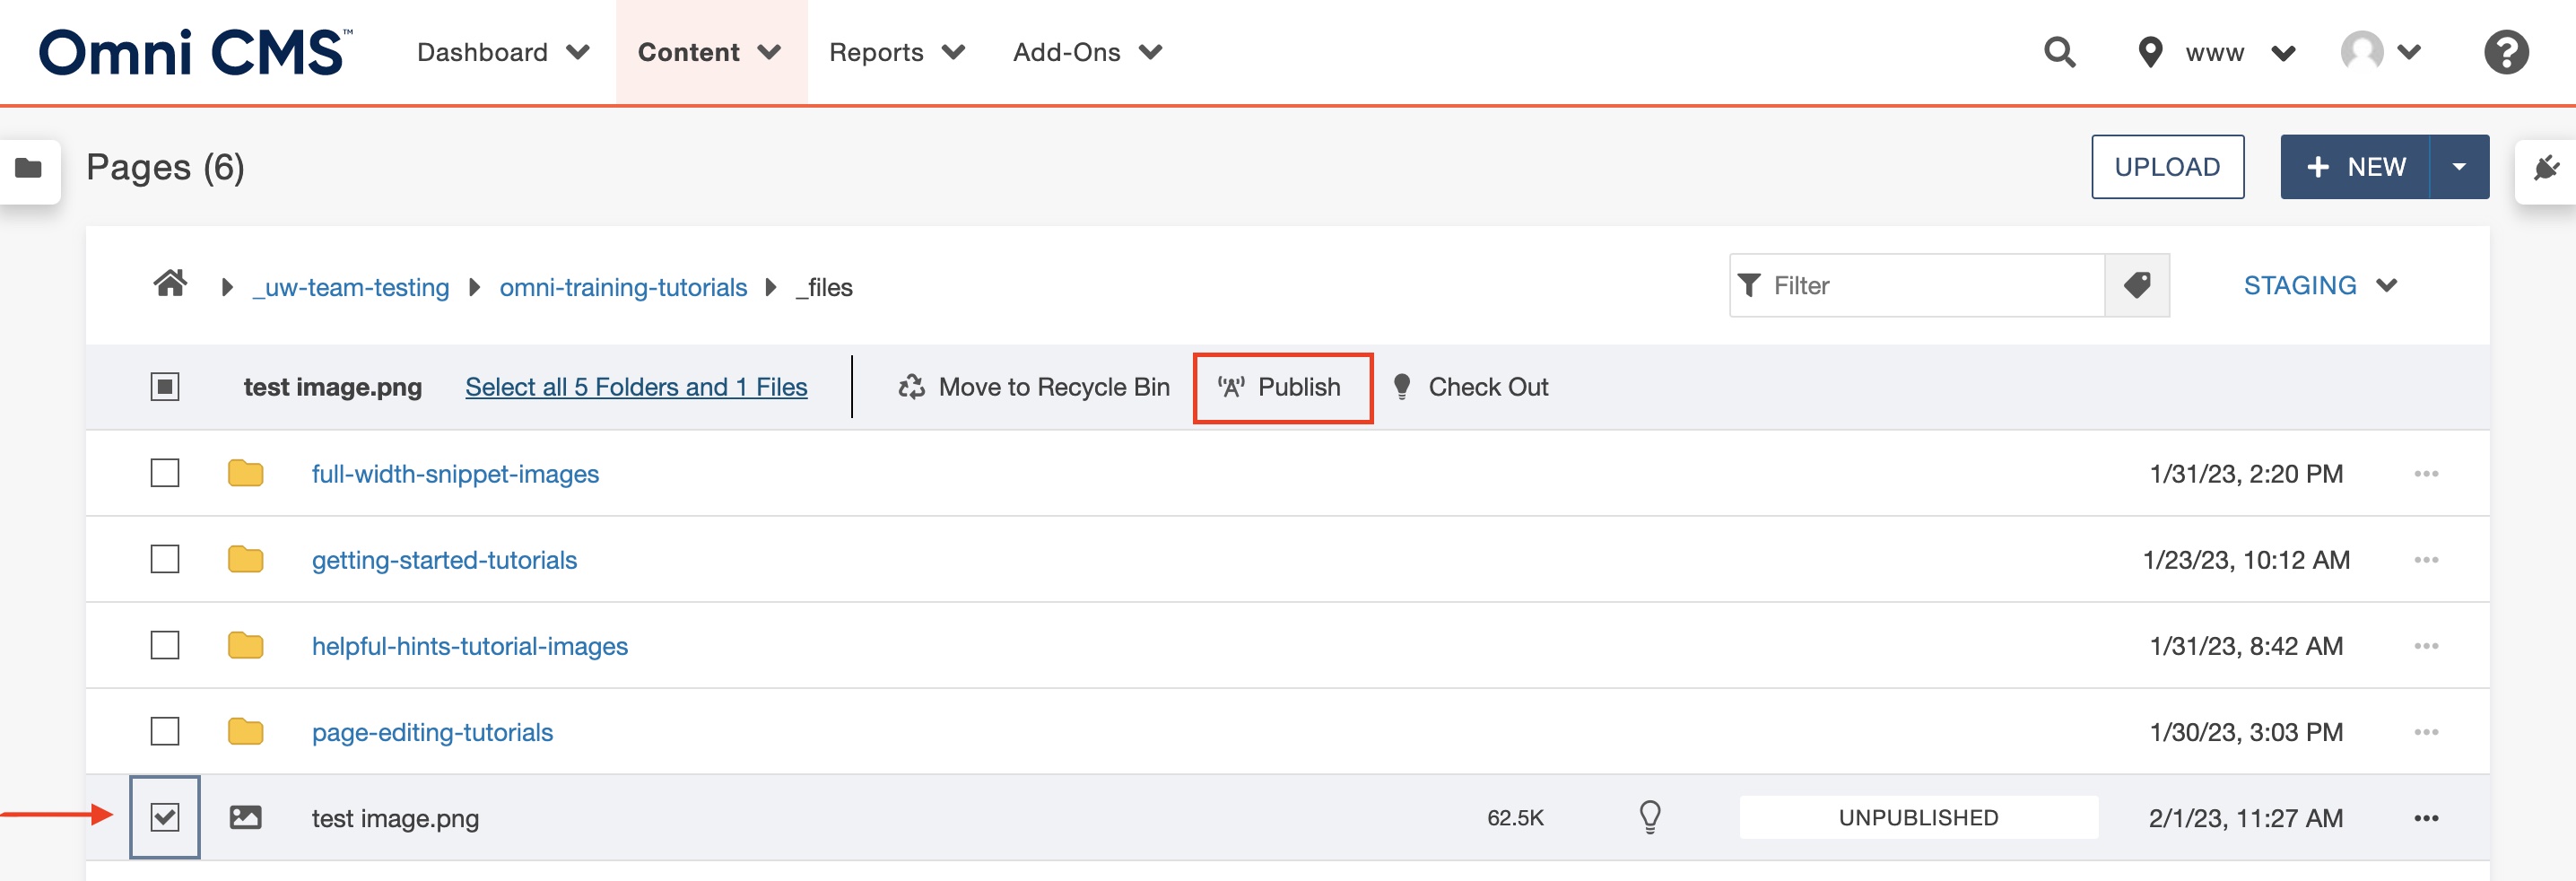
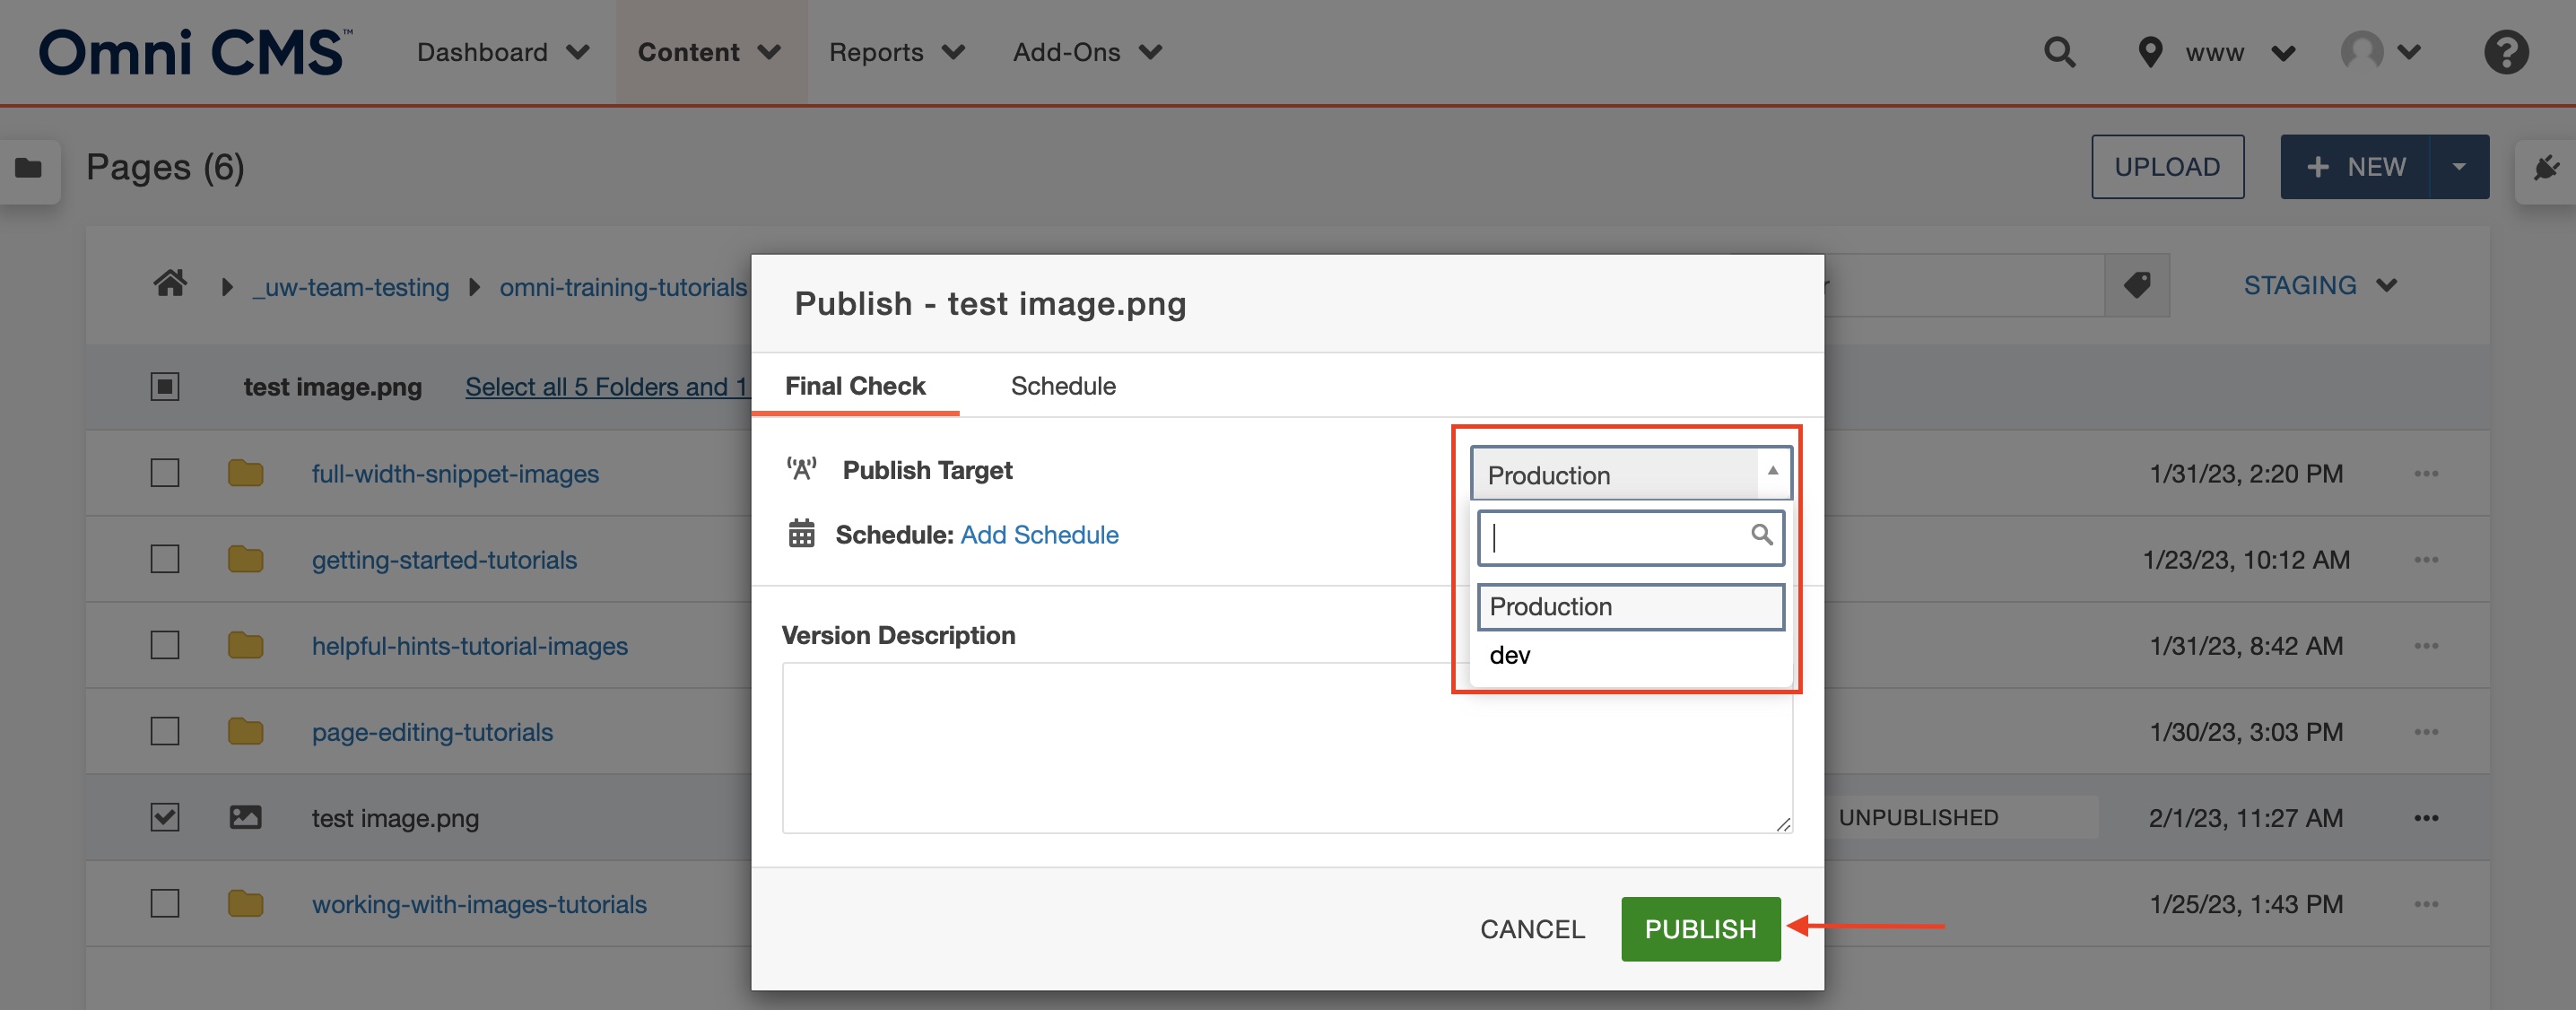
Omni accepts a variety of file types including common extensions such as .jpg, .png, .gif and .pdf. The following size limits are set in place to help support our server space limitations: 

  • Test-Based Files: 25 MB 
  • Image Files: 10 MB 
  • Other Files: 25 MB (such as music or video files) 

If you need assistance with downsizing your images for web upload, we highly recommend taking the Canto Photo Database training as this allows you to download photos from UW’s photo database into compressed sizes that are ideal for websites. Smaller photo sizes help with page load time which can greatly contribute to a positive search engine optimization score and end user experience.


  1. From the content tab at the top of the page, navigate to either the images or documents folder within your site that you will be uploading a photo or PDF into. 

  2. Select the Upload button once you have navigaed to the folder in which you wish to upload an image in. 

    replace an image step 1

  3. Check that your preferences in the window that appears are set to the options shown below. Click "add" and search your computer for the new image or drag it from the desktop.

    replace an image step 2

  4. Ensure that you have selected the correct photo in the window that appears. Click Start Upload.

  5. Select the check box to the left of the filename that you have just uploaded in the folder and click publish in the tool bar that appears at the top. 

    replace an image step 4

  6. Publish to both production (also refered to as default or www) and Dev from the "Publish Target" drop down in the window that appears. 

    Note: To do this repeat step 6 twice and publish to the two different targets. 

    replace an image step 5

  7. Your image is now ready to be used. Check out the how to insert images guide for nrxt steps!


Need additional assistance?

Check out our Omni CMS tutorials

Attend one of our Virtual Open Labs hosted once per week:
Tuesdays: 1:30 - 5 p.m.

Don't forget the Request Help Gadget!
Located in the top right of your screen inside Omni CMS.

plugin icon


Enter Alt Text
Find us on Instagram (Link opens a new window)Find us on Facebook (Link opens a new window)Find us on Twitter (Link opens a new window)Find us on LinkedIn (Link opens a new window)Find us on YouTube (Link opens a new window)