Need additional assistance?
Check out our CMS tutorials
Attend one of our Virtual Open Labs hosted twice per week:
Tuesdays and Thursdays: 10 - 11 a.m. and 1:30 - 4 p.m. (academic year hours)
Don't forget the Request Help Gadget!
Located in the top right of your screen inside the CMS.
![]()
Retaining a page's dependency tag is one of the most important priorities site editors should always be concious about. Deleting a page in turn deletes the its dependency tag which can cause major link breaking for you and other site editors.
Sometimes, you have the need to replace the contents of the page you want to keep so that your dependency tag and Page URL (Page Name) remain the same. This can be done using the Scheduled Expiration feature.
The CMS page expiration function allows you to automatically replace the contents
of a webpage with another page's information, template, content, etc. when the expiration
date is reached. This function is commonly used to keep your website organized without
creating multiple pages that are unneeded or duplicative.
There are a few important notes to keep in mind when using this function:
This can be a complex function so we highly recommend watching this tutorial while following allowing the the steps on this page.
Let’s cover the steps used to Schedule an Expiration and replace the content of our "Page A" with content from "Page B." Both pages must already be built and published to continue.
STEP 1: Identify the target page: Identify the webpage that you want to keep (Page A) and the one whose information you want to replace it with (Page B) including its template, content, page name, and any other relevant information.
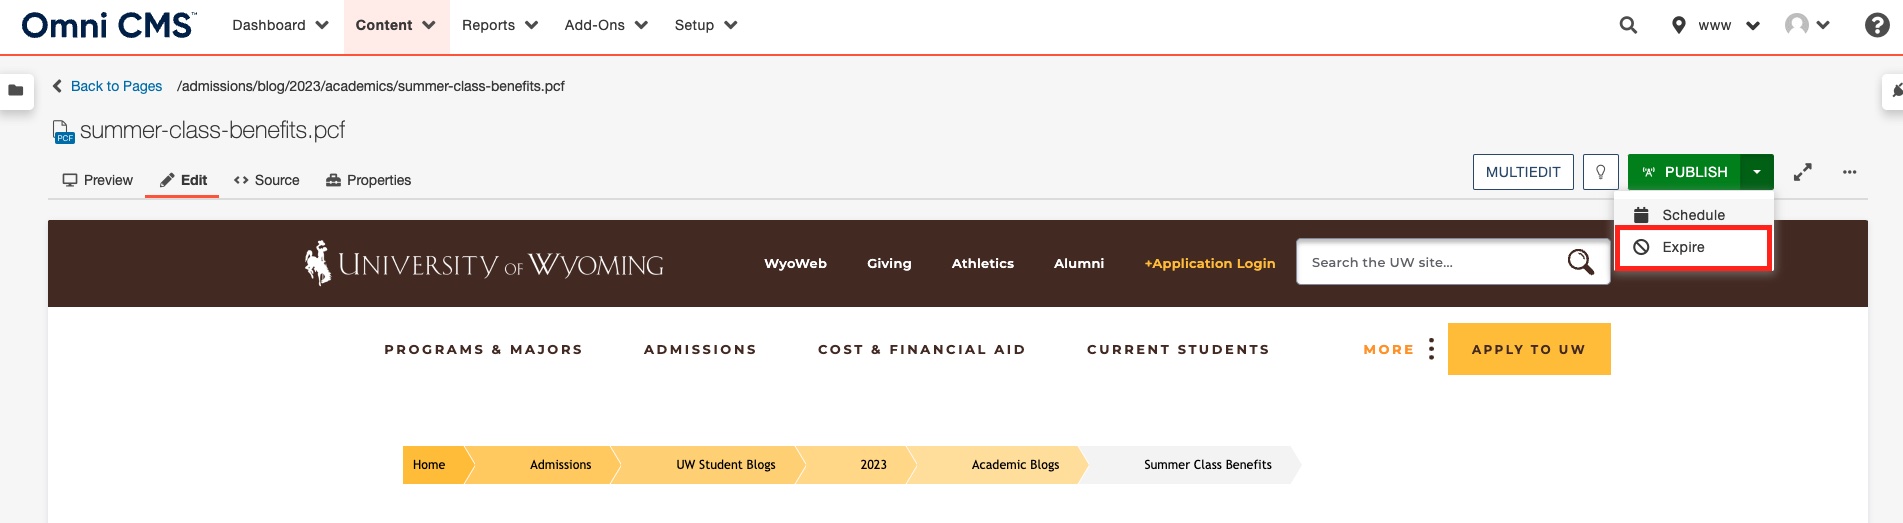
STEP 2: While inside Page A, select the Expiration dropdown found by expanding the green Publish
button in the top right of the screen.
STEP 3: In the Schedule Expiration pane, set the expiration date at least 15 minutes in the future.
STEP 4: In the Replace With box, select the paper icon to locate and select Page B.
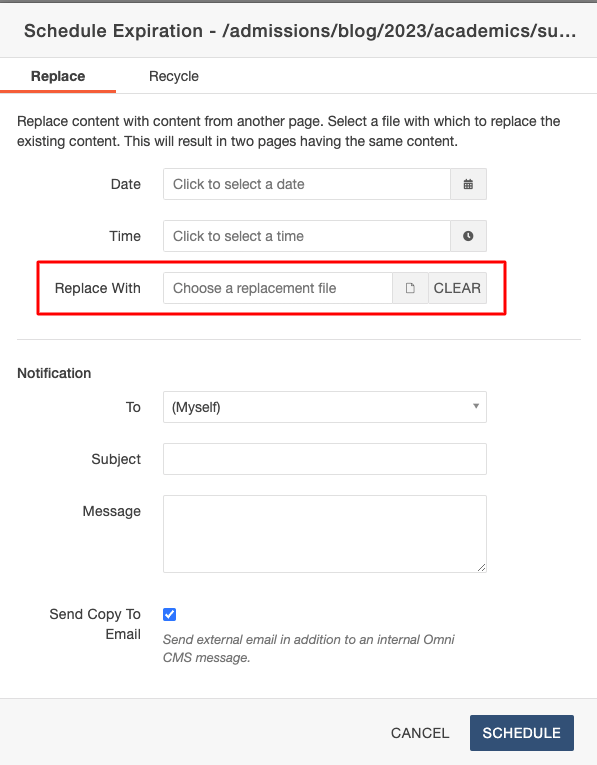
STEP 5: Adjust the notification settings you wish to be notified through and click the SCHEDULE button. You do not need to republish either page.
STEP 6: After your expiration has taken place, navigate back to Page A to ensure its contents
have been replaced with Page B’s content.
STEP 7: Once this has been verified, move Page B to the Recycle Bin to remove it from your
site’s directory, and you’re done!
Need additional assistance?
Check out our CMS tutorials
Attend one of our Virtual Open Labs hosted twice per week:
Tuesdays and Thursdays: 10 - 11 a.m. and 1:30 - 4 p.m. (academic year hours)
Don't forget the Request Help Gadget!
Located in the top right of your screen inside the CMS.
![]()