Important Tips for Using this Function
Identify Page A and Page B
Before scheduling expiration, clearly identify both pages:
- Page A: The original page you are keeping. This URL and dependency tag will remain.
- Page B: The page whose template and content will replace Page A.
Confirm Page B includes the correct template, content and settings before moving forward.
Do Not Publish Page B
This feature is not for combining or swapping pages.
- Do not publish Page B to Production. You should never have two pages with the same content live at the same time.
- This is not a combining feature. Only one page should remain in the CMS.
- This is not a swapping feature. Content does not move back and forth between pages.
- Page A stays. Page B will be removed.
Schedule Expiration Properly
For best results, schedule the expiration at least 30 minutes from the time you complete the setup. This function is designed to:
- Keep Page A’s URL and dependency tag
- Replace its content with Page B’s information
- Be sure to remove Page B from the CMS
Never keep both pages after the process is complete.
Page Expiration Video Tutorial
This can be a complex function so we highly recommend watching this tutorial while following allowing the the steps on this page. This video tutorial references older templates no longer available in the CMS, however the function is the exact same.
Important Note: This video contains instructions to publish Page B. This step is not necessary and should be avoided to prevent having two pages live with the same content at the same time.
Step-By-Step Instructions - Page Expiration Feature
Let’s cover the steps used to Schedule an Expiration and replace the content of our "Page A" with content from "Page B."

Identify the page with the name and location that you want to keep, but have the page's contents expired and replaced. This is what we will call Page A. Then, identify the page that is serving as a draft, with the template and content that you want but not the name and location that you want to keep. This is what we will call Page B.
Schedule the expiration for Page A. There are two ways to do this.
- While you have Page A open to preview or edit, select the dropdown menu on the green Publish button, and then select Expire.

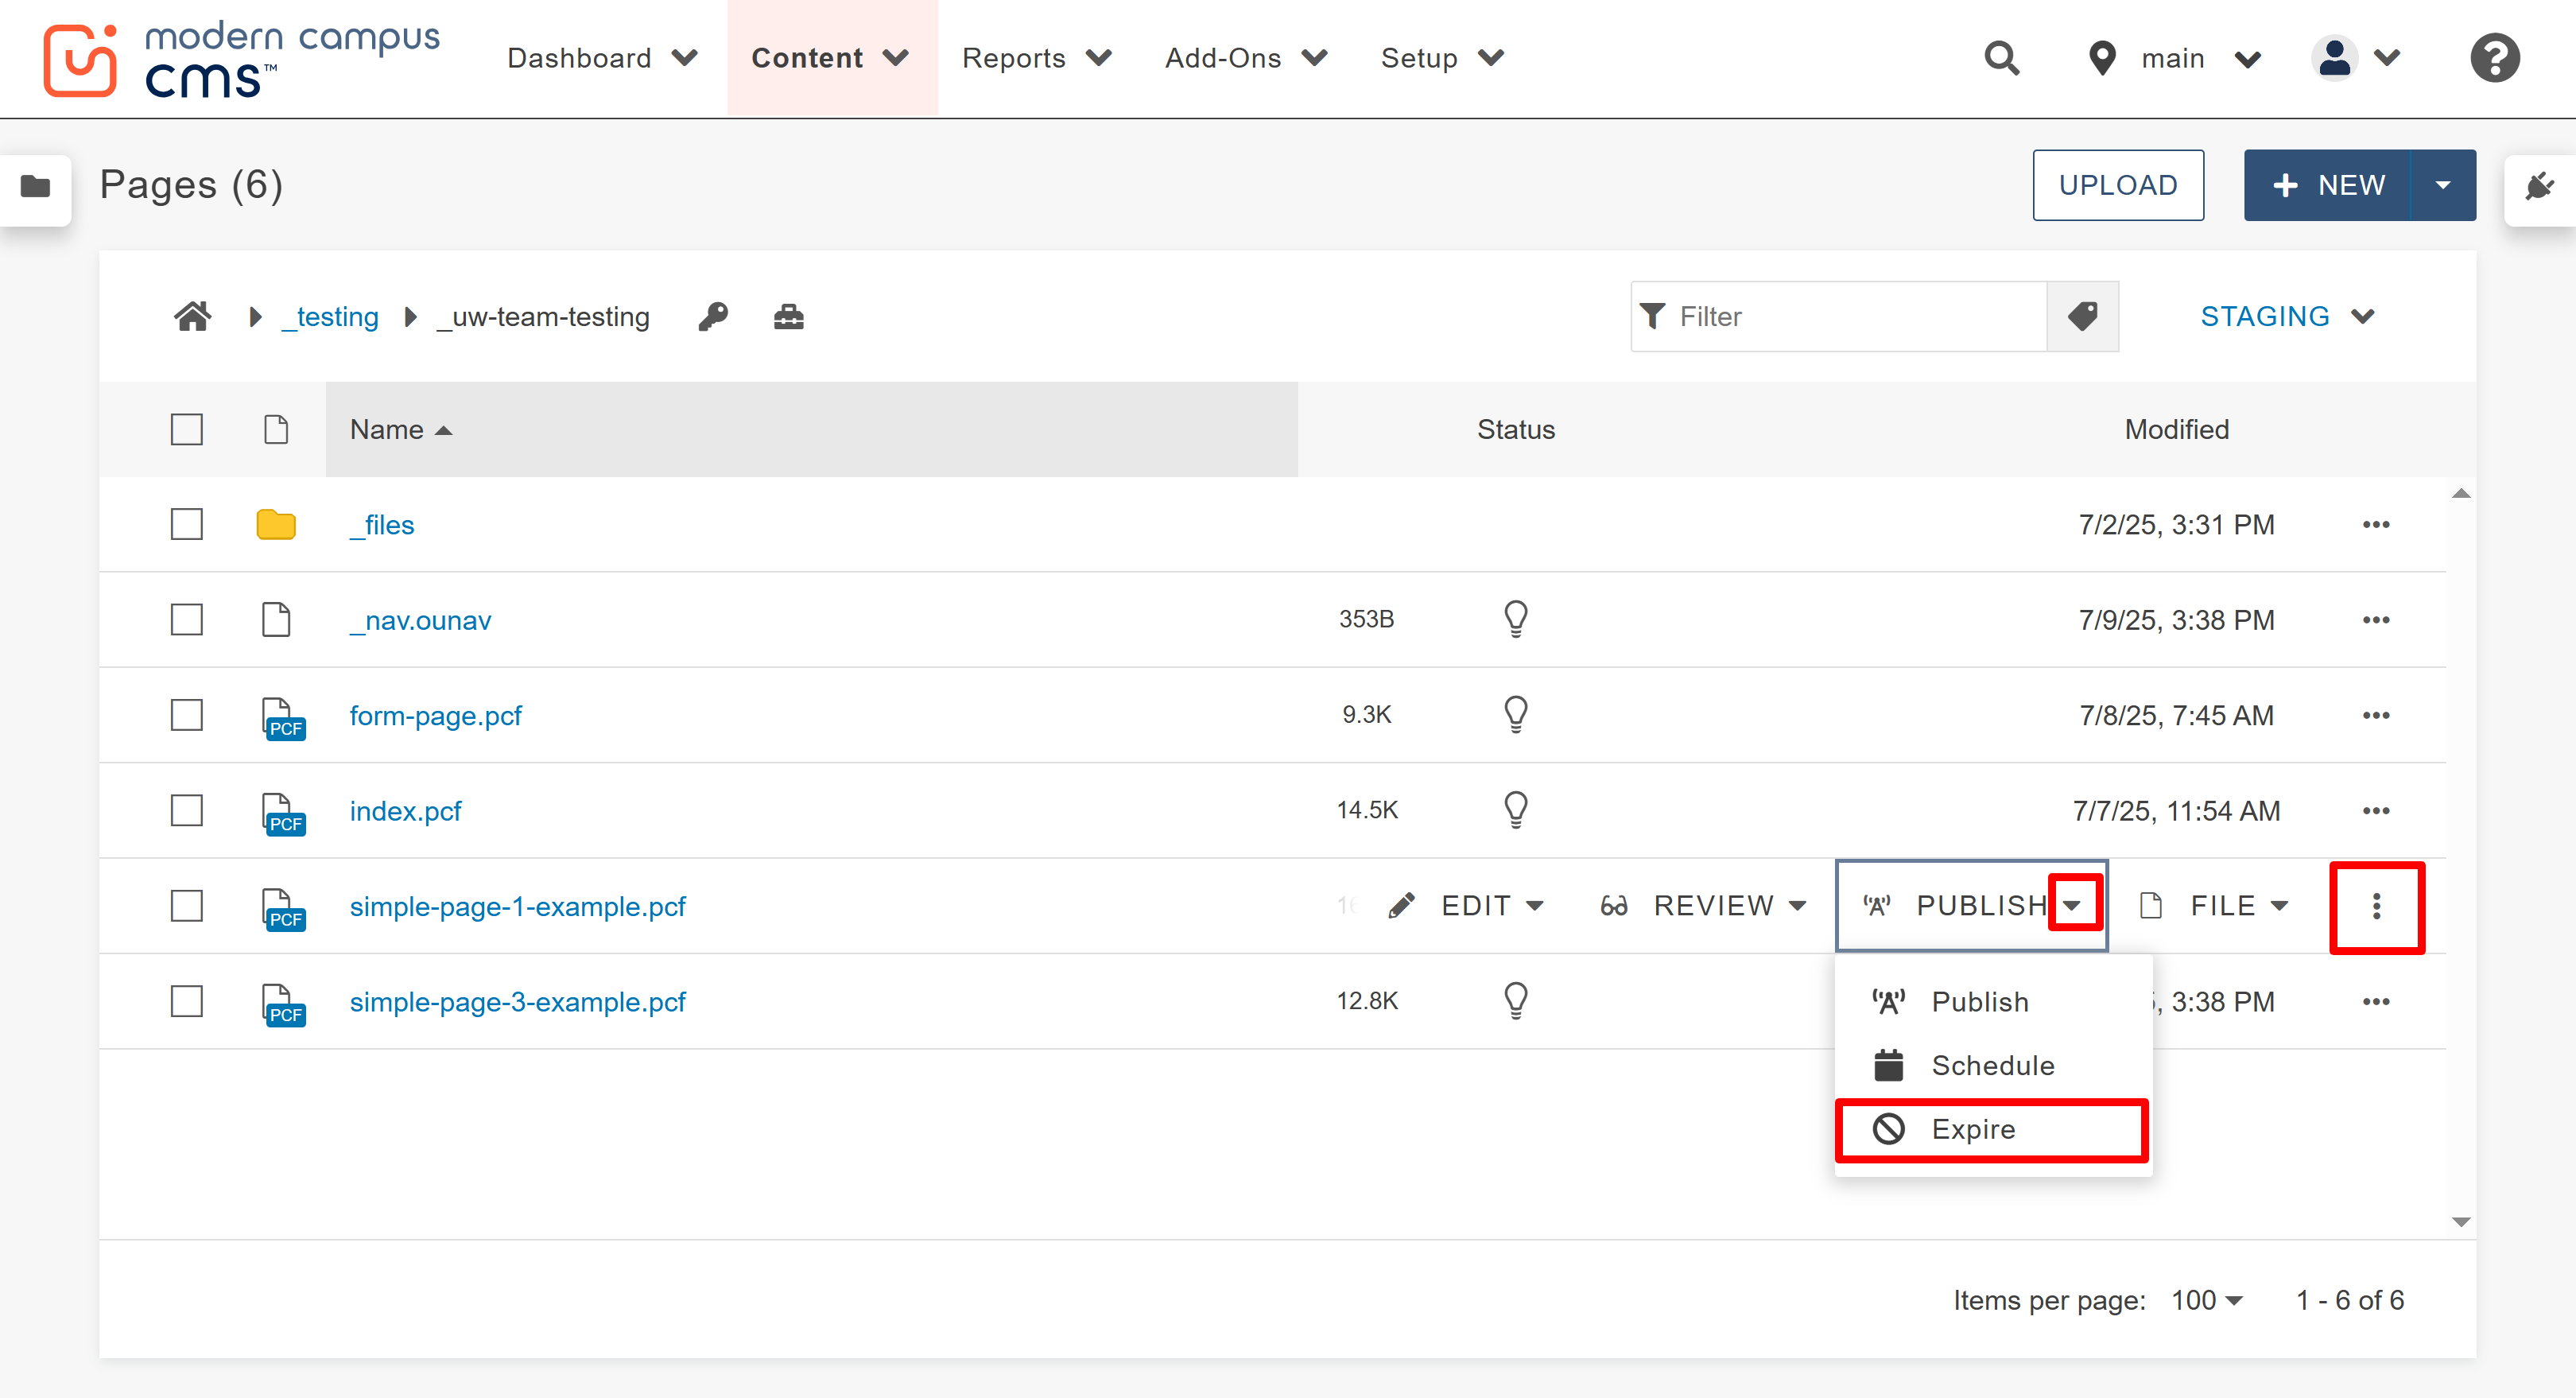
- From the folder structure view, locate the page. Then, select the three dots at the right of the file name. From the menu that appears, select the dropdown menu next to Publish, and then select Expire.

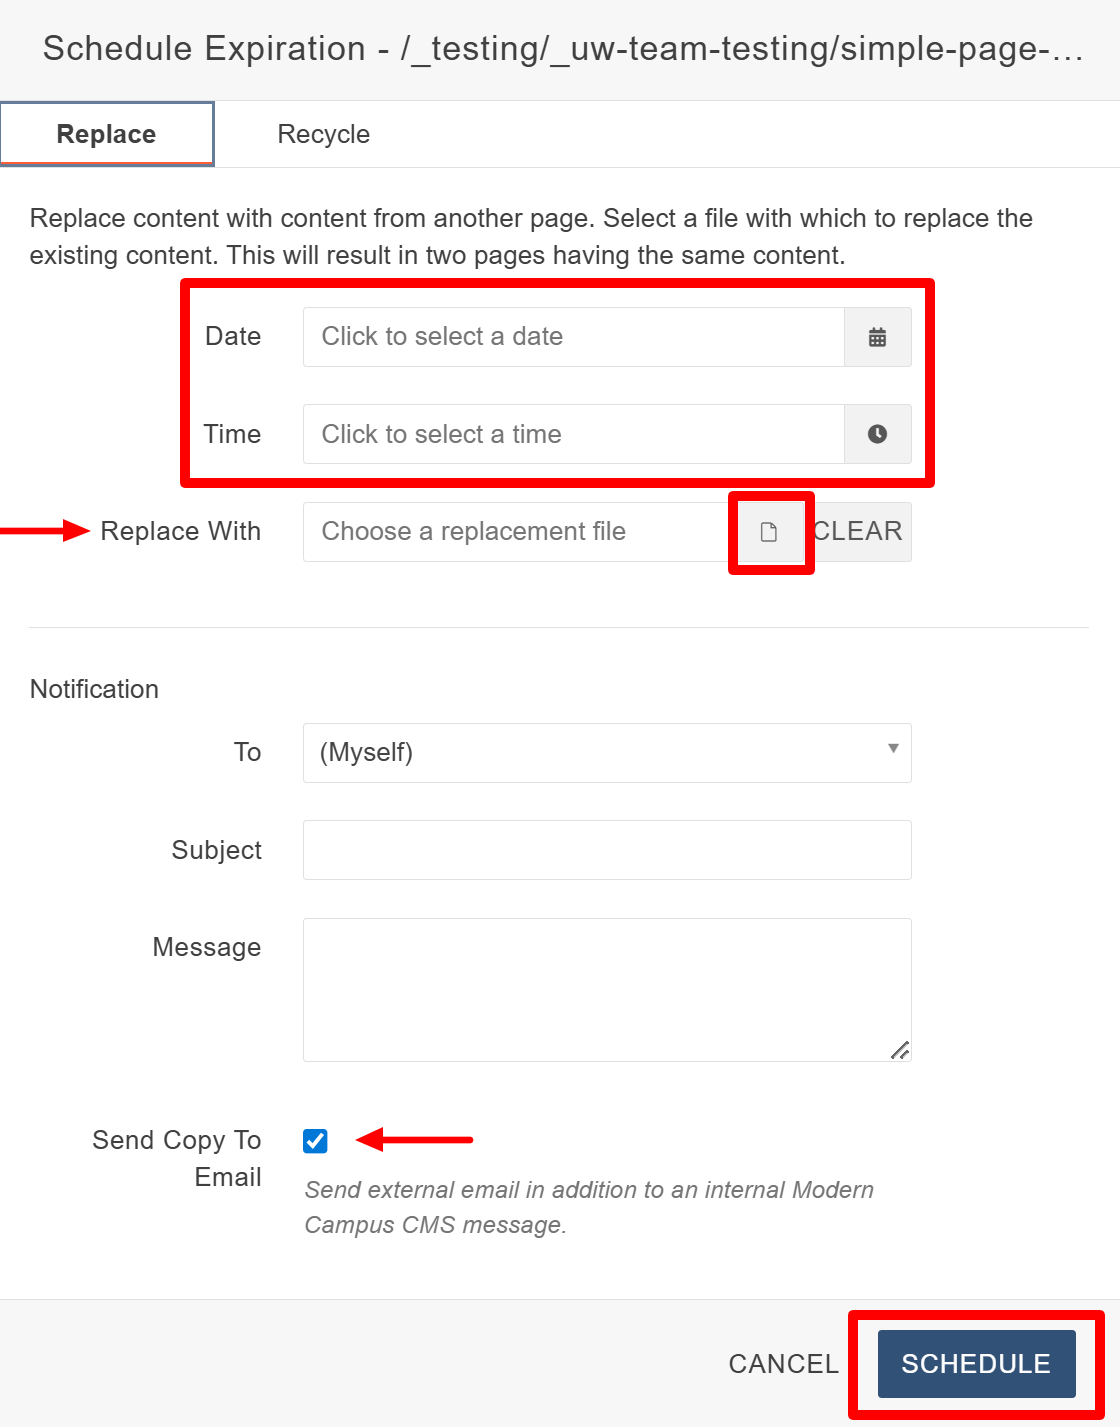
In the Schedule Expiration pane, set the expiration date at least 30 minutes in the future.
In the Replace With field, select the paper icon to locate and select Page B.

Adjust the notification settings you wish to be notified through and click the SCHEDULE button. You do not need to republish either page.
After your expiration has taken place, navigate back to Page A to ensure its contents have been replaced with Page B’s content. Once this has been verified, move Page B to the Recycle Bin to remove it from your site’s directory, and you’re done!

