Need additional assistance?

Check out our Omni CMS tutorials

Attend one of our Virtual Open Labs hosted once per week:
Tuesdays: 1:30 - 5 p.m.

Don't forget the Request Help Gadget!
Located in the top right of your screen inside Omni CMS.

plugin icon


Enter Alt Text
Find us on Instagram (Link opens a new window)Find us on Facebook (Link opens a new window)Find us on Twitter (Link opens a new window)Find us on LinkedIn (Link opens a new window)Find us on YouTube (Link opens a new window)

Editing, Saving and Publishing

Step by Step Instructions


In order to edit your page, you must have it checked out for editing using the light bulb icon. Checking the page out will allow you to see all of the editable regions of a page. For more information on checking out a page, refer to this guide.
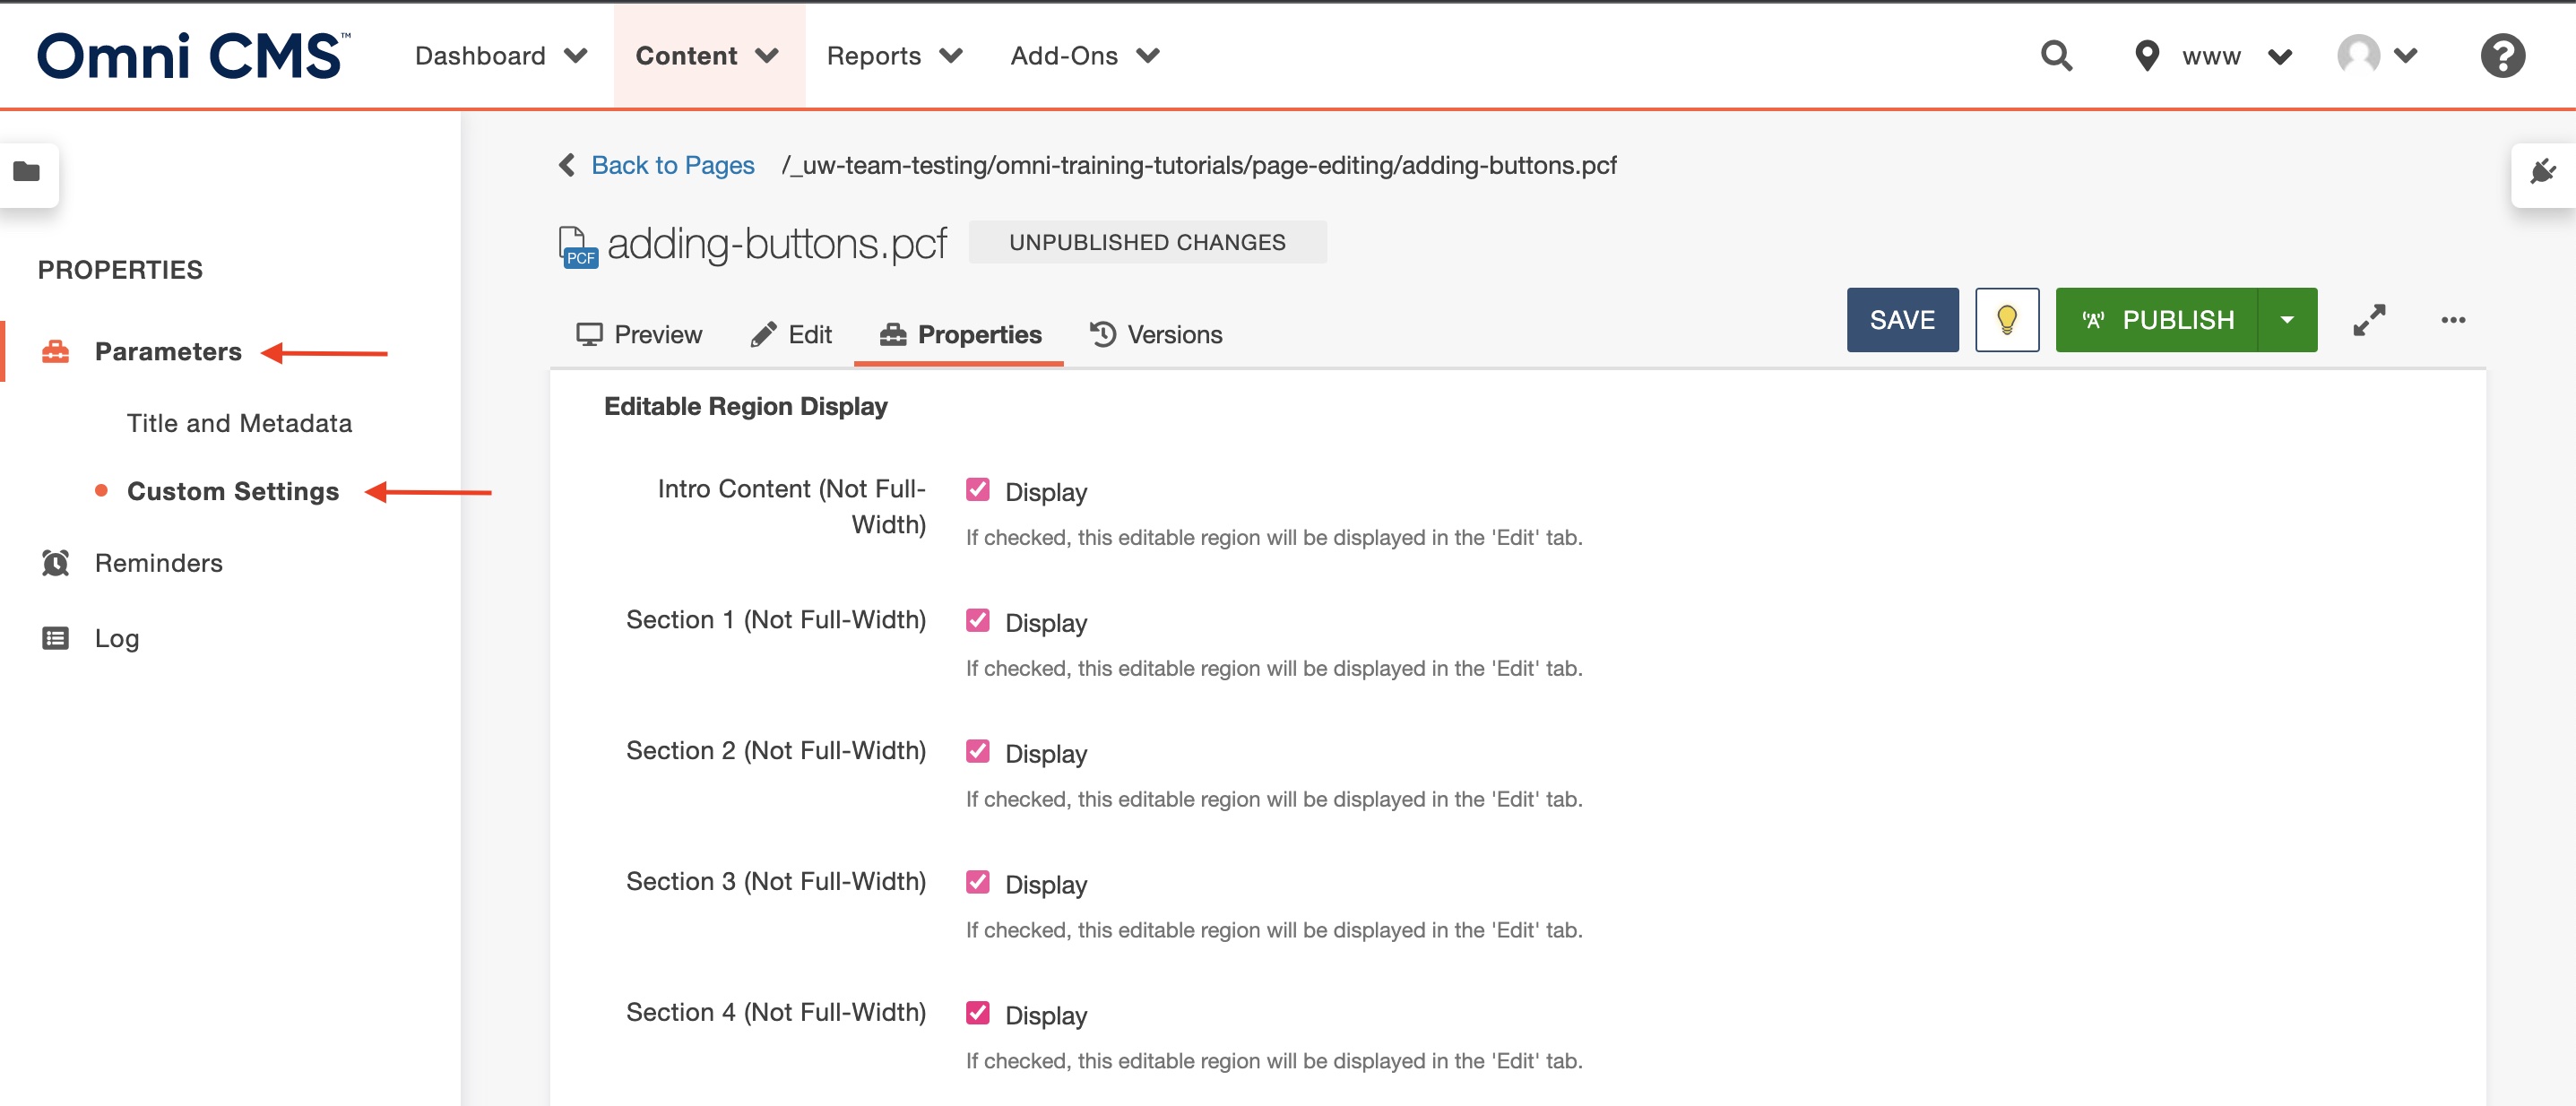

Editable Regions


Sections 

Editing Sections 

  1. Sections are the most fundamental and basic of editable regions on a page. While building a page, sections are where you will either place a snippet, component or directly add content using the WYSIWYG editor. Sections are automatically built into every template and are not required to be added to the page by a site editor. For sections to be visible, make sure you are in the "edit" tab.

    edit save pubish image 1

  2. The editable region is displayed as highlighted white box. All non-editable regions are displayed as light gray in the background. All sections are prepopulated with a default snippet. Change snippets, add components or enter images, text or videos as needed into each editable region using the main toolbar. Refer to other tutorials in the knowledgebase if you have questions how to insert any of these medias.

  3. When you are finished editing, click the save button above the toolbar to save all edited or unsaved changes on the page and move on to the next section or edit. 

    edit save publish image 2


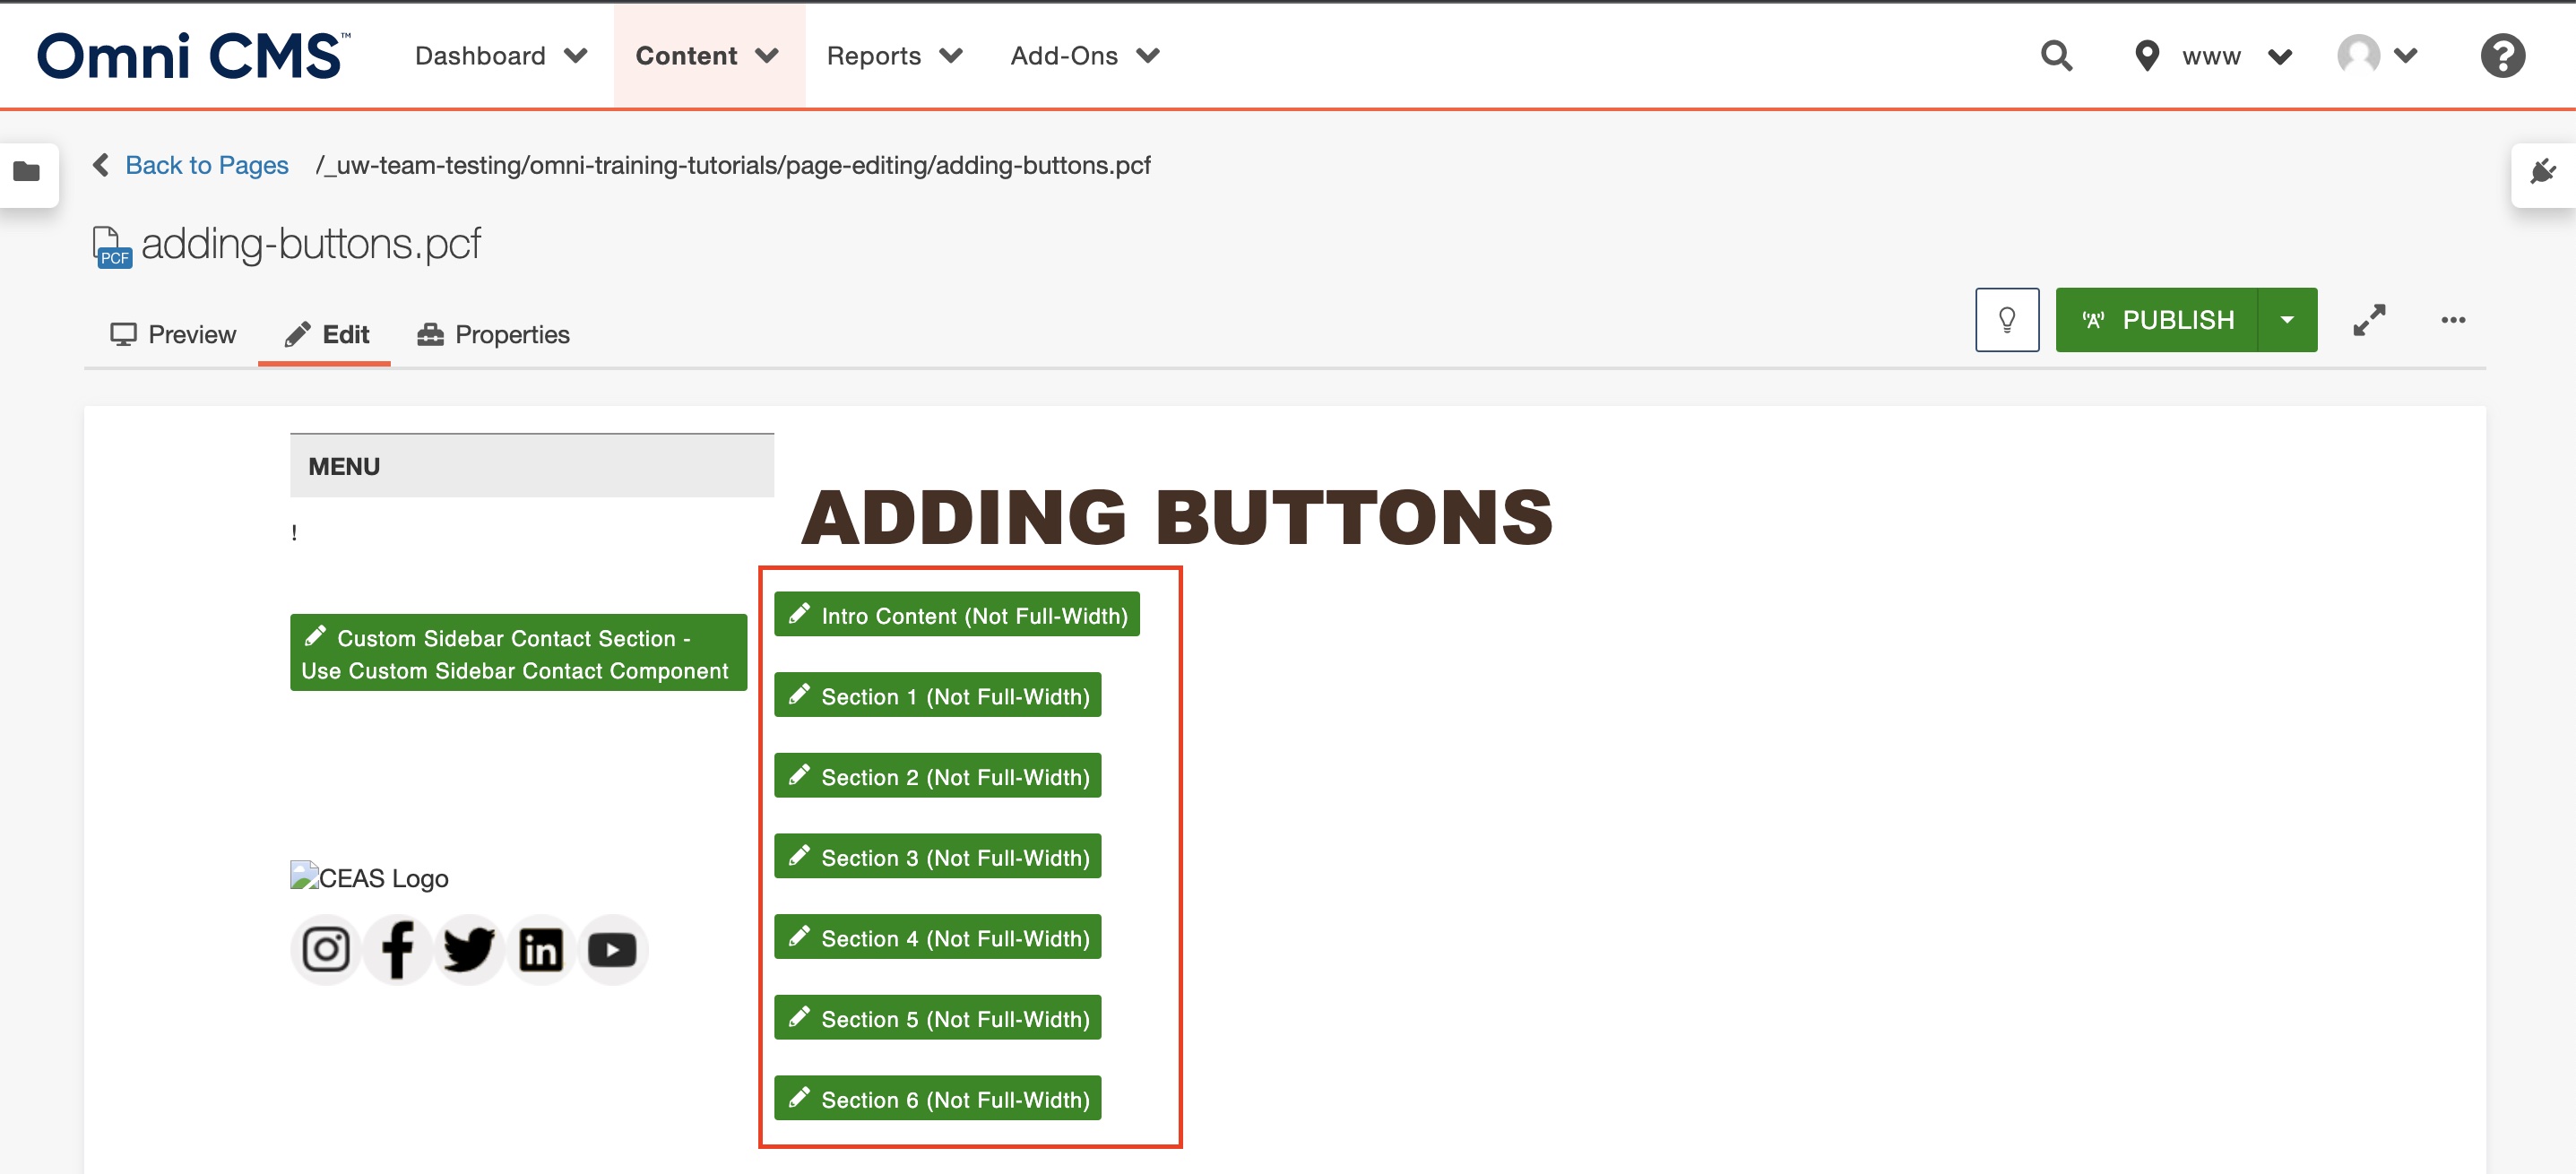
Turning Sections On & Off 

Depending on what type of template you are using, you can use up to 12 sections on your page. By default, when building a page, a total of 7 sections (intro content + 6 sections) are turned on when the page is created. Sections cannot be deleted or rearranged however; they can be turned on and off by following these steps:

  1. Check a page out for editing by clicking into an editable region or turning the lightbulb icon on.
  2. Select the Properties tab from the top of the page. 
  3. Parameters > Custom Settings > Editable Region Dispay 

    edit save publish 3


Properties

Now you know can edit your visible sections in the properties tab! Properties also control: 
  • Page Title 
  • Breadcrumb display 
  • Masthead Image 
  • Side Navigation 
  • Contact Section 
  • Social Media Tags 
  • Multi-Edit Conent - (only in Blog-News-Article template)


Publishing 


Preview

Click on the preview tab to display the edited page without disruption from editable regions. 

edit save publish 4


Publish 

  1. Once you are happy with your edits, click publish.

    edit save pubish 5

  2. A window will appear. In the "Publish Target" drop down notice it will default to production. Then click publish again.

    edit save publish 6

  3. Repeat step 3 and publish to the Dev target. 

    edit save publish 7

  4. Click on the "View in new window" tab to see your content live and check your links.

    edit save publish 8


Video Tutorial


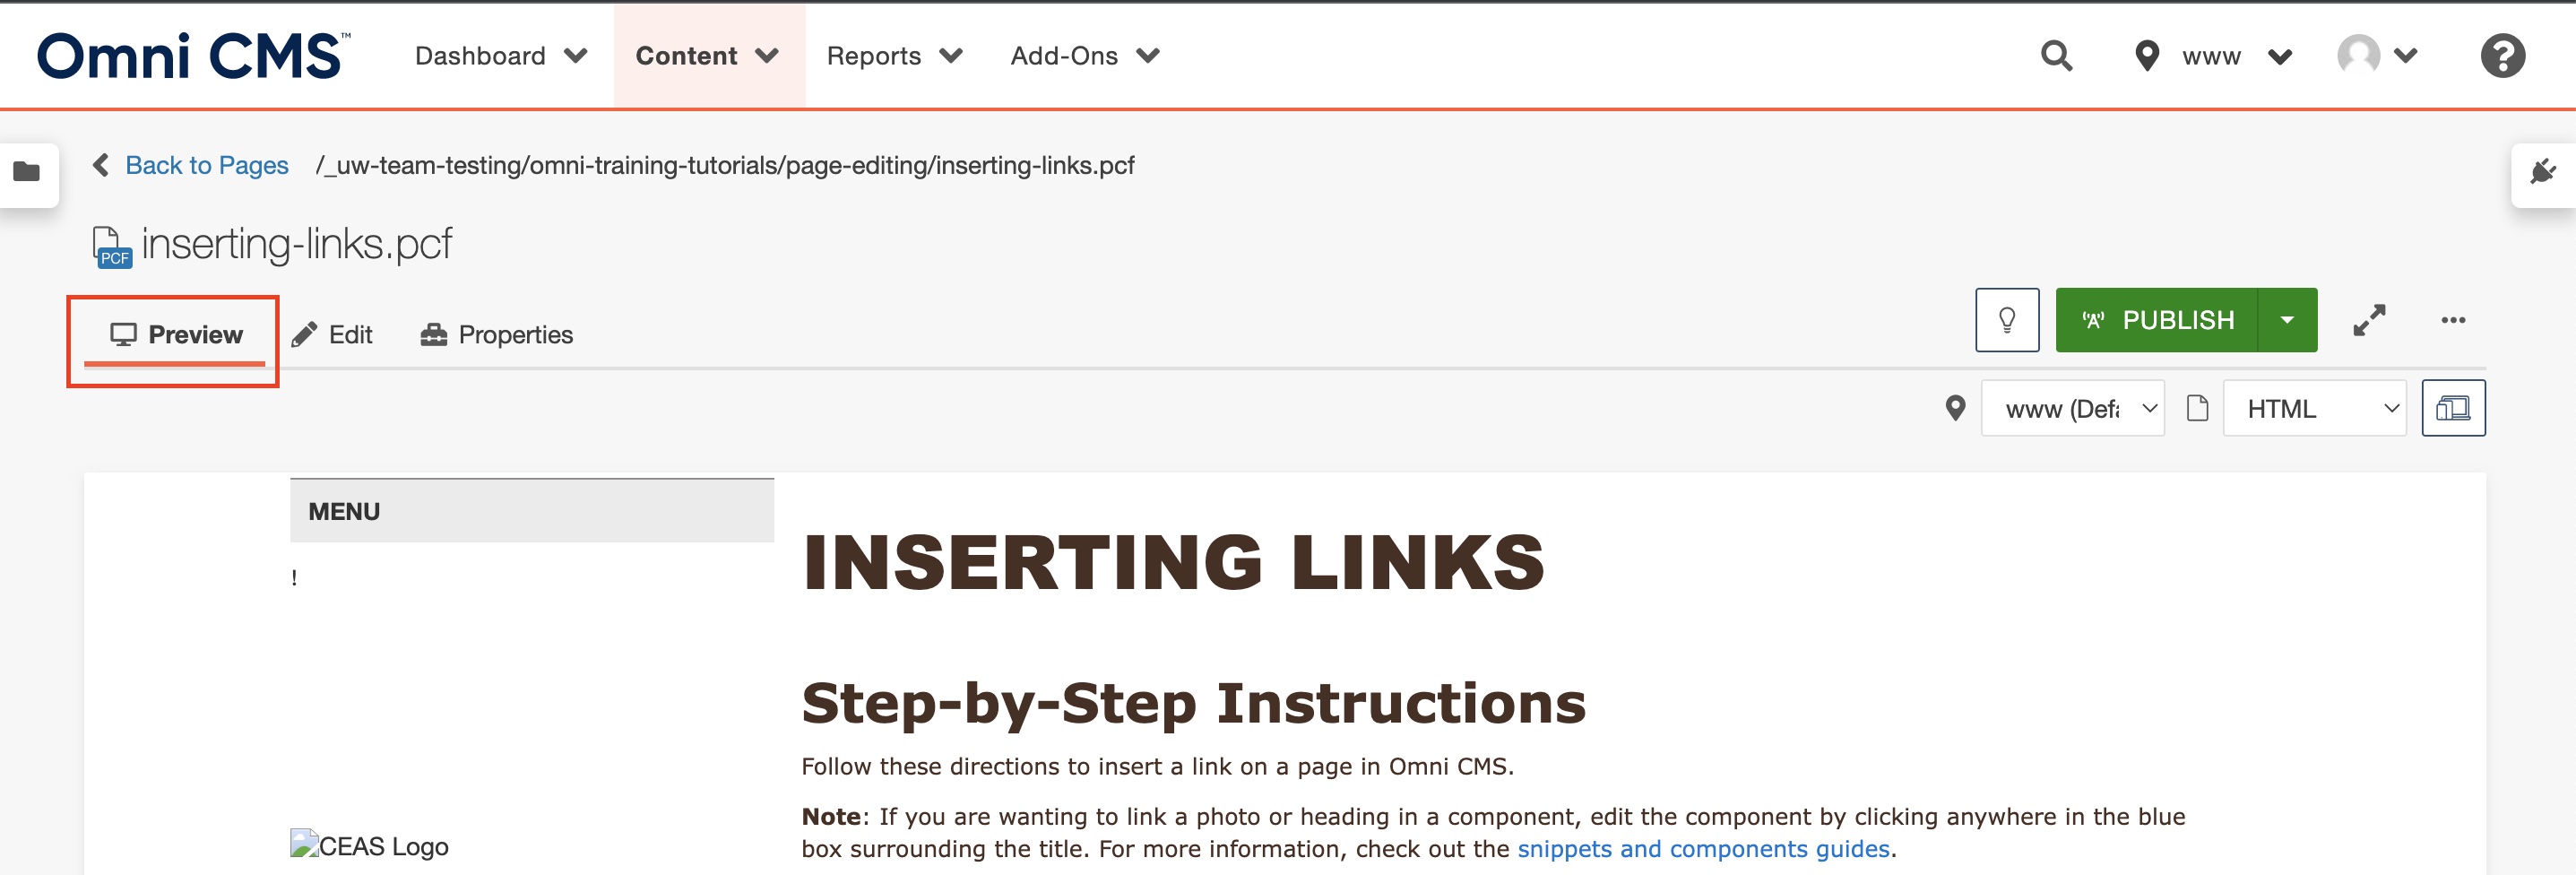
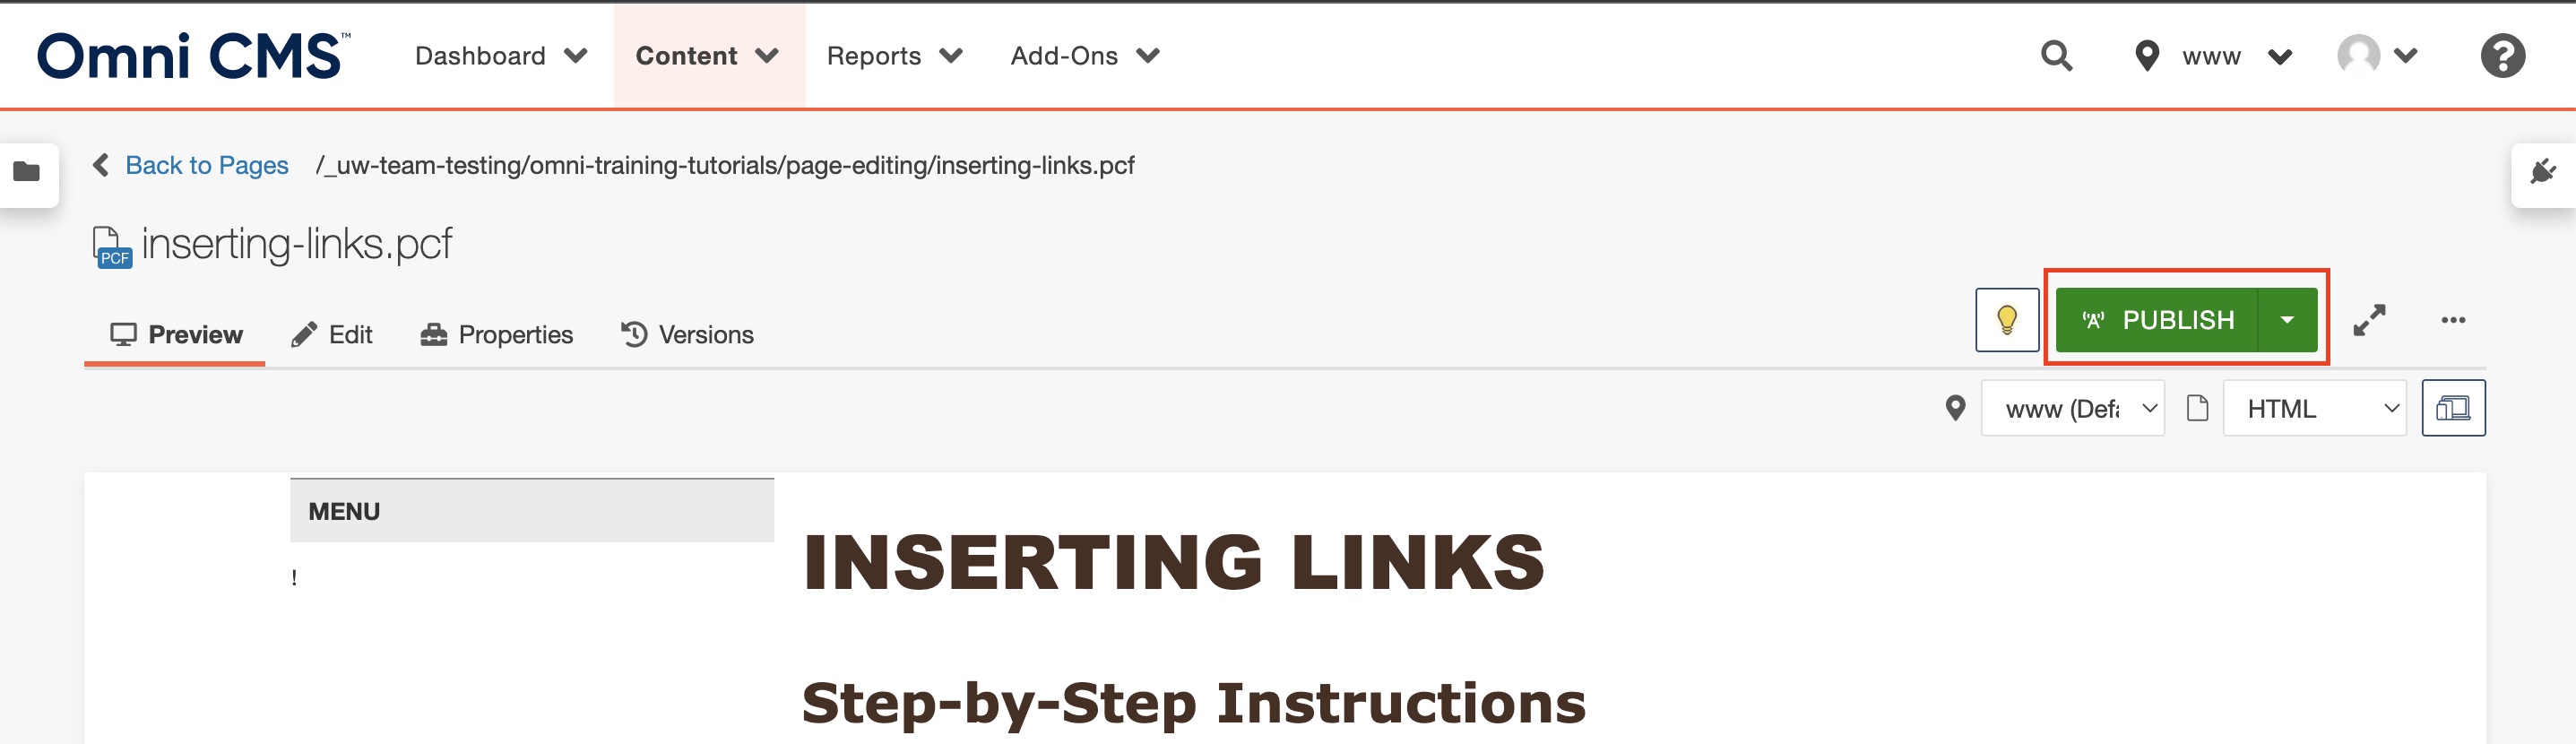
For more information about editing your pages watch this video tutorial! 


Need additional assistance?

Check out our Omni CMS tutorials

Attend one of our Virtual Open Labs hosted once per week:
Tuesdays: 1:30 - 5 p.m.

Don't forget the Request Help Gadget!
Located in the top right of your screen inside Omni CMS.

plugin icon


Enter Alt Text
Find us on Instagram (Link opens a new window)Find us on Facebook (Link opens a new window)Find us on Twitter (Link opens a new window)Find us on LinkedIn (Link opens a new window)Find us on YouTube (Link opens a new window)