
Page Templates
The pages on your site must be created using an approved page template. These templates contain upwards of 10 sections that can be turned on/off so you can organize your webpage content how you see fit. Using these templates ensures visual consistency, structural integrity and long-term accessibility compliance for your website. The templates were built with research, strategy and accessibility in mind. Each section is intentional and designed to support your content in a modern, user-friendly way. All UW pages are mobile-optimized and allow you to plug in your content and images so you can easily add information.
Instructions for creating a new page
After you have written and planned your page content, and you've decided where the page should be placed in your site structure, then you're ready to create a new page!
Navigate to the folder where you want to create a new page, and then select the "+ New" button in the top right of the screen.

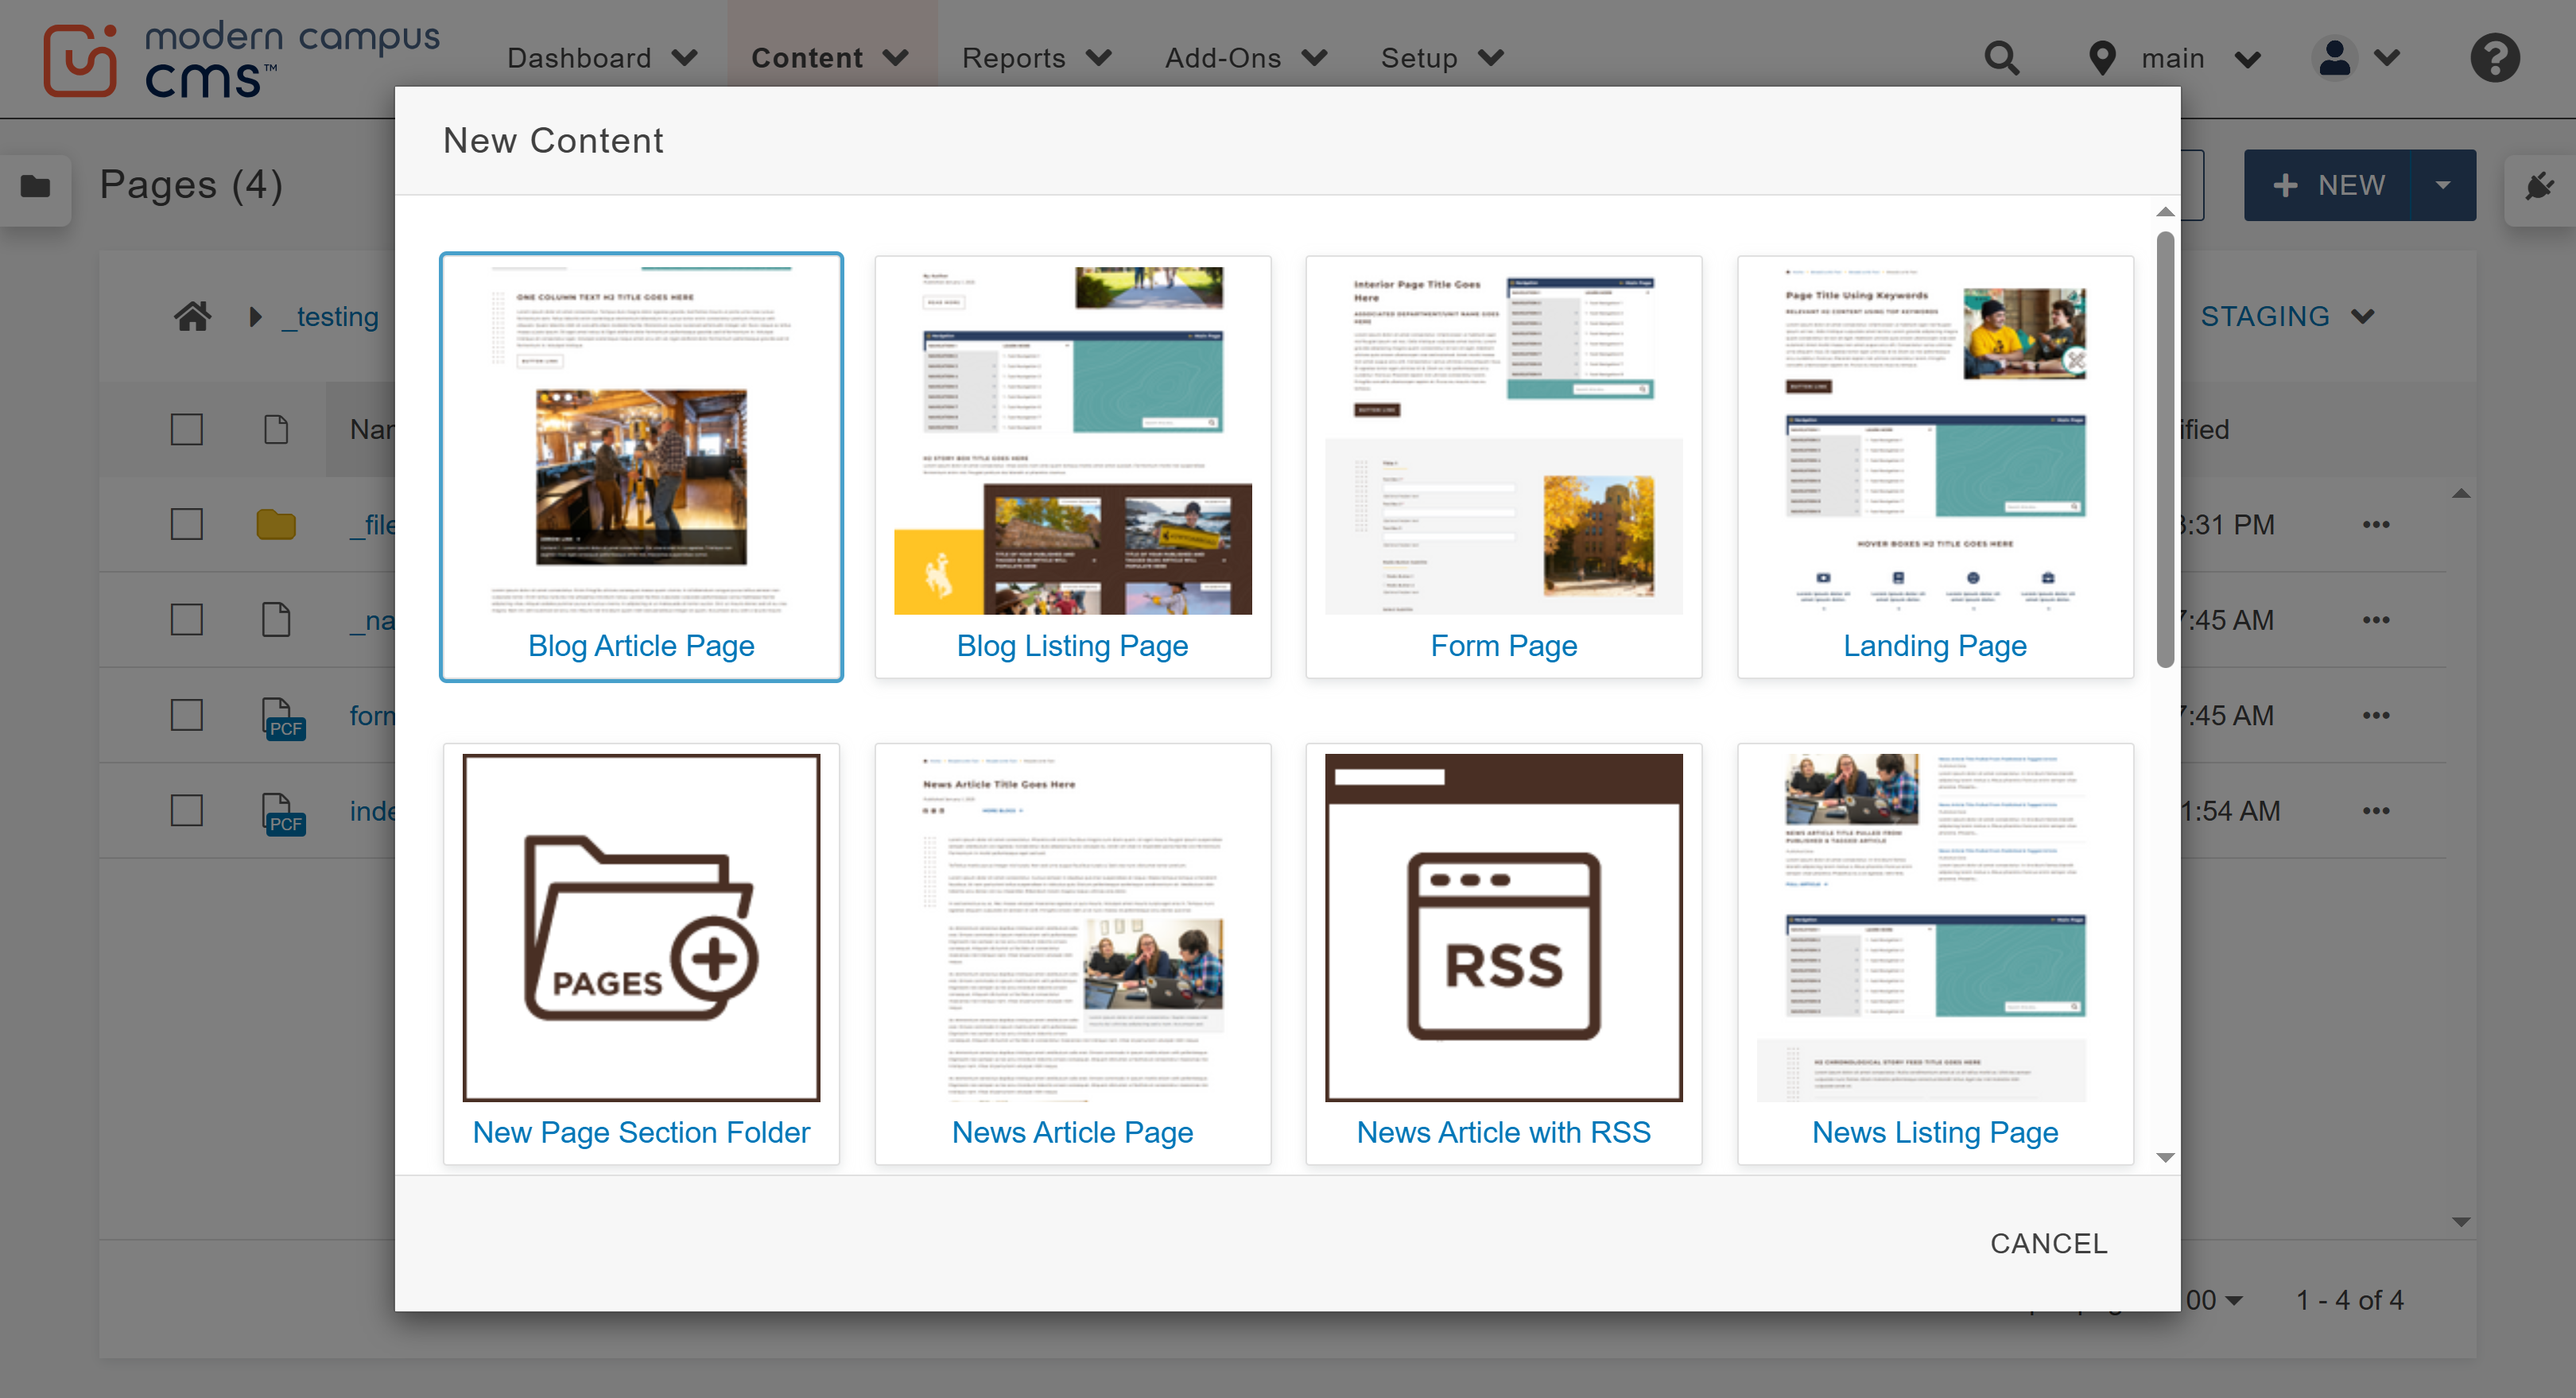
Choose the page template that is most applicable. For examples of how each part of the available templates look and function, browse these guides.
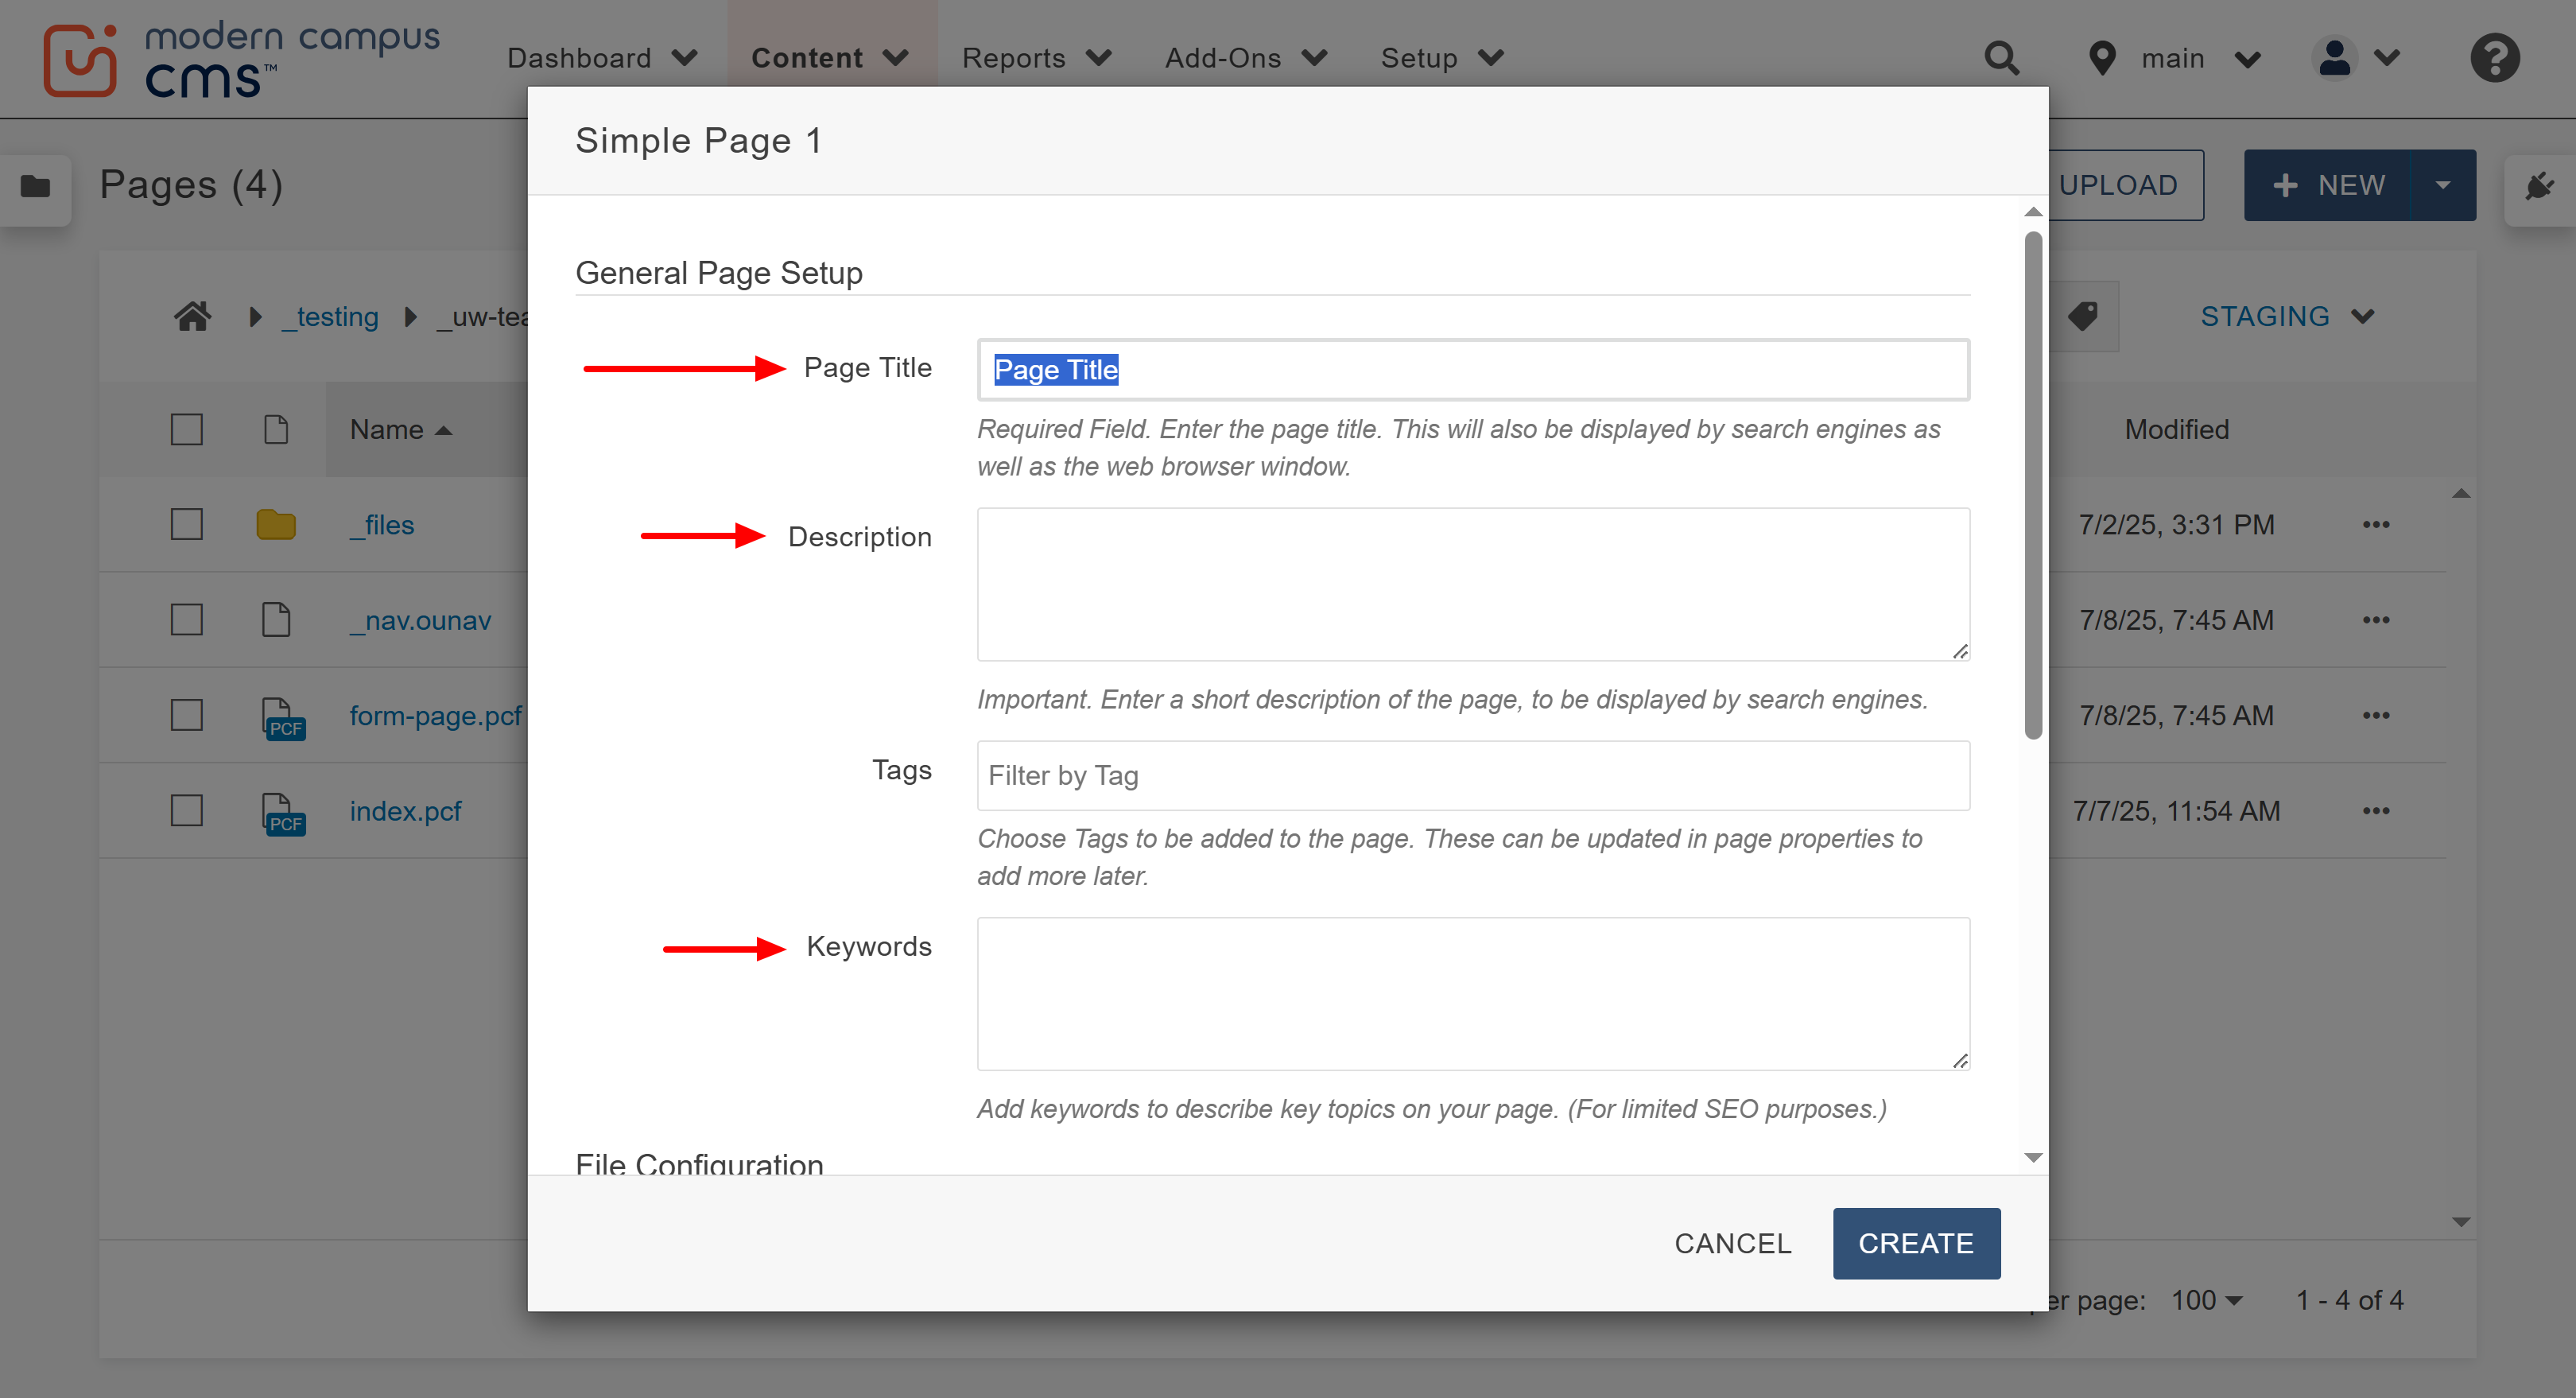
A new window will appear with multiple fields that you'll fill out for general page
setup and file configuration. In this window, these are the fields you will need to
complete:
GENERAL PAGE SETUP:
- Page title: Put in your page title. This will be your Header 1 text on the page, will be displayed in search engines and the web browser window, and will be the title of the page in the site map. Be sure your title has proper grammar and spelling. Example: "Financial Aid Documents"
- Description: Add a description. This description will appear in search engine results. Your description should be at least 25 words in full sentences describing what the user will find on the page. Example: "Find all the documents needed to apply for financial aid including FAFSA instructions, scholarship applications and requirements and contact information for assistance."
- Keywords (optional) : Consider using keywords here to boost Search Engine Optimization (SEO) on your page.
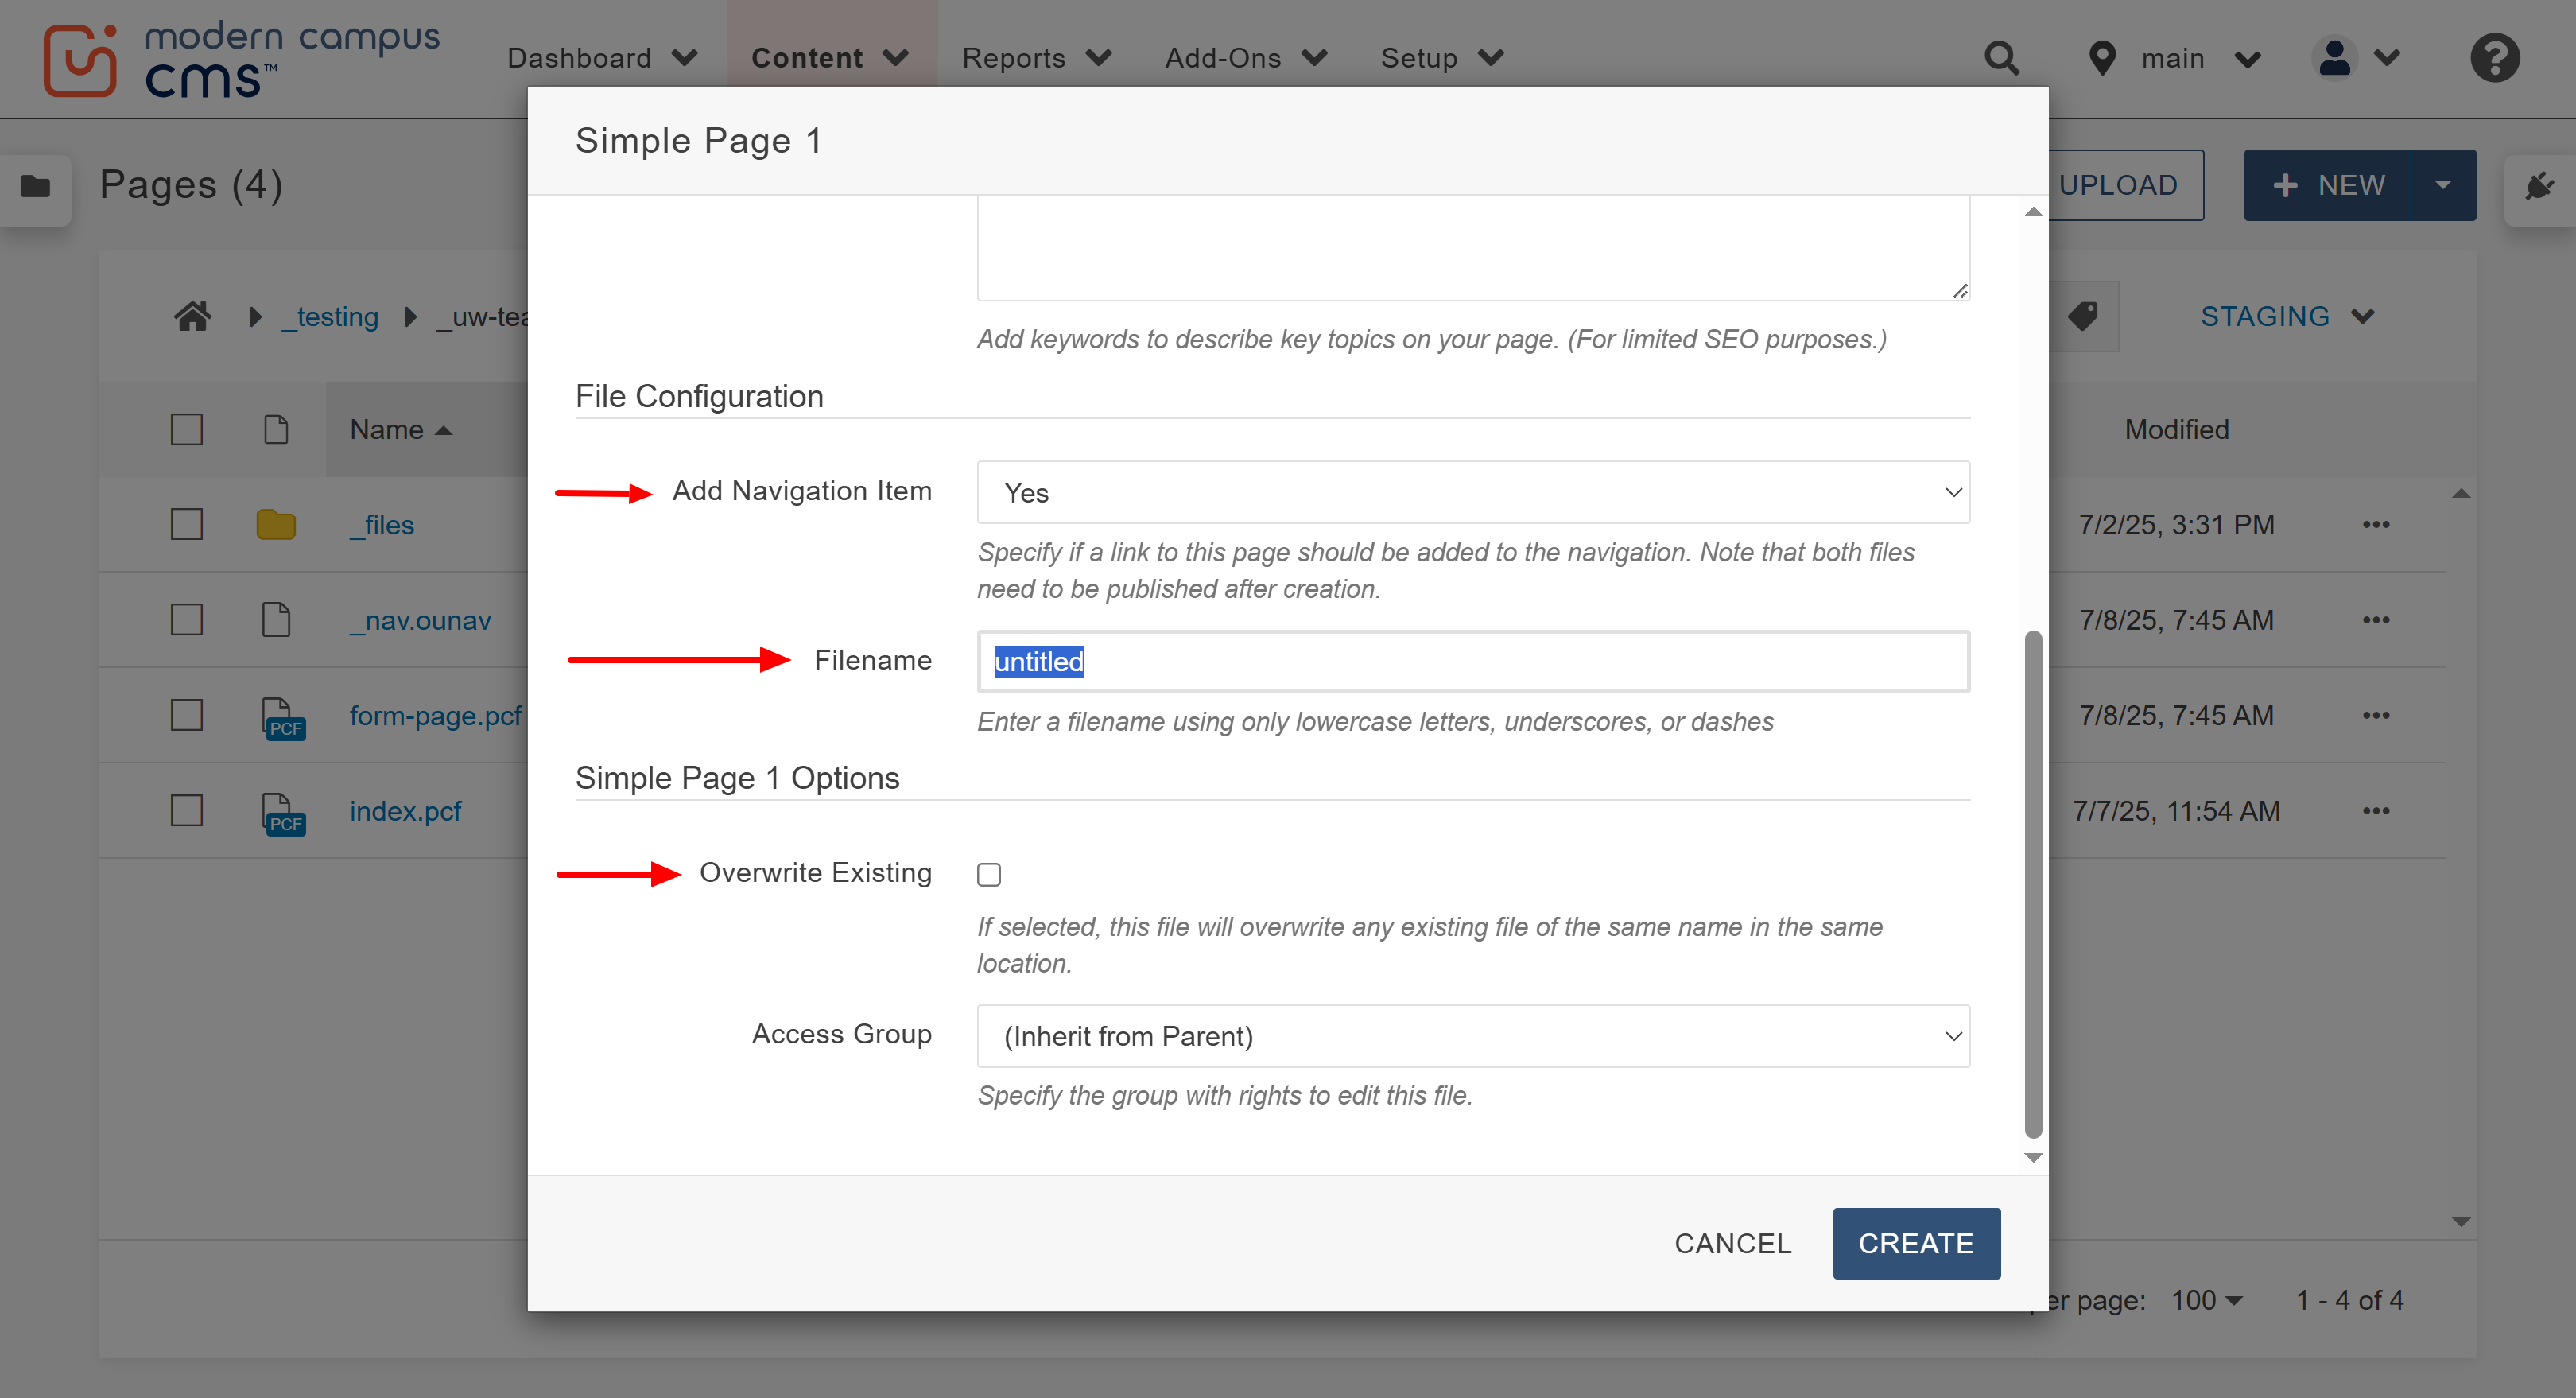
FILE CONFIGURATION:
- Add Navigation Item: Always leave defaulted to YES.
- Filename: Fill in the file name with the same phrasing as the "Page Title" from step one but
with different formatting. Without entering a Filename, the page file will default
to the name "untitled." Just like with folder, image, and document names, the file
name should be:
- Separated by dashes (not underscores)
- Lowercase letters only
- No symbols
- Overwrite Existing (optional) : This option can be selected if you want this new page to overwrite the template and content of a page file that already exists with the same name in the same location. This will immediately overwrite the existing page's content with a blank template page when you create the new page file.
After the page setup and file configuration fields have been filled out from Step 3, select the "Create" button.
The new page will automatically be opened to the Editing view and you can begin adding content. Be sure to refer to the snippet and component guides, as well as others in this tutorials knowledge base to help aid you in creating your page successfully.
The University of Wyoming has earned its Research Level 1 (R1) status from the Carnegie Classification of Institutions of Higher Education, placing Wyoming's only four-year university with the top research universities in the United States.