- When saving the new document file to your computer, name the new document the exact
same as the one already in the CMS that you are going to replace. Reminder: file names
should have no capital letters and use hyphens or dashes instead of spaces.
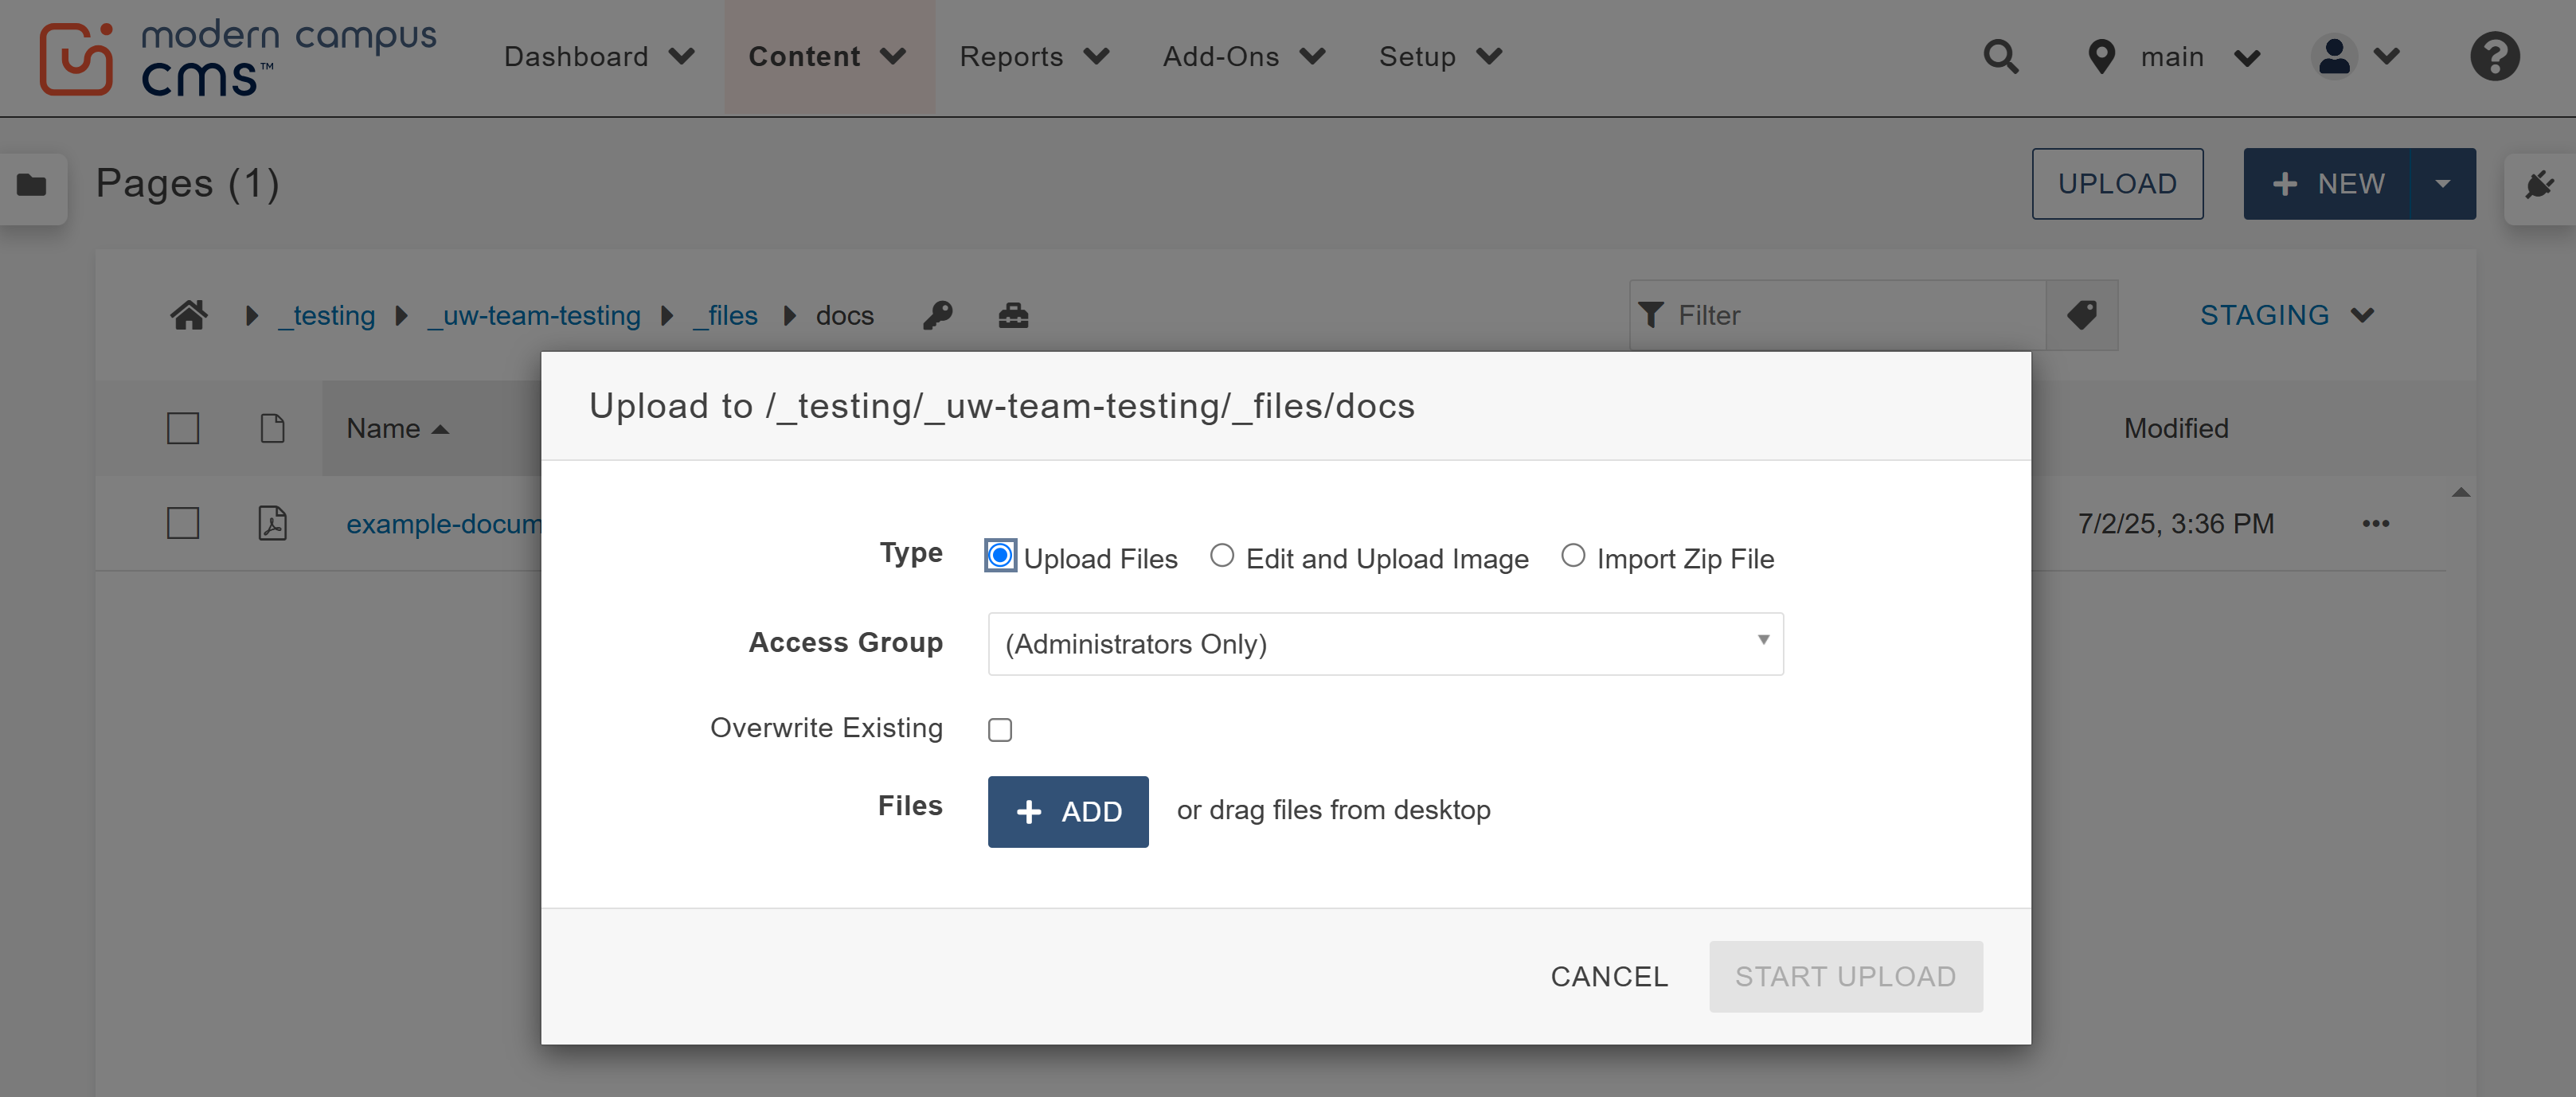
- In Modern Campus CMS, navigate to where the file you're replacing is located. Click
the Upload button. Make sure you are in Staging, not Production.

- In the window that appears, check that your preferences are set as the default options:
the Type as Upload Files and the Access Group as Inherit Existing.

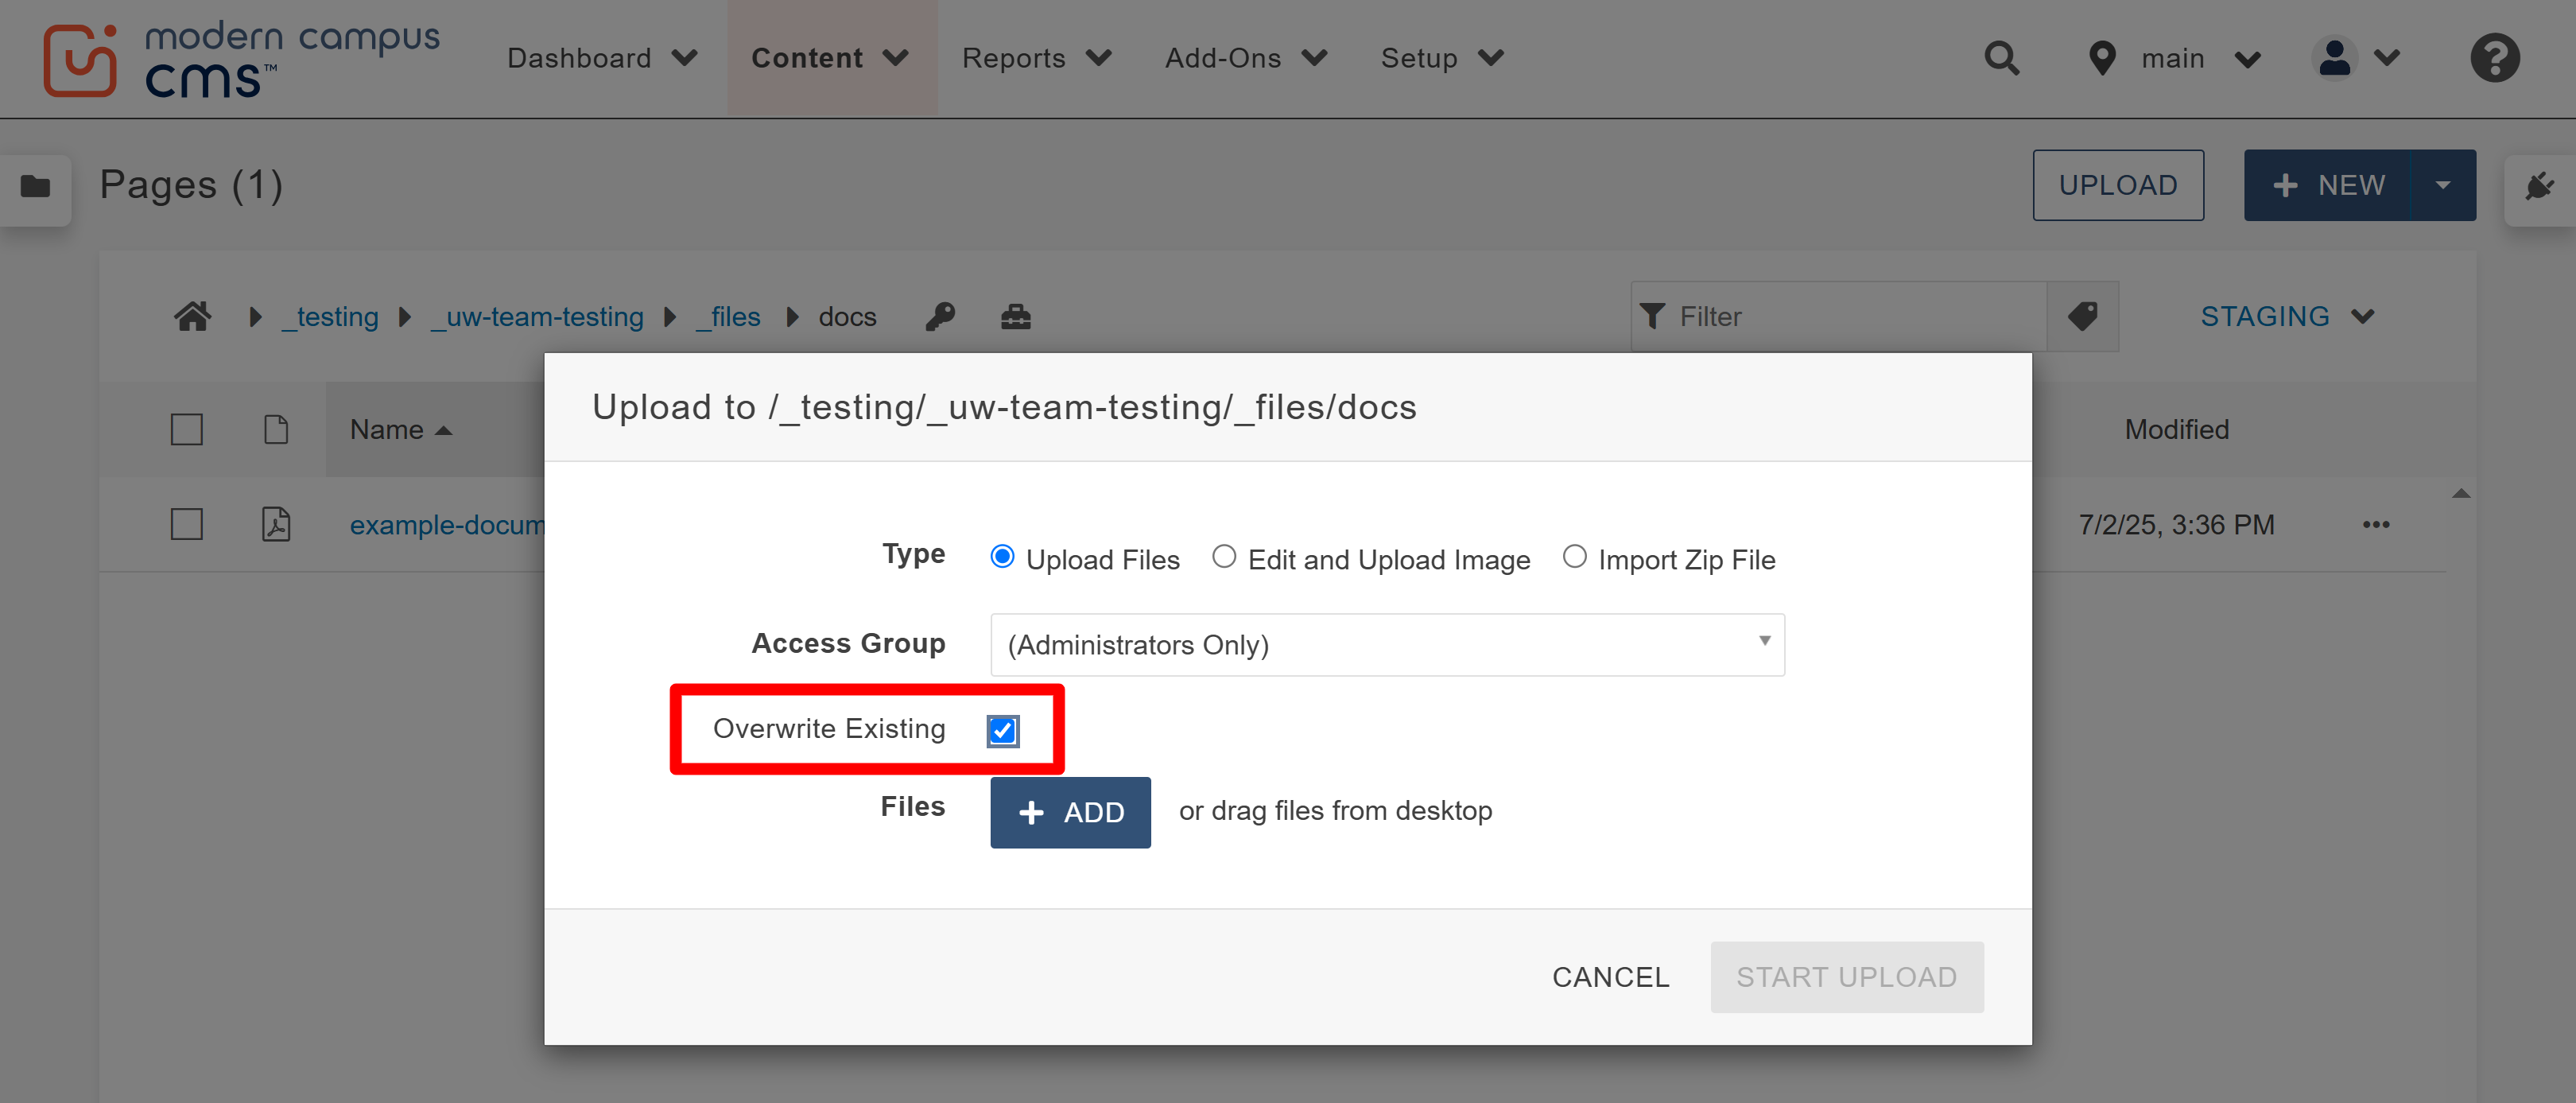
- Check the box next to "Overwrite Existing." If you do not check the Overwrite Existing
box, then when you try to upload the file the status will show up as “Filename already
in use” and will not allow you to move forward.

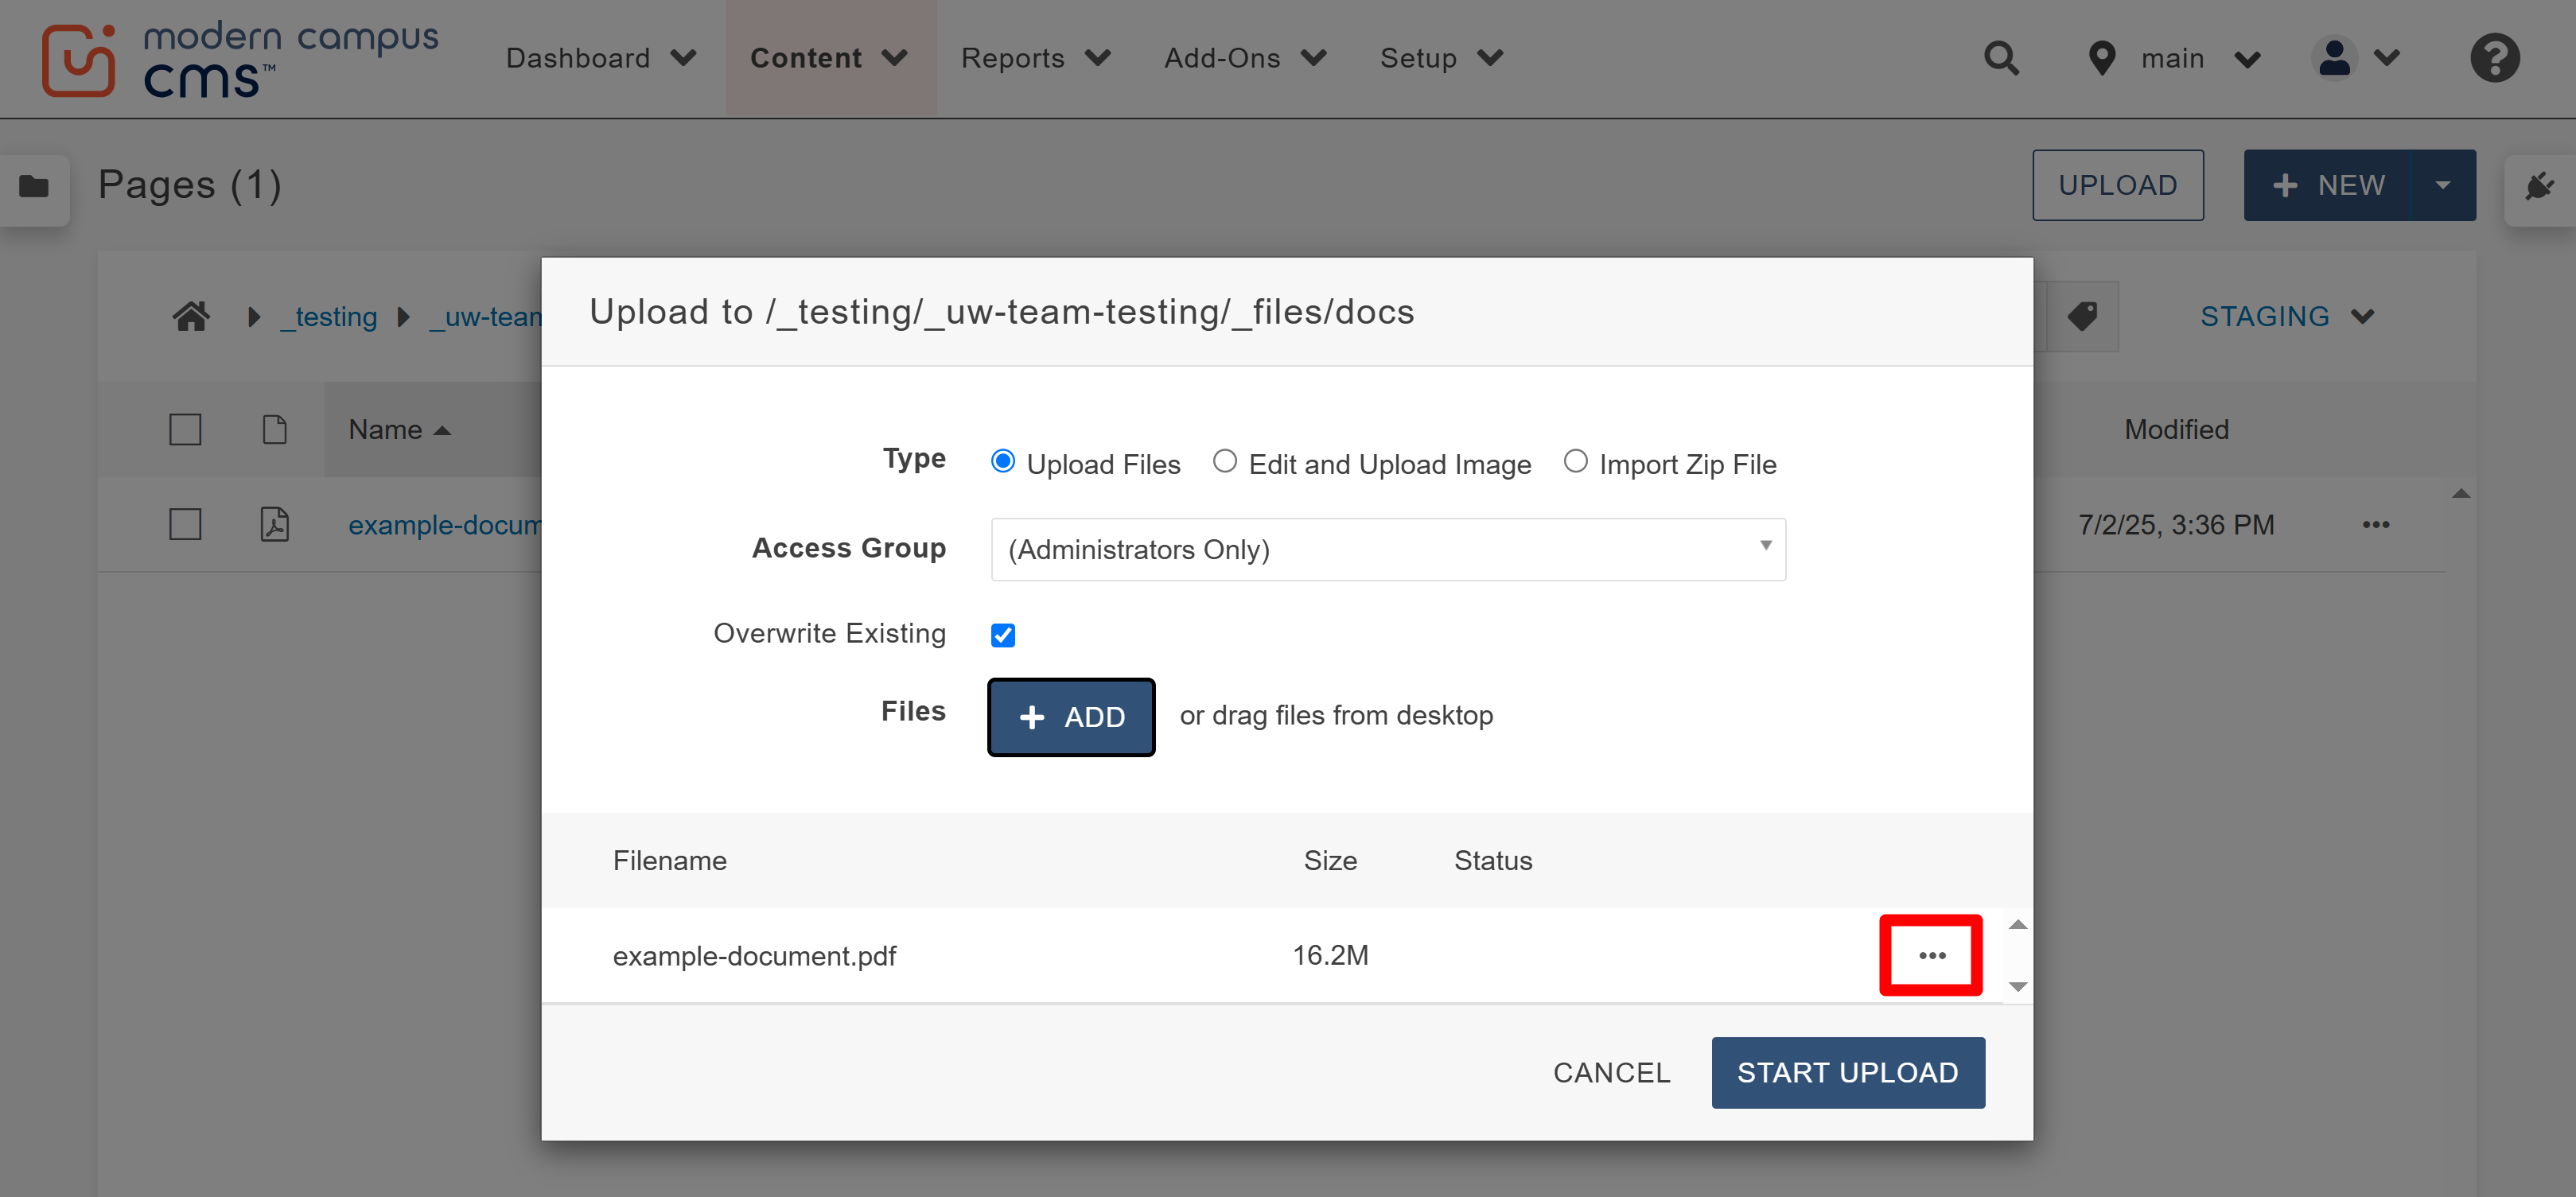
- Click the "+ADD" and search your computer for the new file or drag it from the desktop.
When the "Overwrite Existing" box is checked, the filename should appear without any
error messages.
Note: You may click the three dots to the right of the status and have the options to remove or rename your file.
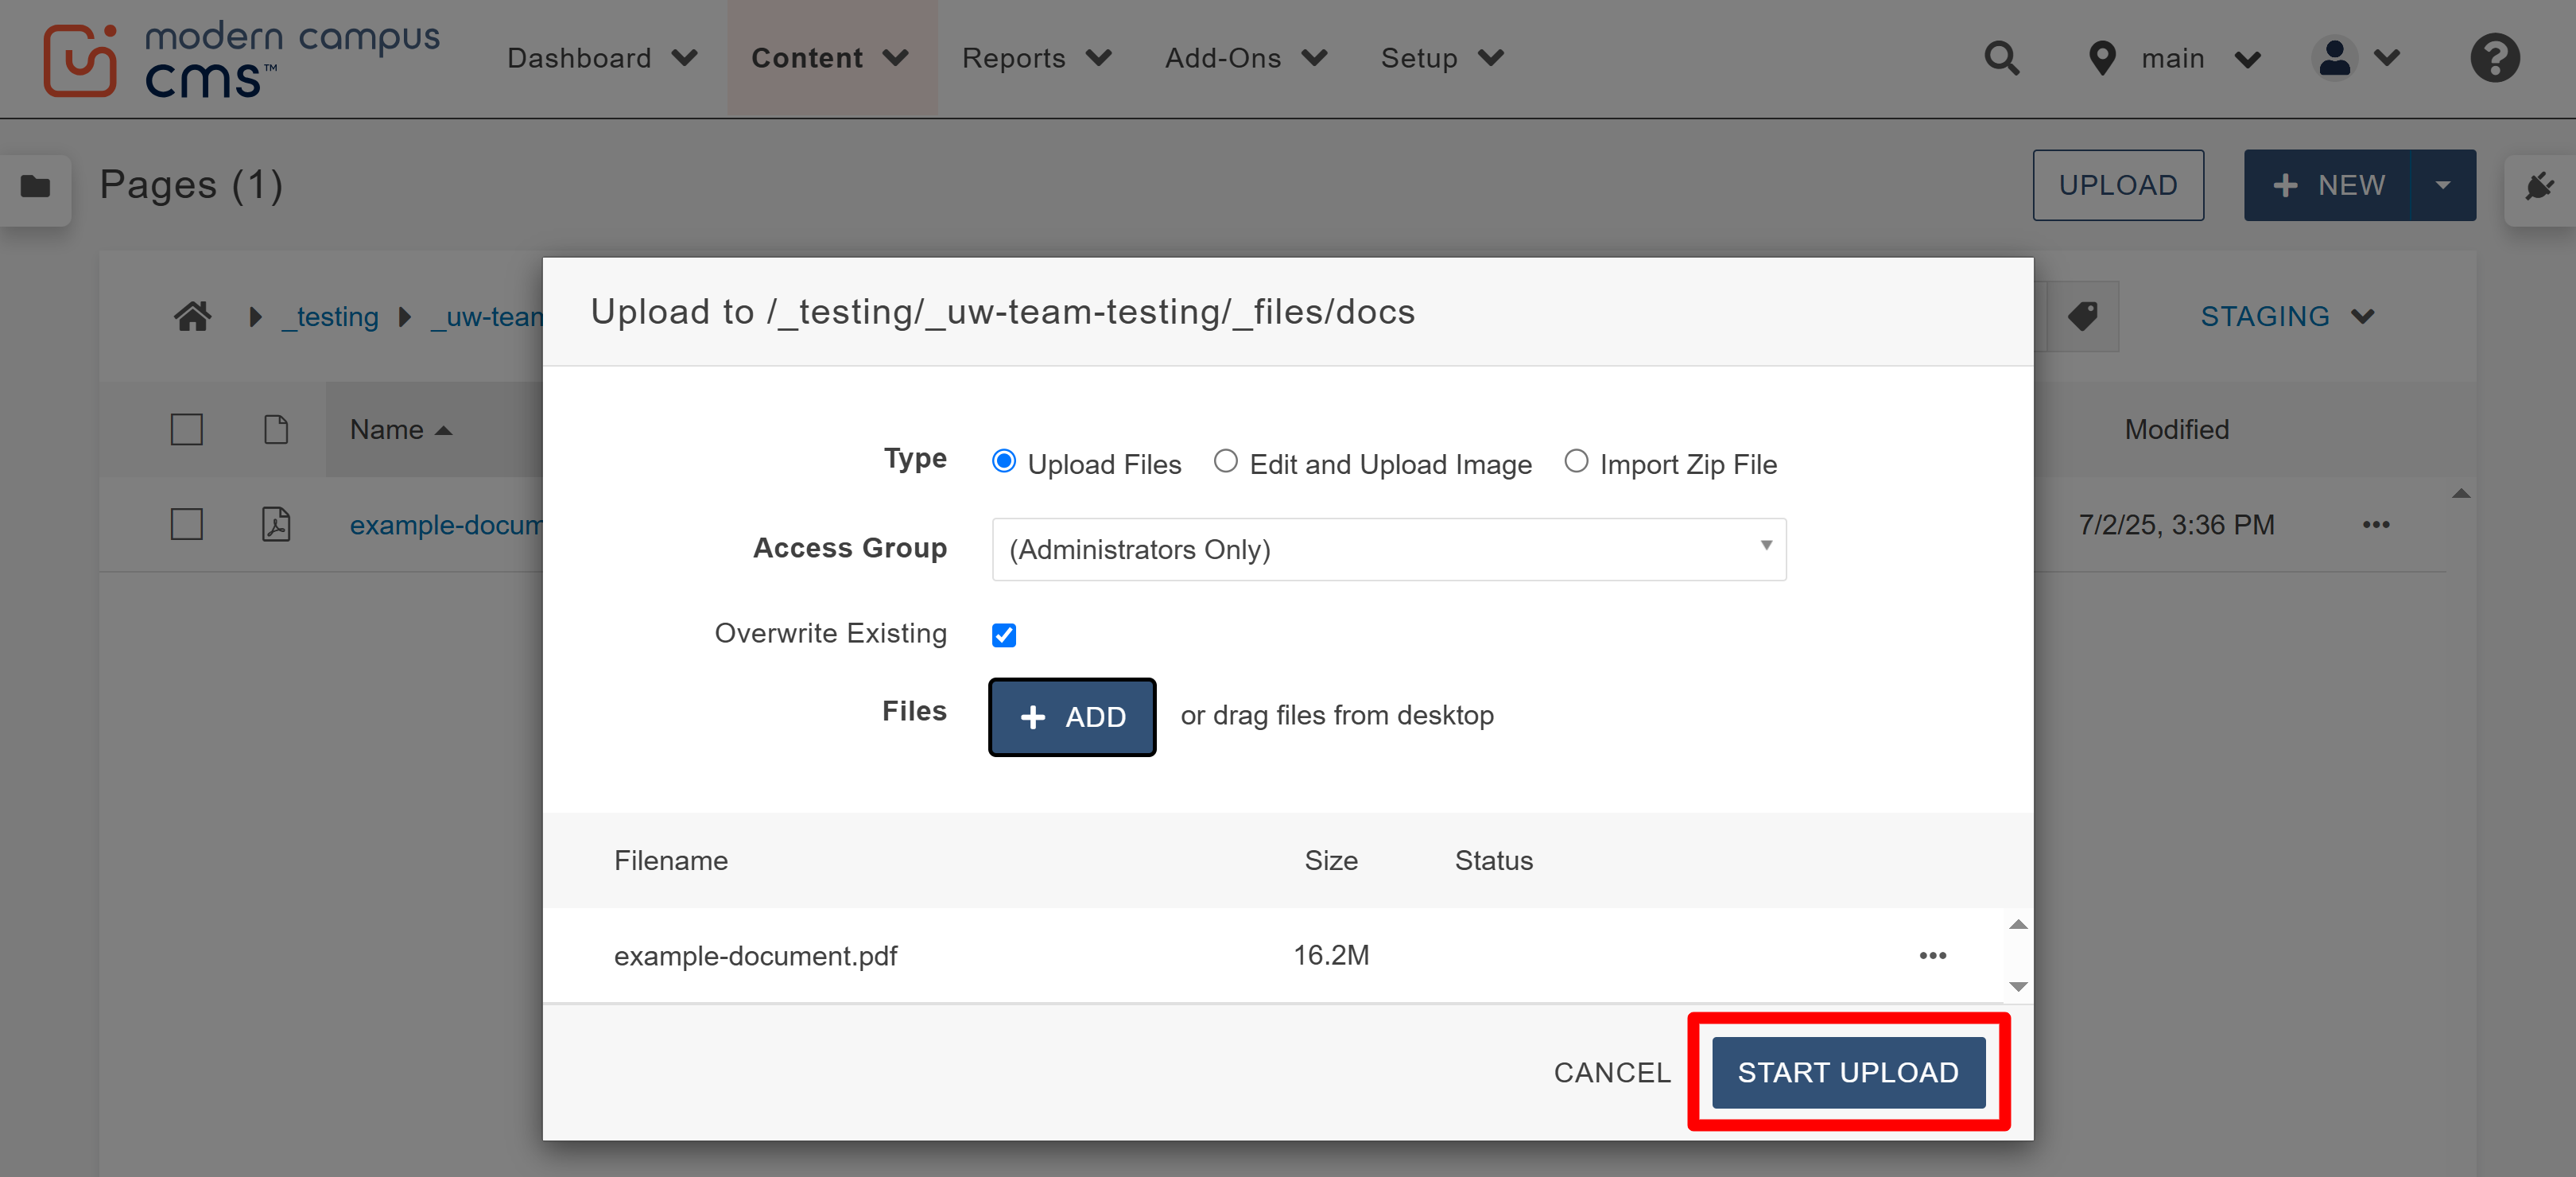
- Once you and the system are happy with the file, click Start Upload.

- Publish the document by selecting the check box to the left of the file name and then
selcting publish from the toobar or by selecting the three dots to the far right of
the file and selecting publish from that menu. After publishing the file, also publish
the page(s) that the document appears on.
Note: Remember to publish the file and the page twice, once to Dev and once to the default of Production.
If you check it and the old document is still appearing, try the following:
- Refresh the page in your browser.
- Hard refresh the page by selecting Shift+Ctrl+R (for PC) or shift+command+R (for mac) on your keyboard.
- Open an incognito or private window in your browser and check the page again.

