Editable Regions
Content Sections
Editing Sections
- The Content sections are the most fundamental and basic of editable regions on a page.
Each page template will contain a set of snippets that have already been carefully
placed inside each editable region. They are often designed to be added onto, using
new rows to make up additional content areas of the same snippets. Some templates
contain empty content sections. These editable regions are intentionally left blank
so you can build upon the layout that already exists within that template. For the
sections to be visible, make sure you are in the "edit" tab of your page.
- When you click into a content section, the editable region is displayed as a white
box with a snippet already in place with a non-editable region as a light gray background.
For "empty" sections that do not already contain a snippet, this editable region is
where you place a new snippet. Some snippets are designed to let you make minor edits
such as adding or removing rows from the snippet, or contain layers where a snippet
is within another snippet. When you are editing a snippet, the border of the snippet
will change from a thin light gray line to a light blue line, so that you know where
you are working within your snippet. Refer to the tutorial pages or your review your
training course for more details on using snippets. Note: Do not delete snippets from your page. If you do not want to use a snippet that is
already on the page, then you will turn off the Content Section in Page Parameters.
- When you are finished editing, click the save button above the toolbar to save all
edits or unsaved changes on the page and move on to the next section or edit.
Turning Sections On & Off
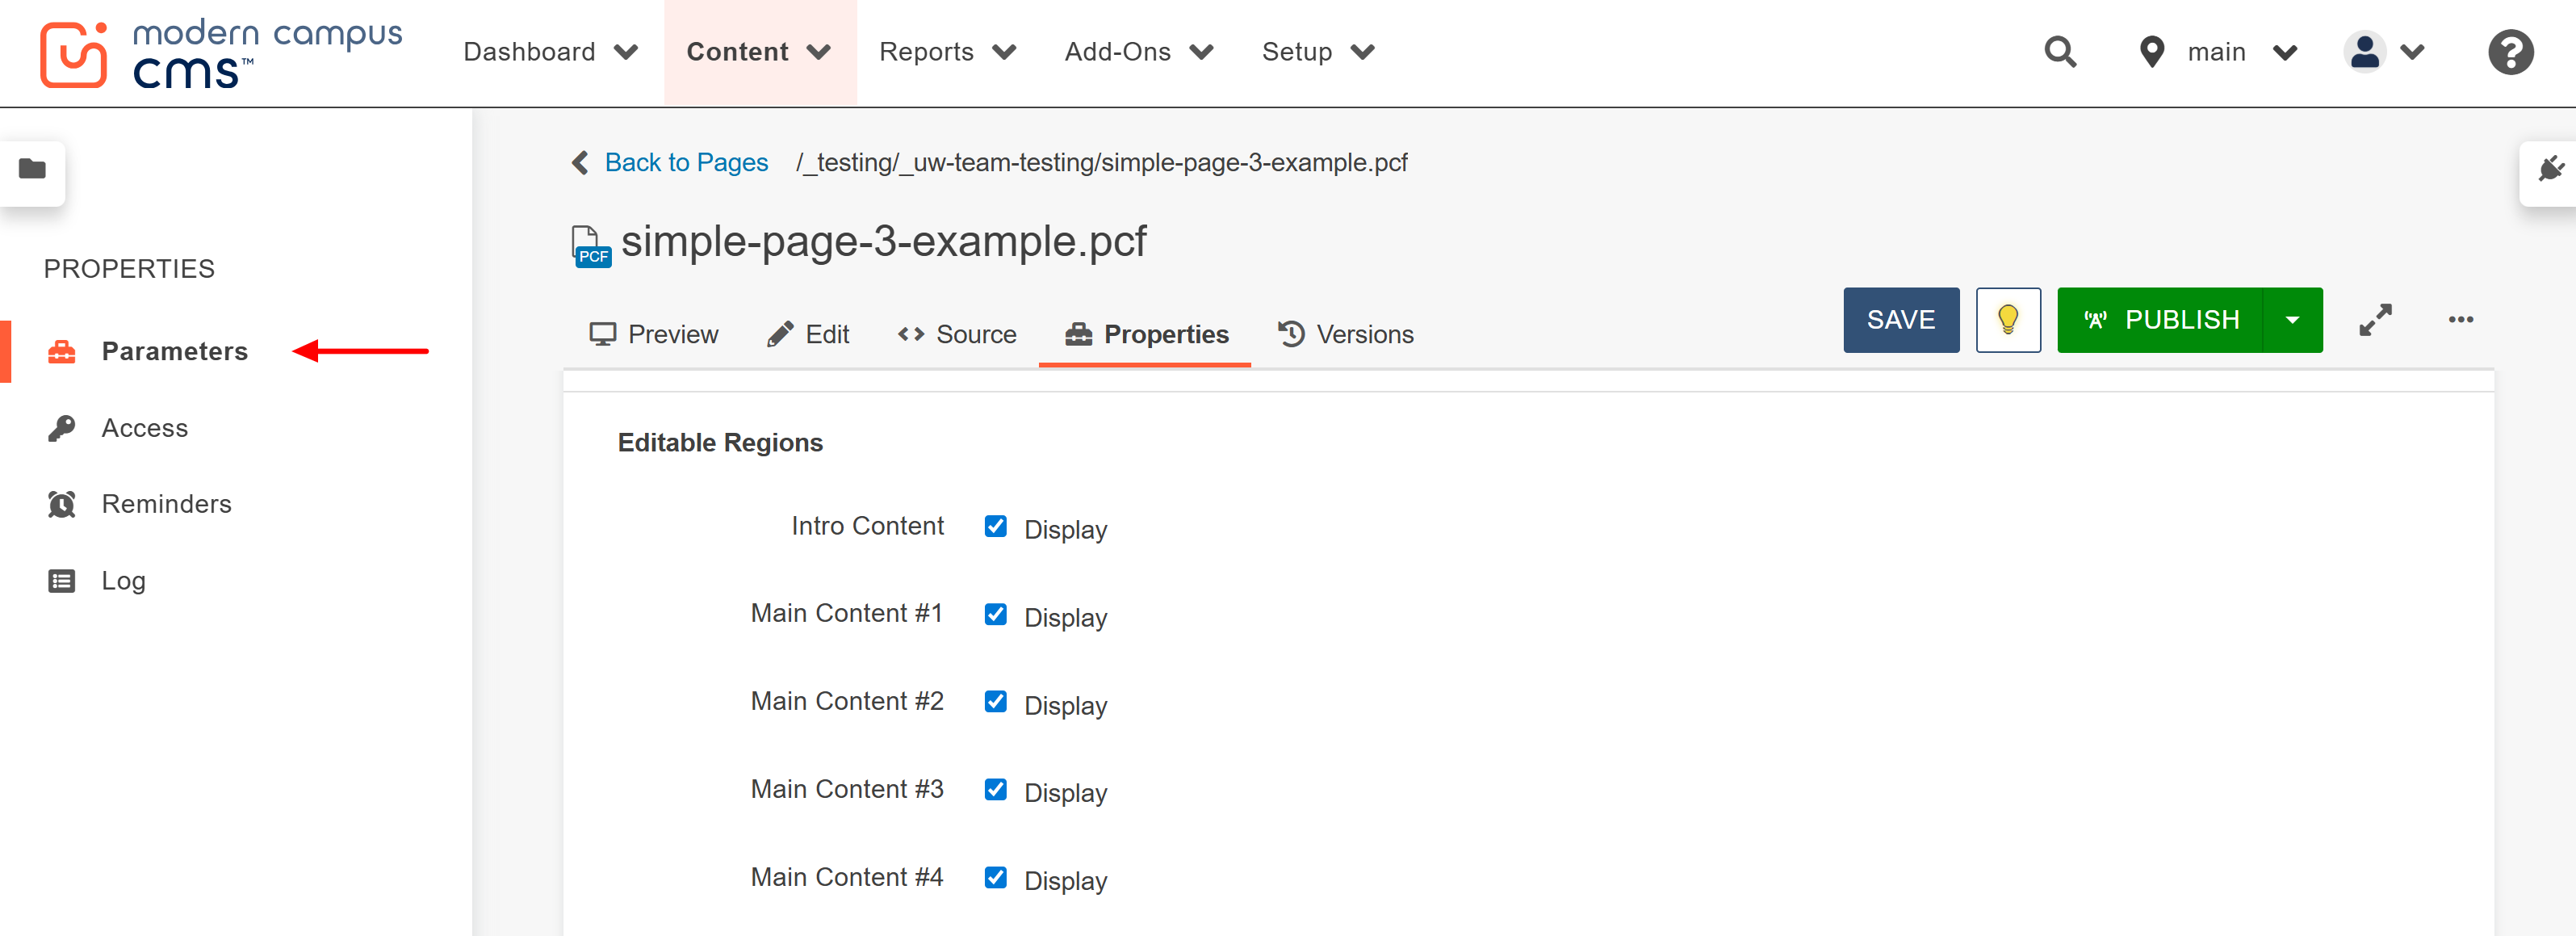
Depending on what type of template you are using, you will have multiple content sections on your page. By default, when building a page, all sections (intro content + numbered main content sections) are turned on when the page is created. Sections cannot be deleted or rearranged however; they can be turned on and off by following these steps:
- Check a page out for editing by clicking into an editable region or turning the lightbulb icon on.
- Select the Properties tab from the top of the page.
- By default, you will be viewing the Properties > Parameters. Scroll down to the Editable
Regions to turn them on or off. Note: You must have the page checked out to view and edit the Parameters.
Properties
Now you know can edit your visible sections in the properties tab! Properties also control:- Title and Metadata
- Title: This will be your Header 1 text on the page, will be displayed in search engines and the web browser window, and will be the title of the page in the site map. Be sure your title has proper grammar and spelling.
- Description: This will appear in search engine results. Your description should be at least 25 words in full sentences describing what the user will find on the page.
- Keywords: This is optional. Consider using keywords here to boost Search Engine Optimization (SEO) on your page.
- Custom Settings
- Page Heading (if it will differ from Title)
- Sub-heading (optional)
- Custom Breadcrumb
- Page Banner Type
- Banner Image (if using one) and Banner Image Alt Text
- Page Navigation: option to display on the page and to expand on page load
- Contact Section
- Multi-Edit Conent - (only on some page templates)
Publishing
Preview
Click on the preview tab to display the edited page without disruption from editable
regions. From here you can also see what your page will look like on different screen
sizes.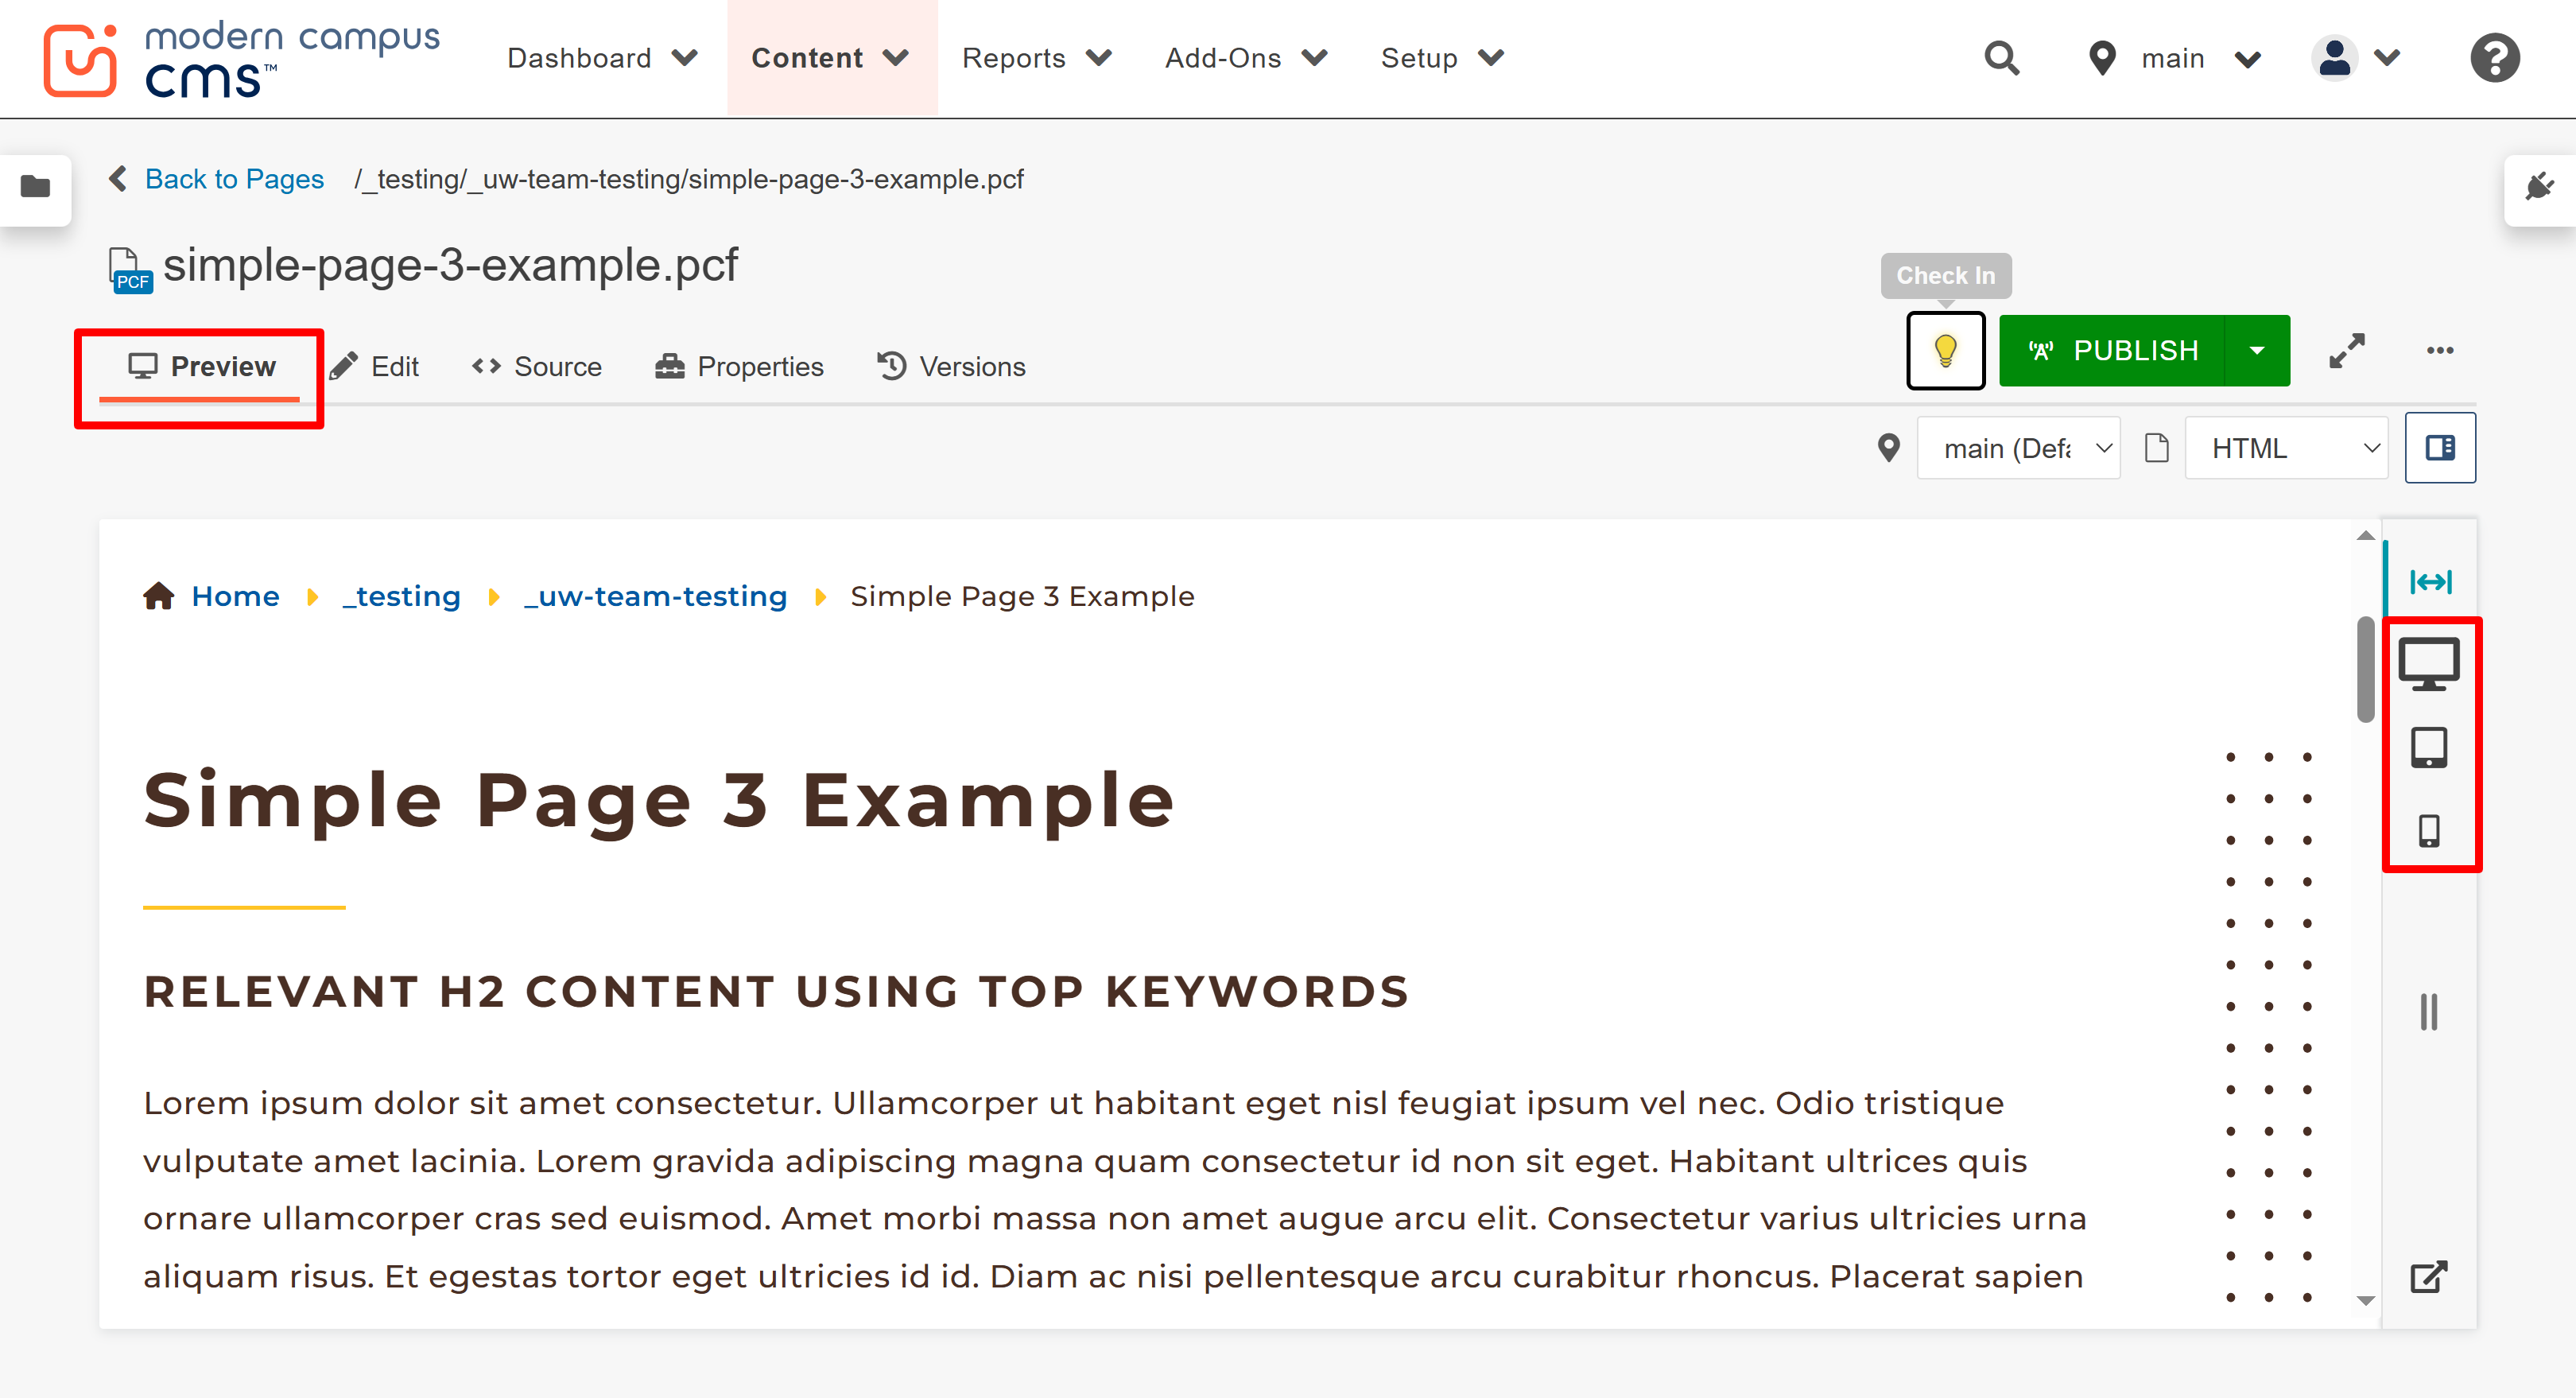
Publish
- Once you are happy with your edits, click publish.

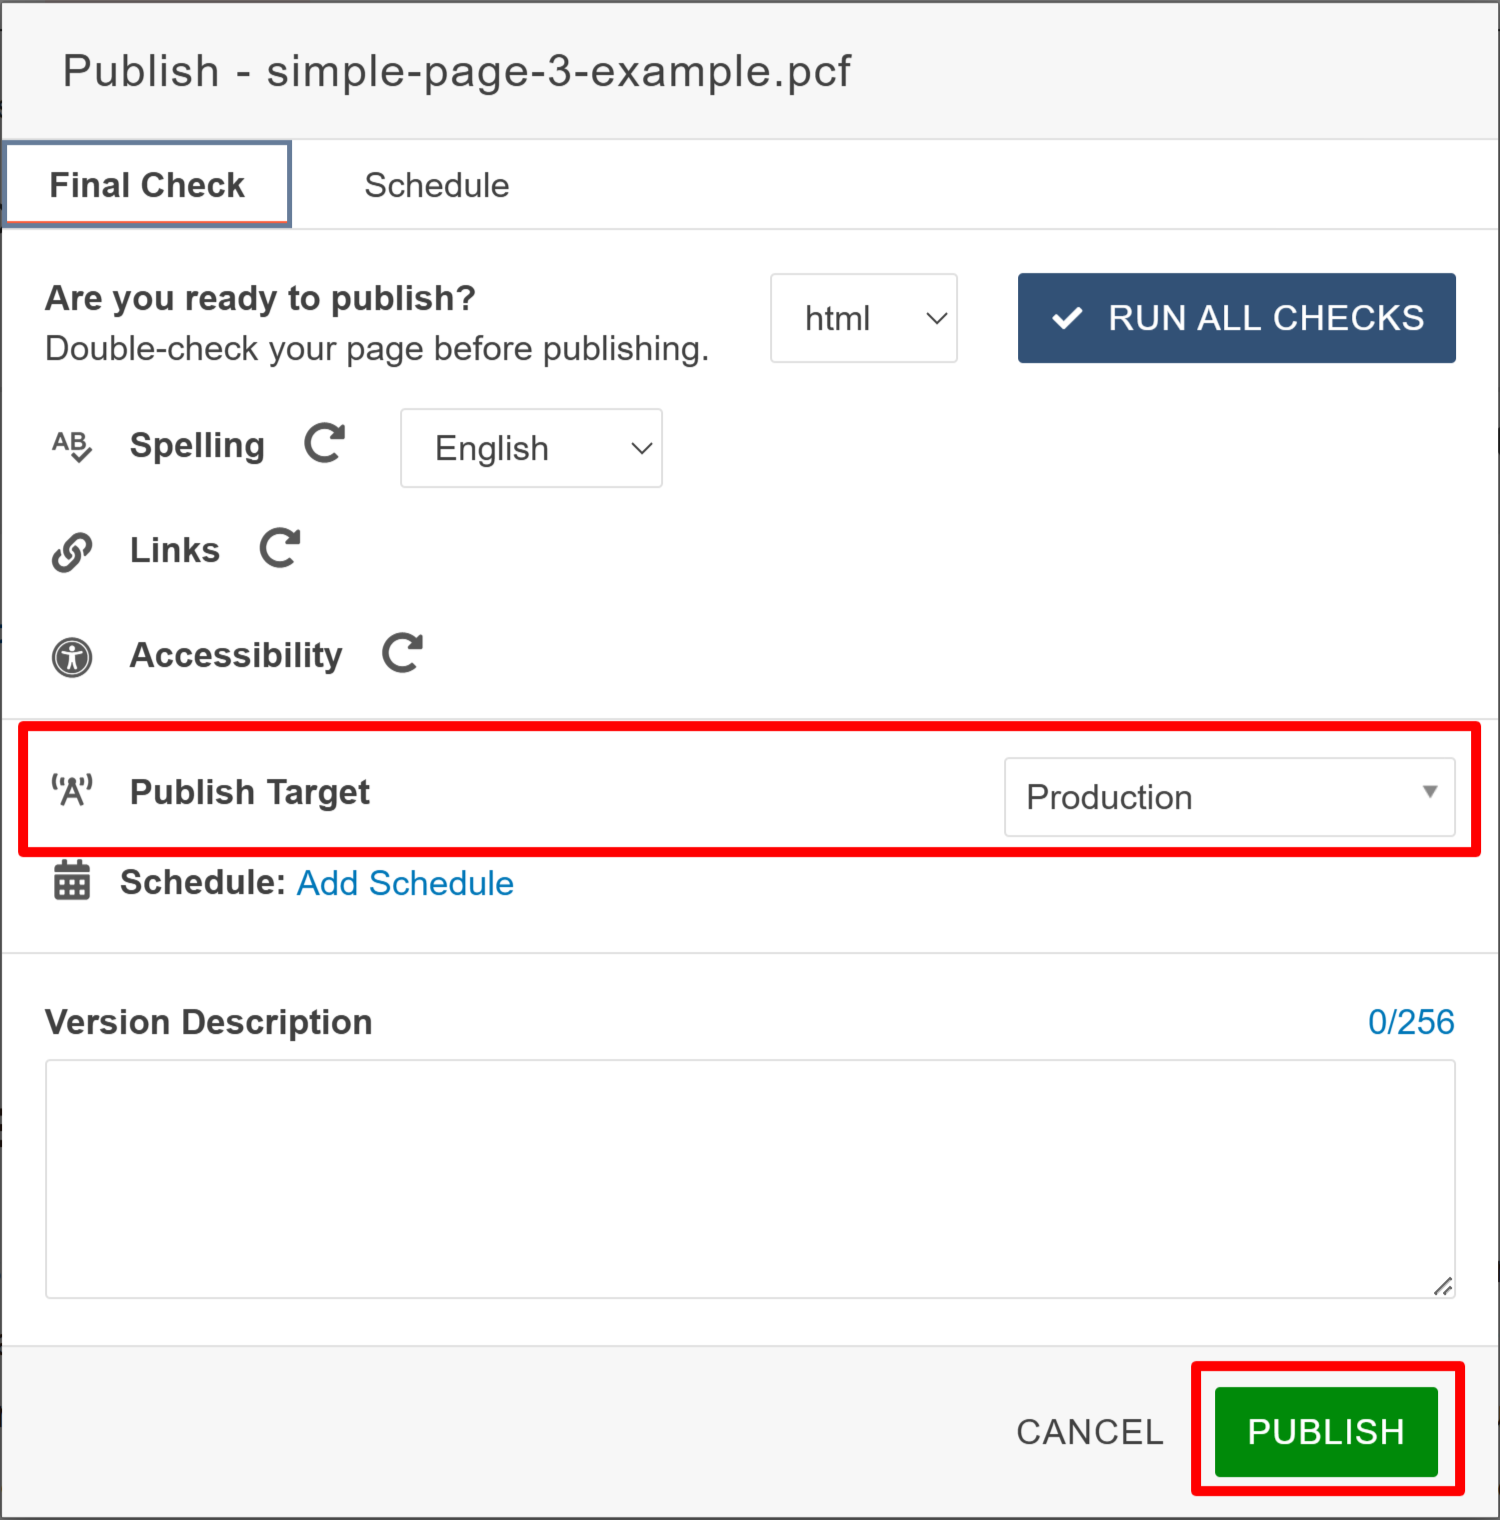
- A window will appear. Select the Run All Checks button to run checks on spelling, links and accessibility. Review the Page Check tutorial for more details on this.
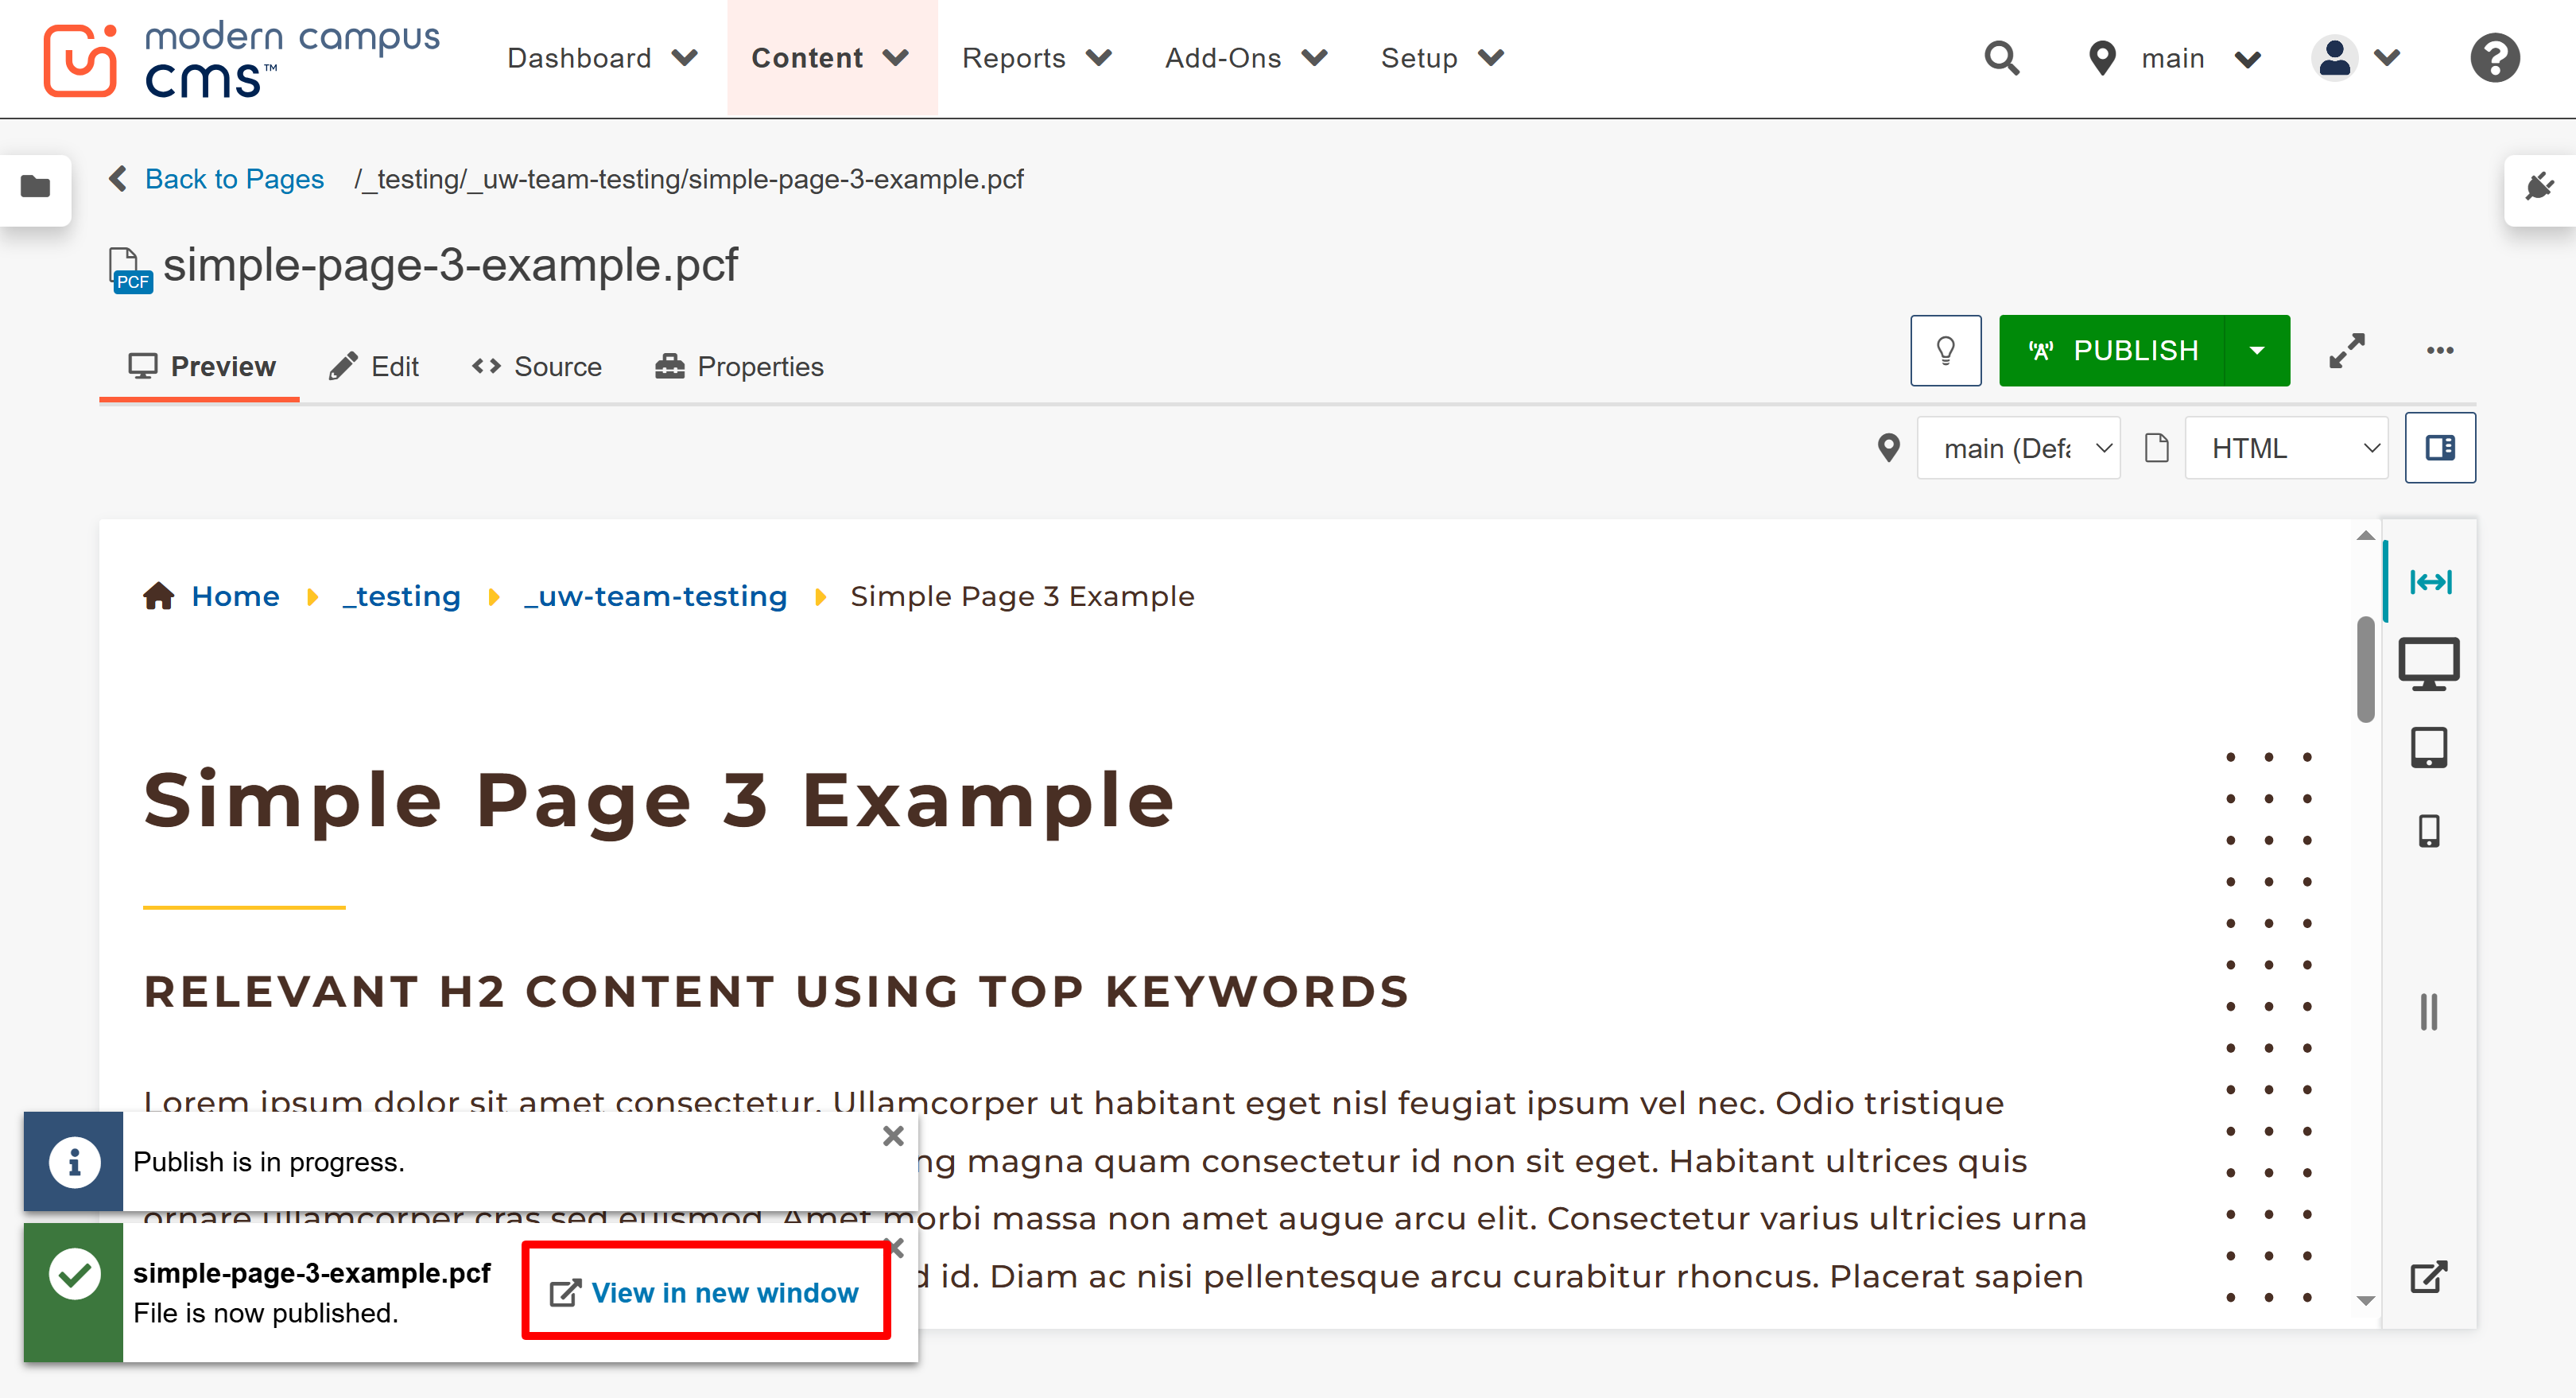
- In the "Publish Target" drop down notice it will default to Production. You should
always publish to both Dev and Production. Once the page is published, a small window
will popup with a link to "View in new window." Click the "View in new window" link
to see the published page and check your links. This is also when you should be performing
an additional accessibility scan on the page. You can learn more about the accessibility
scan tools on the Web Accessibility Testing Guide page.
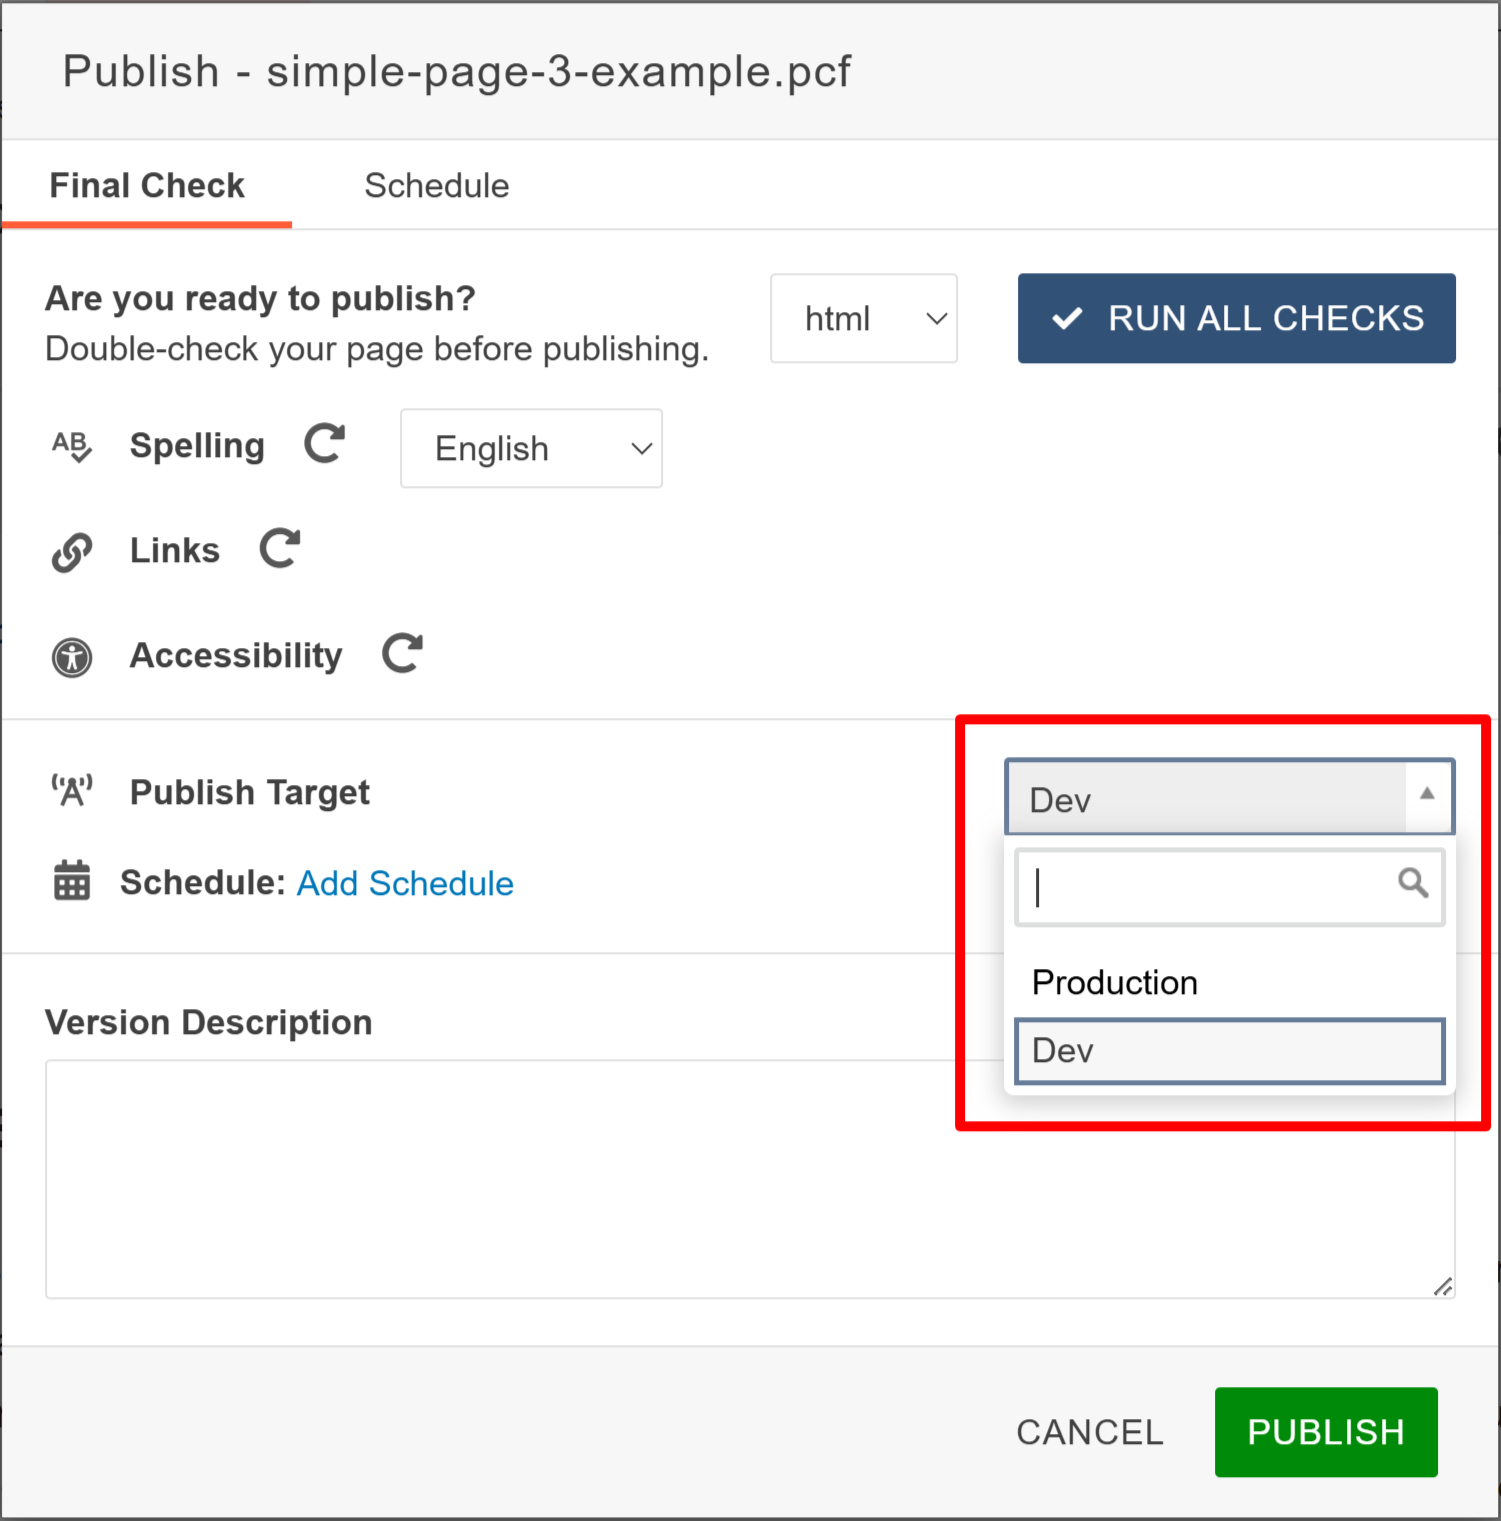
- In the Publish Target, select the dropdown to publish to the Dev target. Click on
the "View in new window" tab to see the published page and check your links and use
accessibility testing tools. When you publish to Dev, you will be able to view the
page for review. You can also send the URL for the dev published page to non-editors
(people in your working unit that do not have access to the CMS) to allow them to
view the page for review if that is something that your working unit wants you to
do.
- If you are satisfied with the page, then you will also go ahead and publish to Production.
Publishing to Production will make the page a live web page. When the Publish Target
is on Production, select the Publish button.
Video Tutorial
For more information about editing your pages watch this video tutorial!

