
Step 1: From the Content tab at the top of the page, navigate to either the images or documents
folder within your site's "_files" folder where you will be uploading a photo or PDF
into.
Select the Upload button once you have navigated to the folder in which you wish to
upload the file. 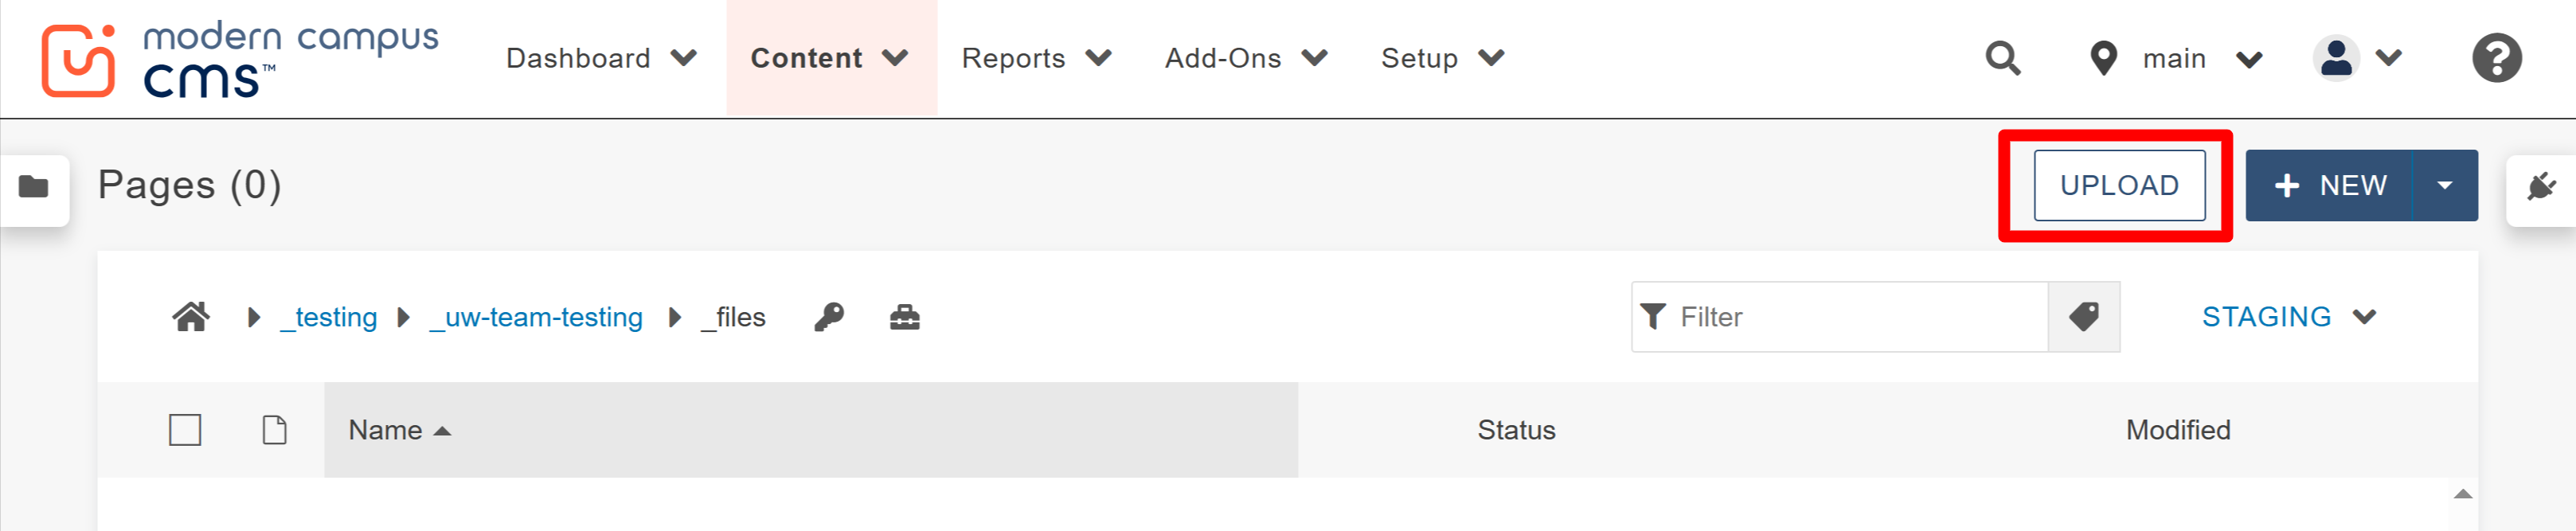
Step 2: In the window that appears, check that your preferences are set as the default options:
the Type as Upload Files and the Access Group as Inherit Existing. Click the "+ADD"
and search your computer for the new file or drag it from the desktop.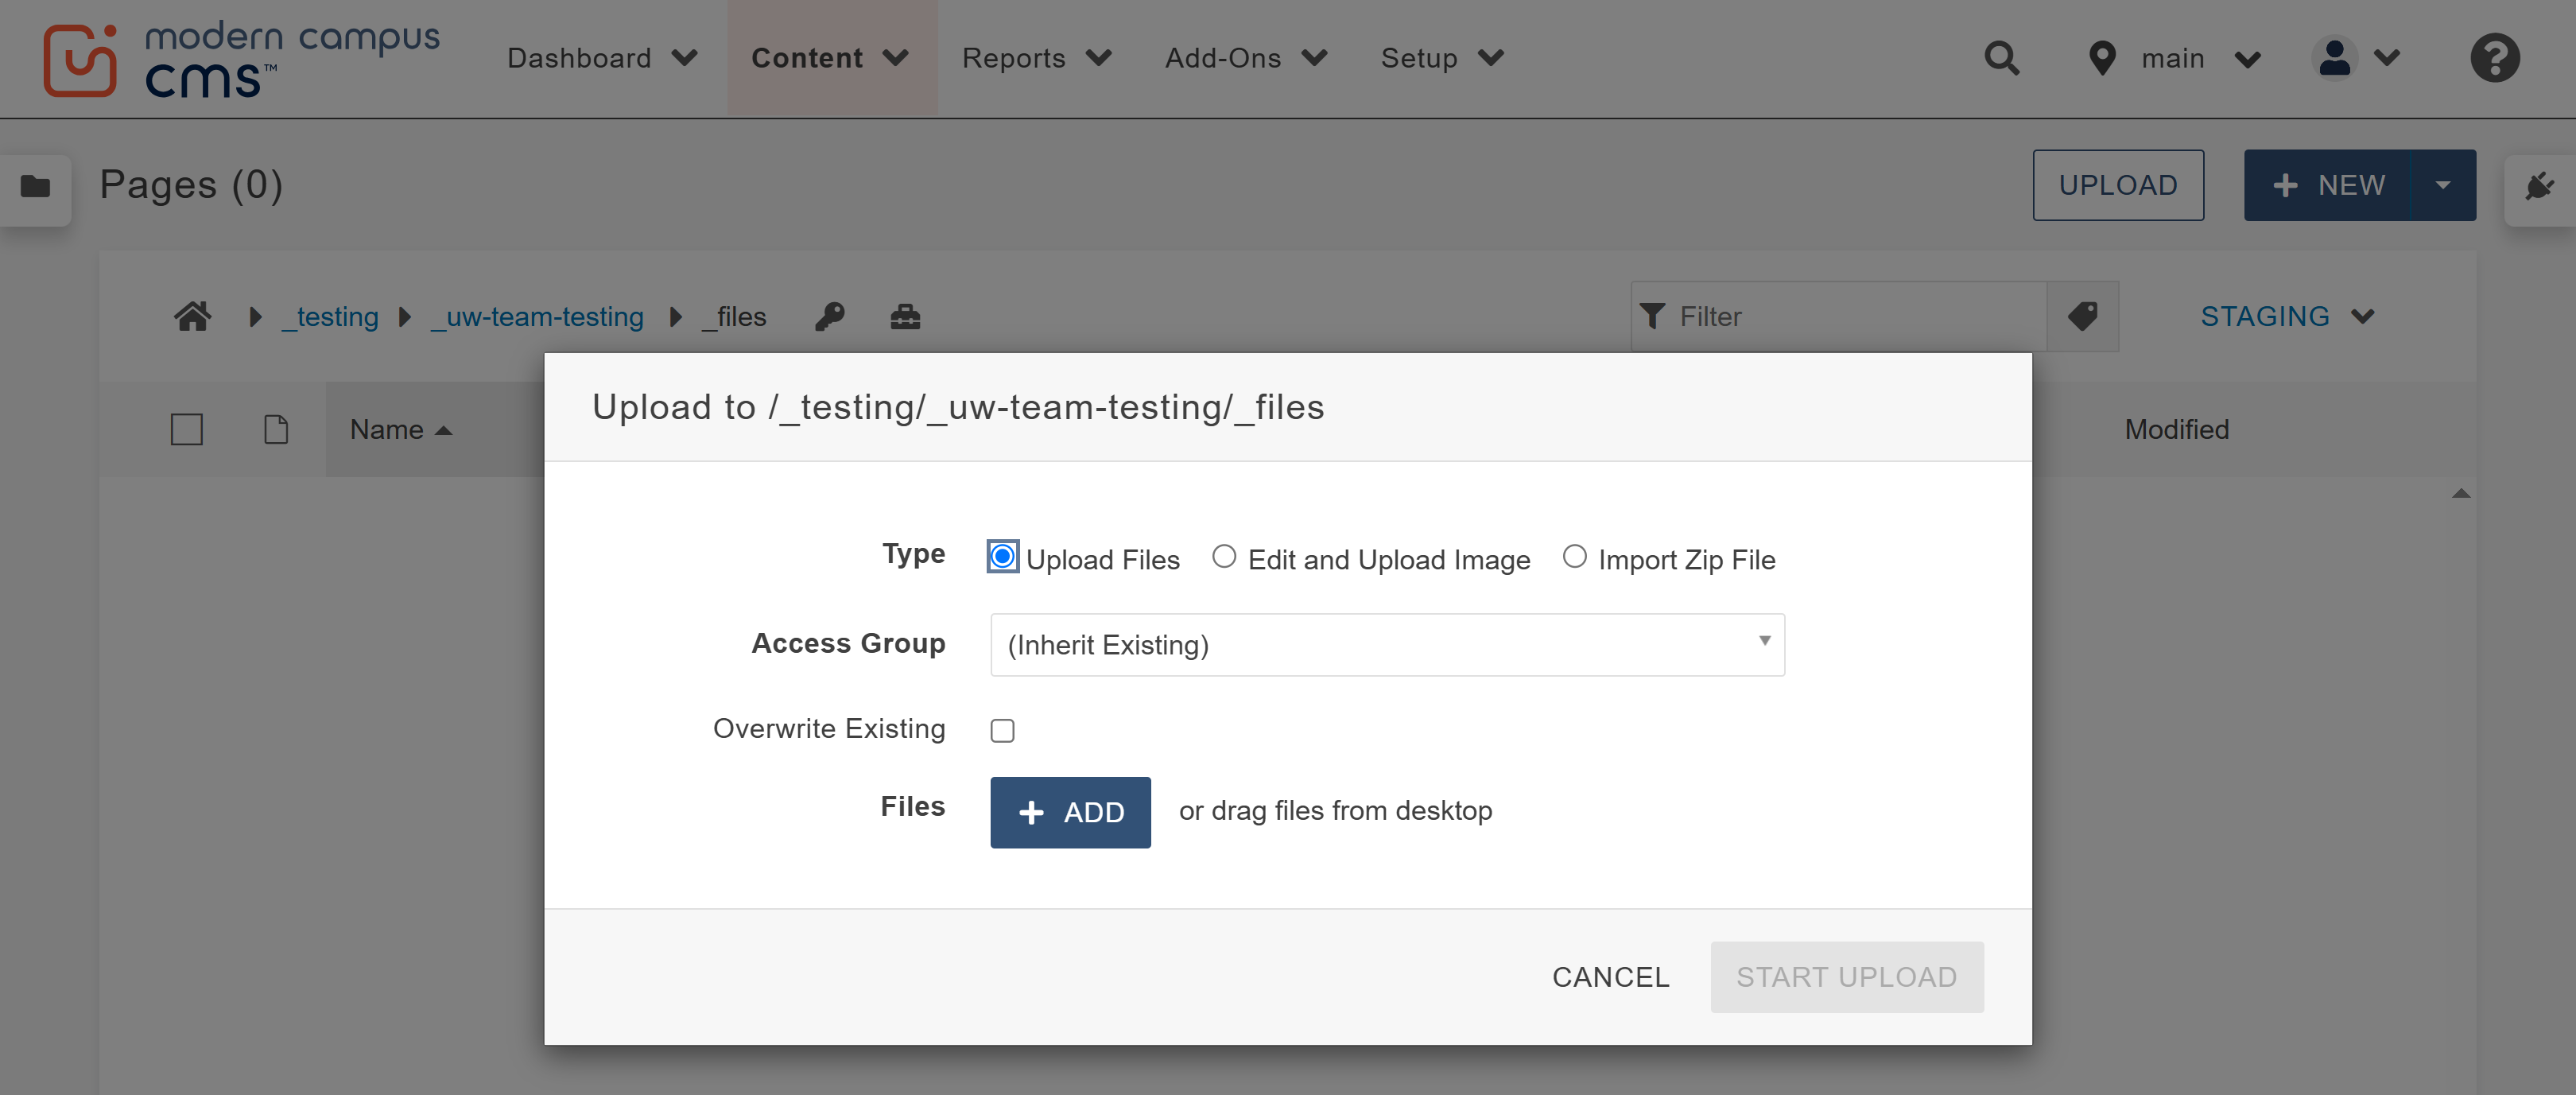
Ensure that you have selected the correct photo or document in the window that appears.
Click the Start Upload button.
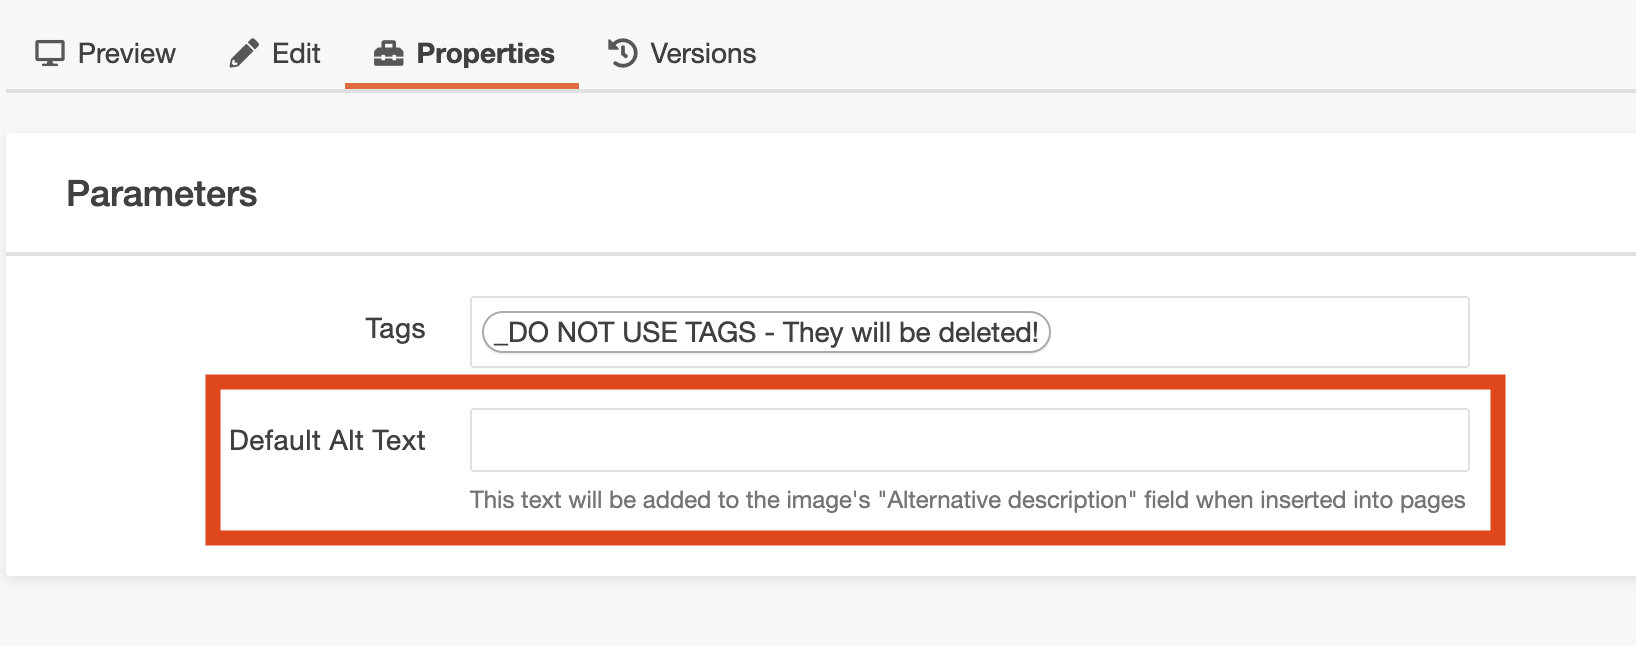
Step 3: Images must have an alternative description (alt text) for accessibility. Add an image
description by navigating to the image Properties tab.
Alt Text Best Practices
Good alt text helps someone who can't see the image understand what it shows and why
it's there. Keep these tips in mind:
- Be specific and concise: aim for under 125 characters when possible.
- Describe what's actually in the photo: instead of "campus building," write "The Wyoming Union building on a sunny afternoon." Instead of "outdoor photo," try "Students relaxing on the lawn at Prexy's Pasture."
- Include relevant context or action: if people are doing something, say so. e.g., "Two students working with lab equipment in a chemistry lab" rather than just "Students in a lab."
- Skip phrases like "image of" or "photo of": screen readers already announce it's an image, so jump straight into the description.
- Avoid keyword stuffing: alt text is for accessibility, not SEO. Write for real people
first, not search engines.
Step 4: In your files list, select the check box to the left of the file name that you have
just uploaded in the folder and click publish in the tool bar that appears at the
top. 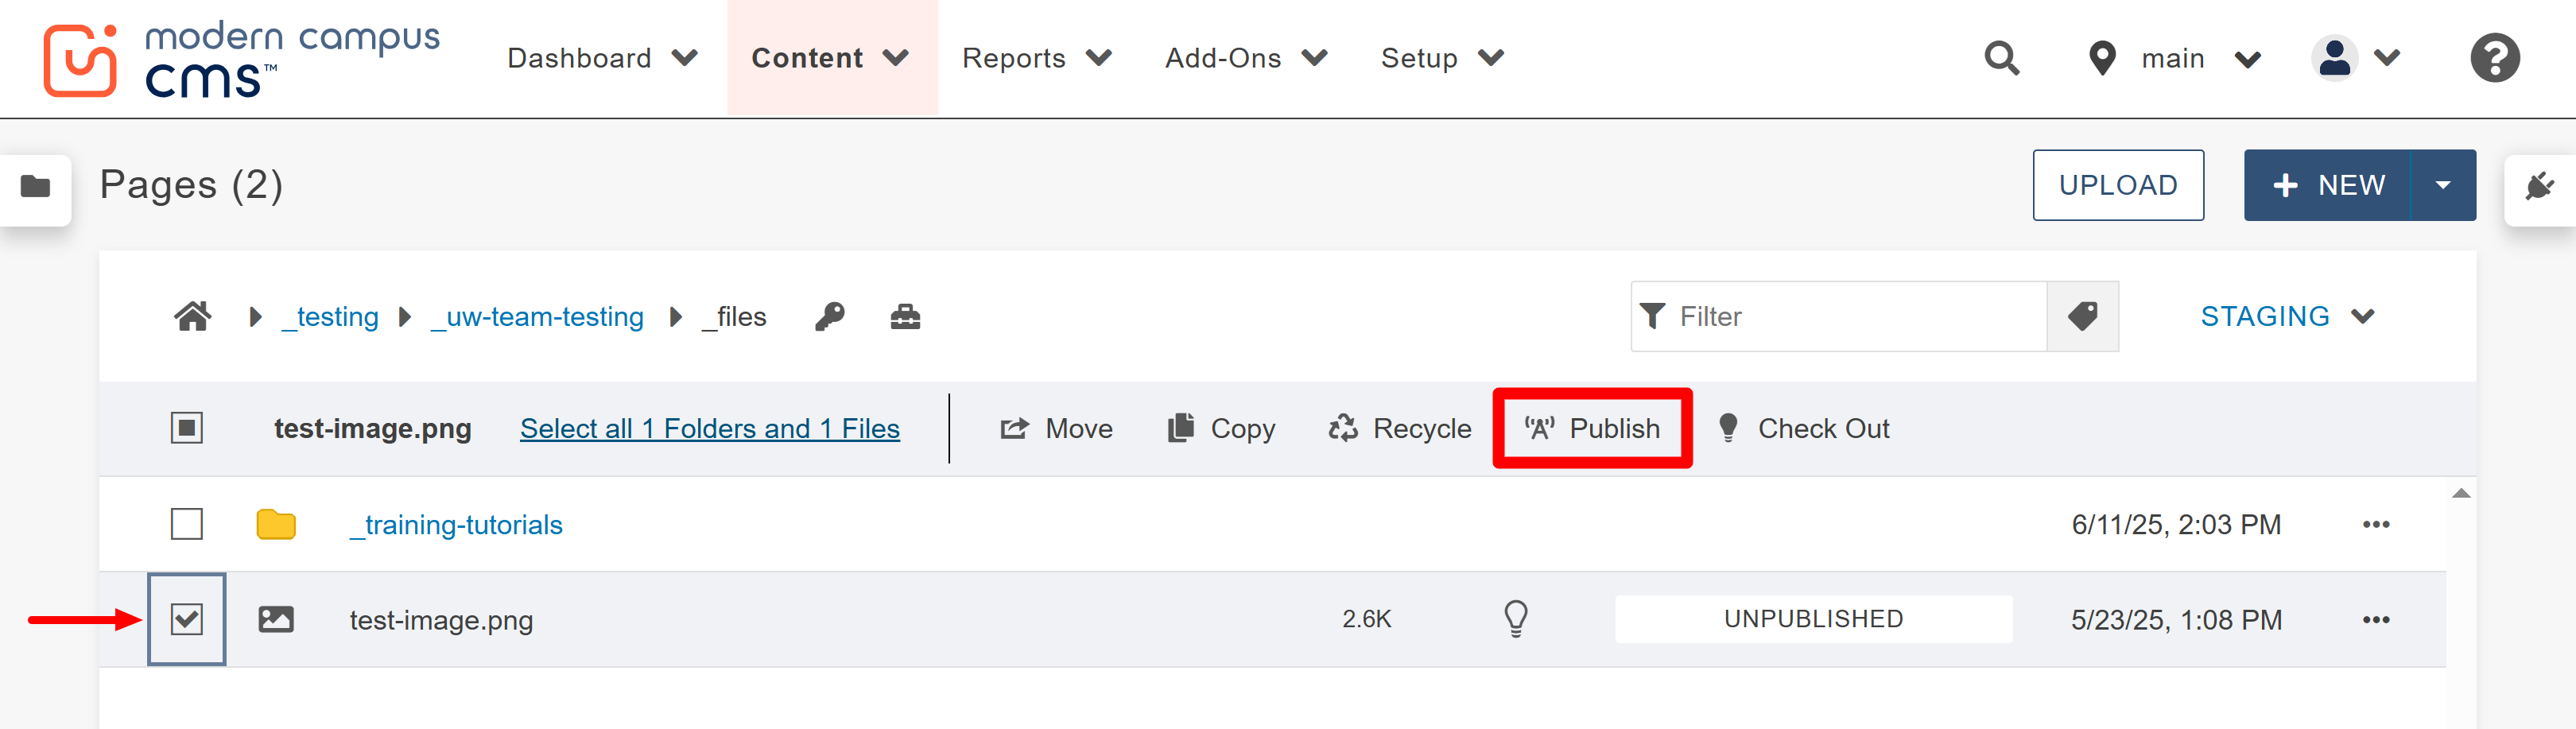
Publish to both Production (also referred to as default or main) and Dev from the
"Publish Target" drop down in the window that appears.
Note: To do this, repeat step 6 twice and publish to the two different targets. 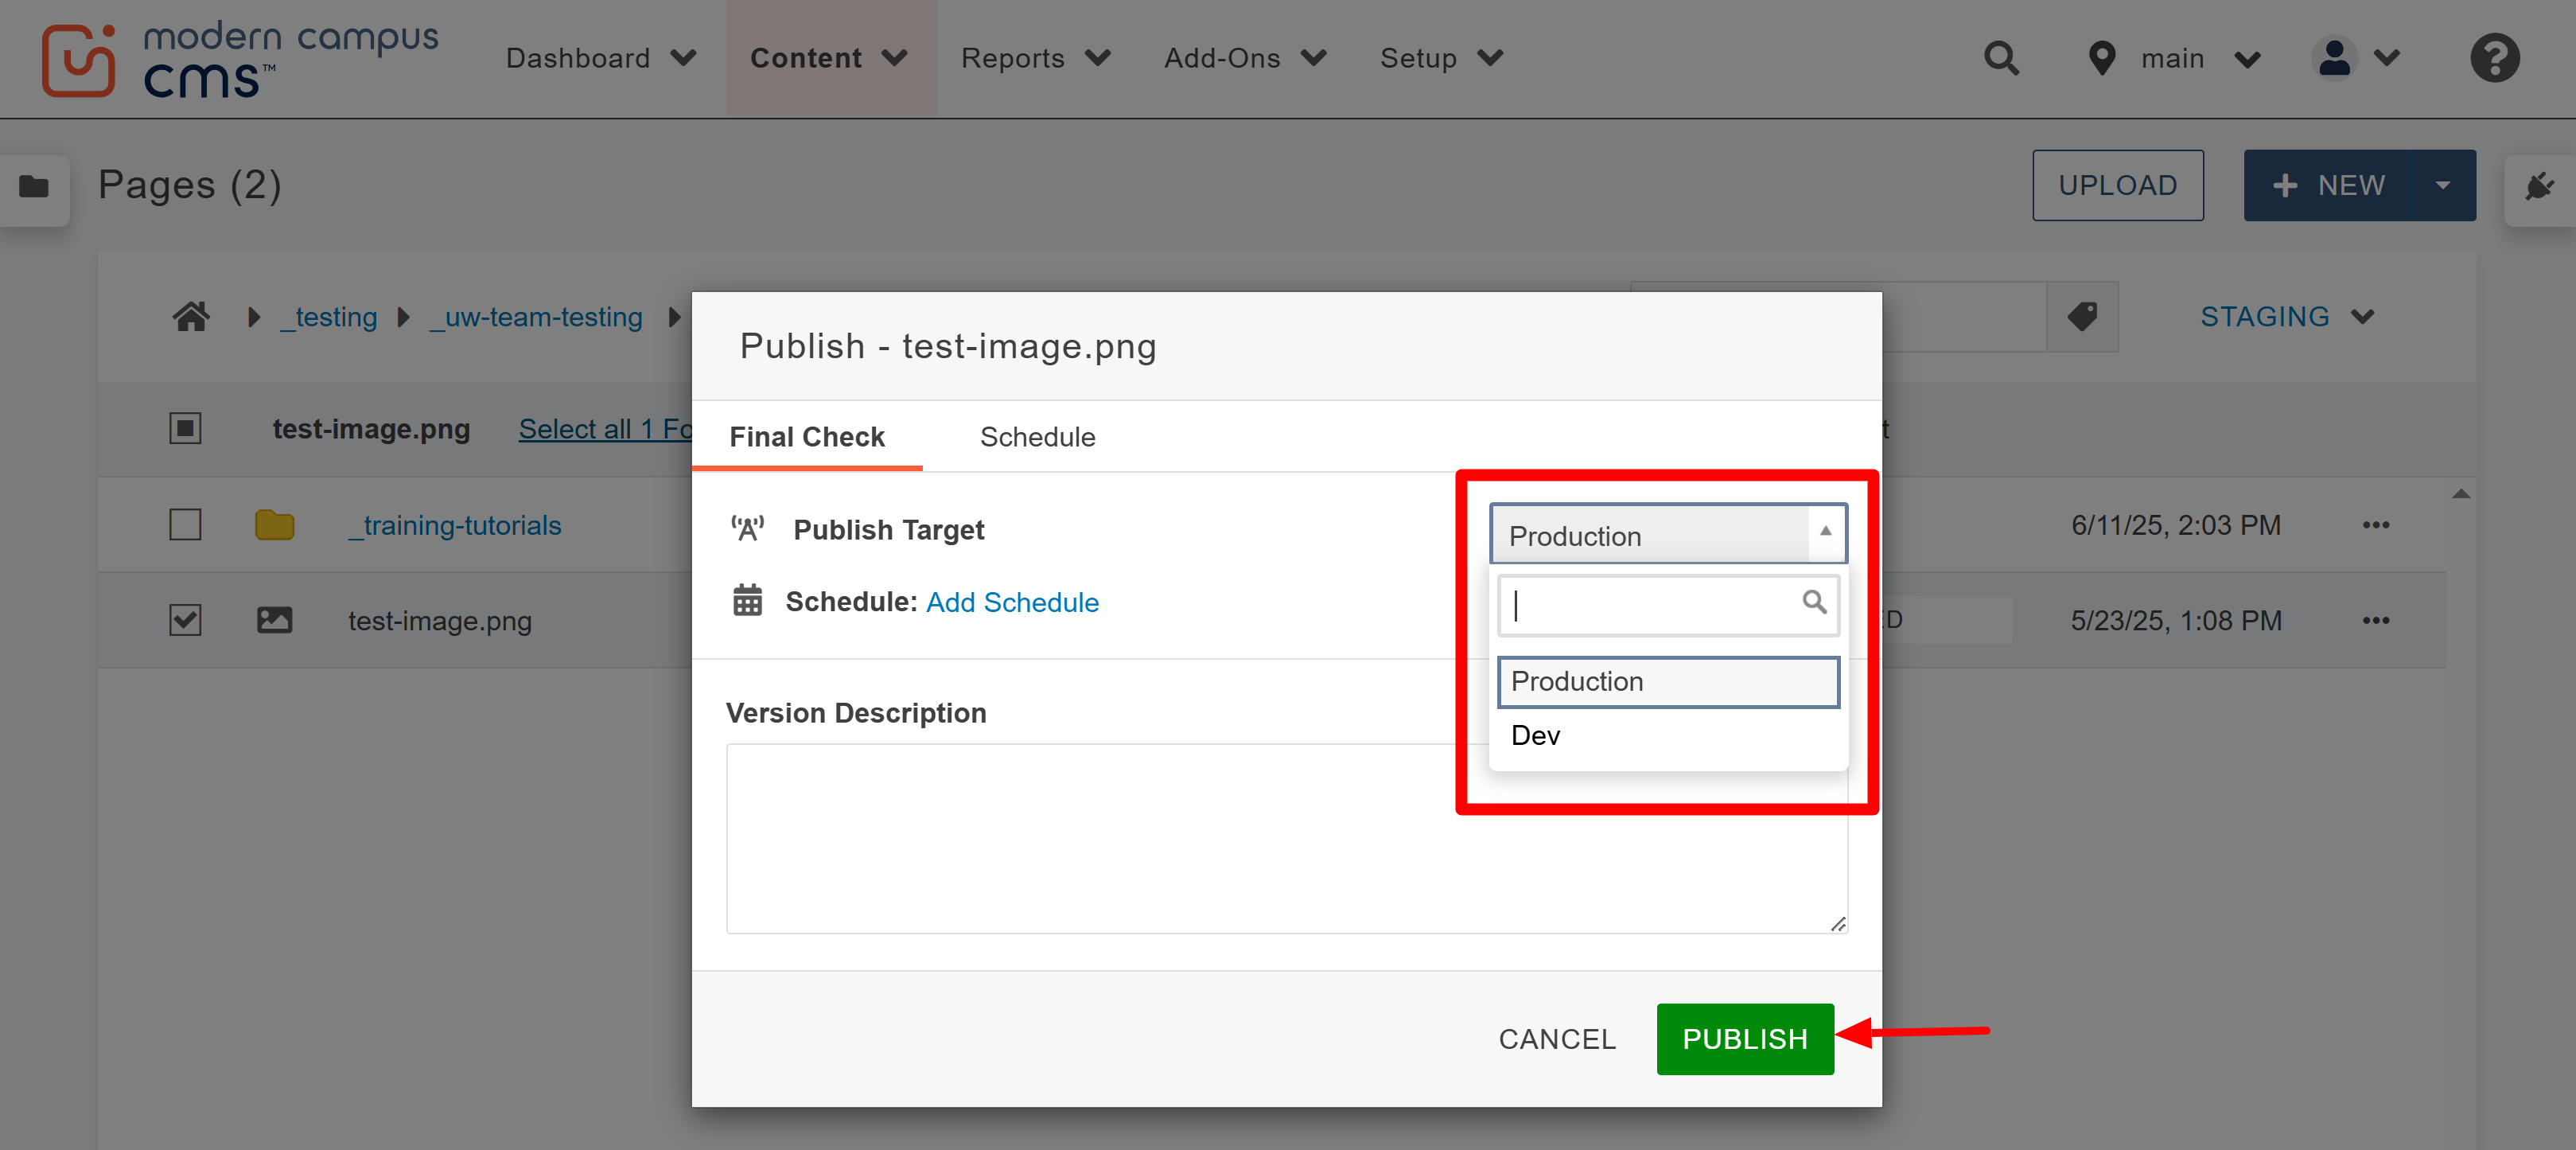
Your image is now ready to be used. Check out the how to insert images guide for next steps!

The University of Wyoming has earned its Research Level 1 (R1) status from the Carnegie Classification of Institutions of Higher Education, placing Wyoming's only four-year university with the top research universities in the United States.