
how to add an Image on your page
Whether the page template has a placeholder image that you want to replace or has a free space to add an image, this guide will cover selecting and adding an image to your page.
From inside the snippet content region, select the Insert/edit image button on the
WYSIWYG toolbar.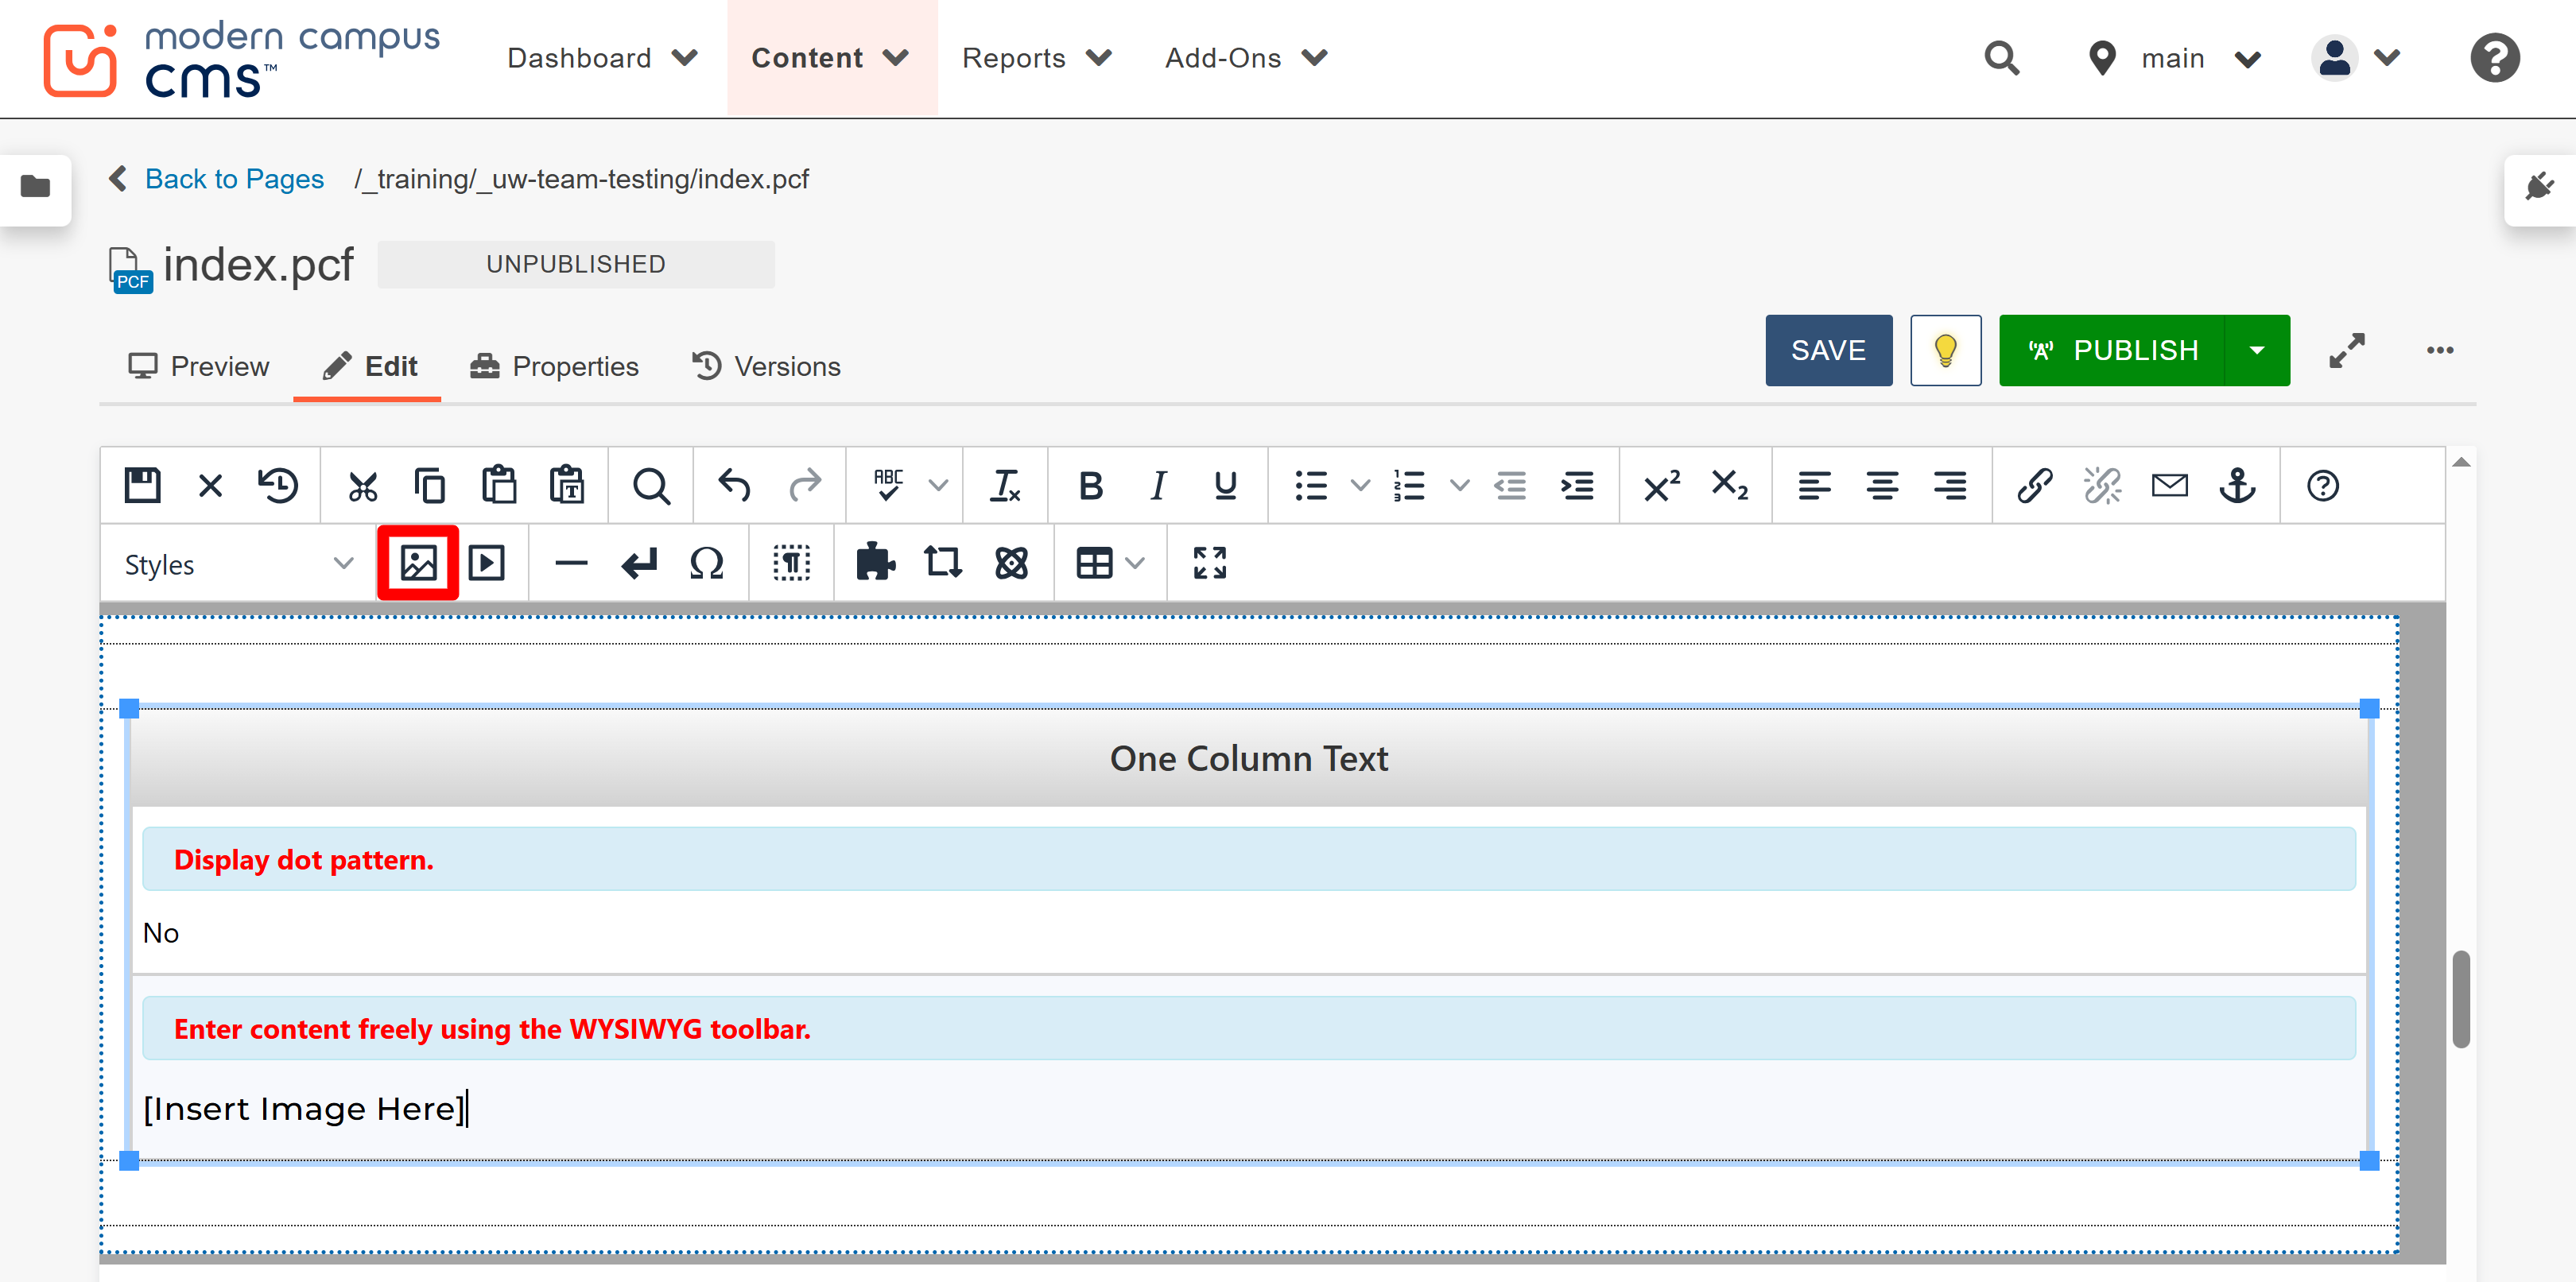
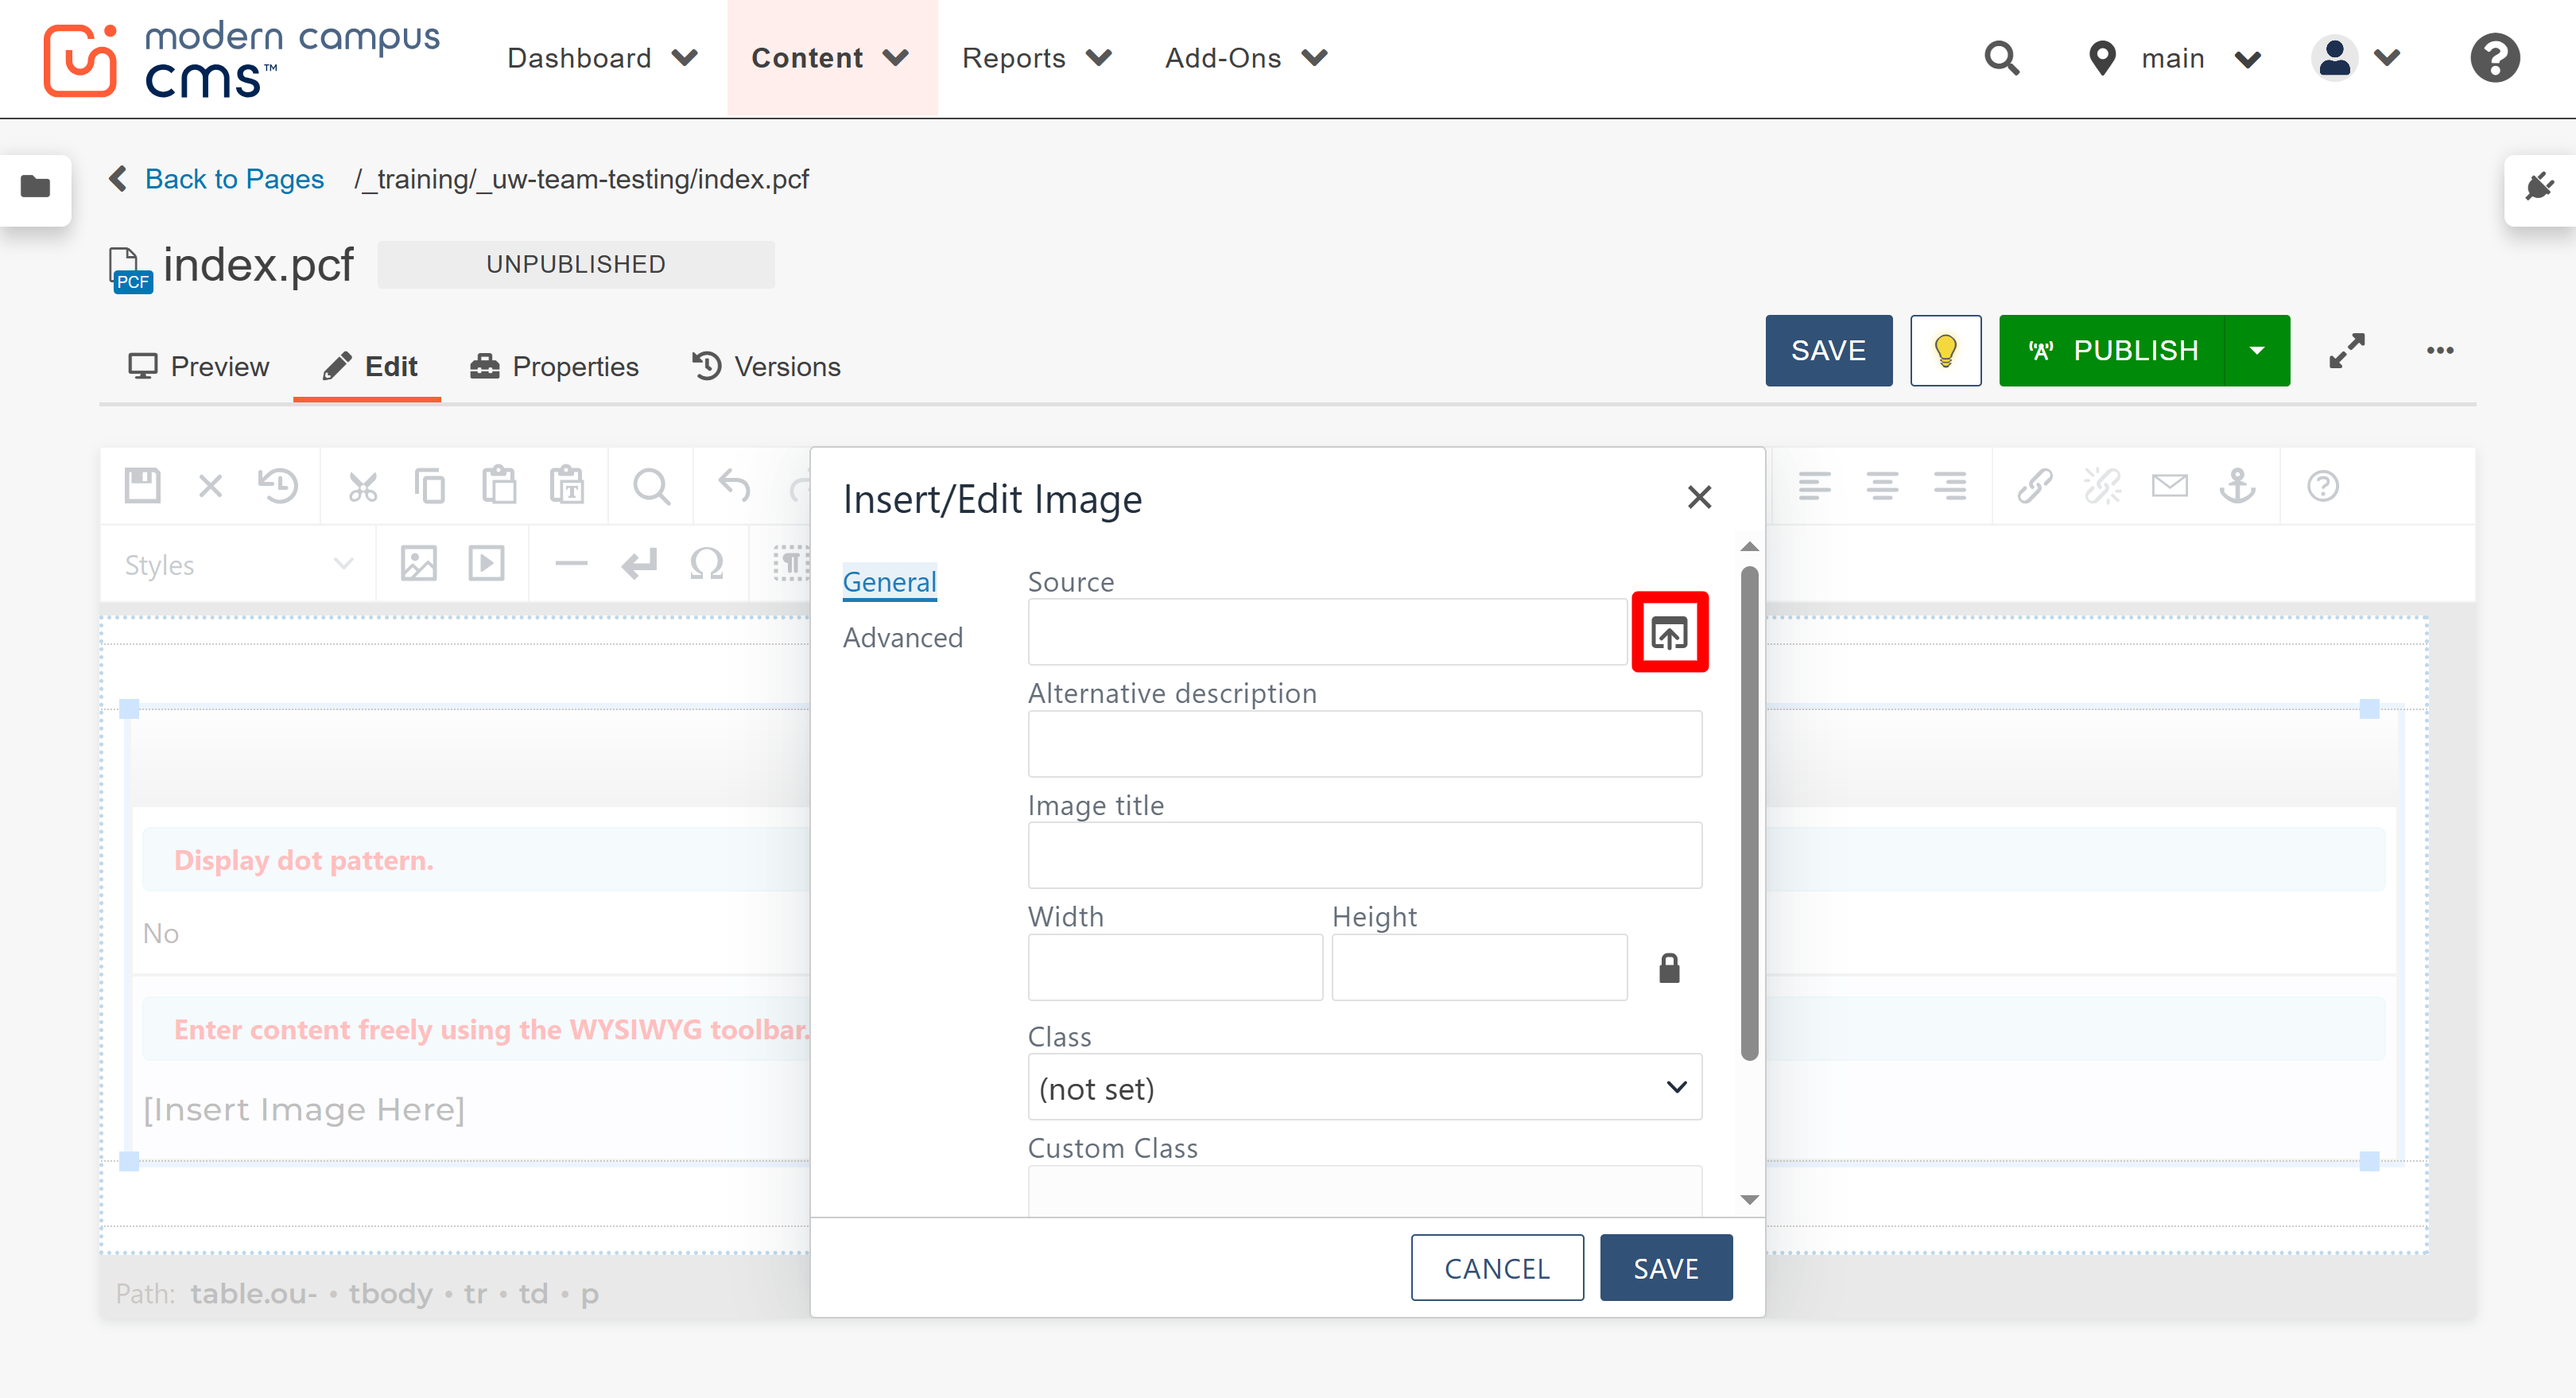
When the Insert/Edit Image window is displayed, select the Source button.
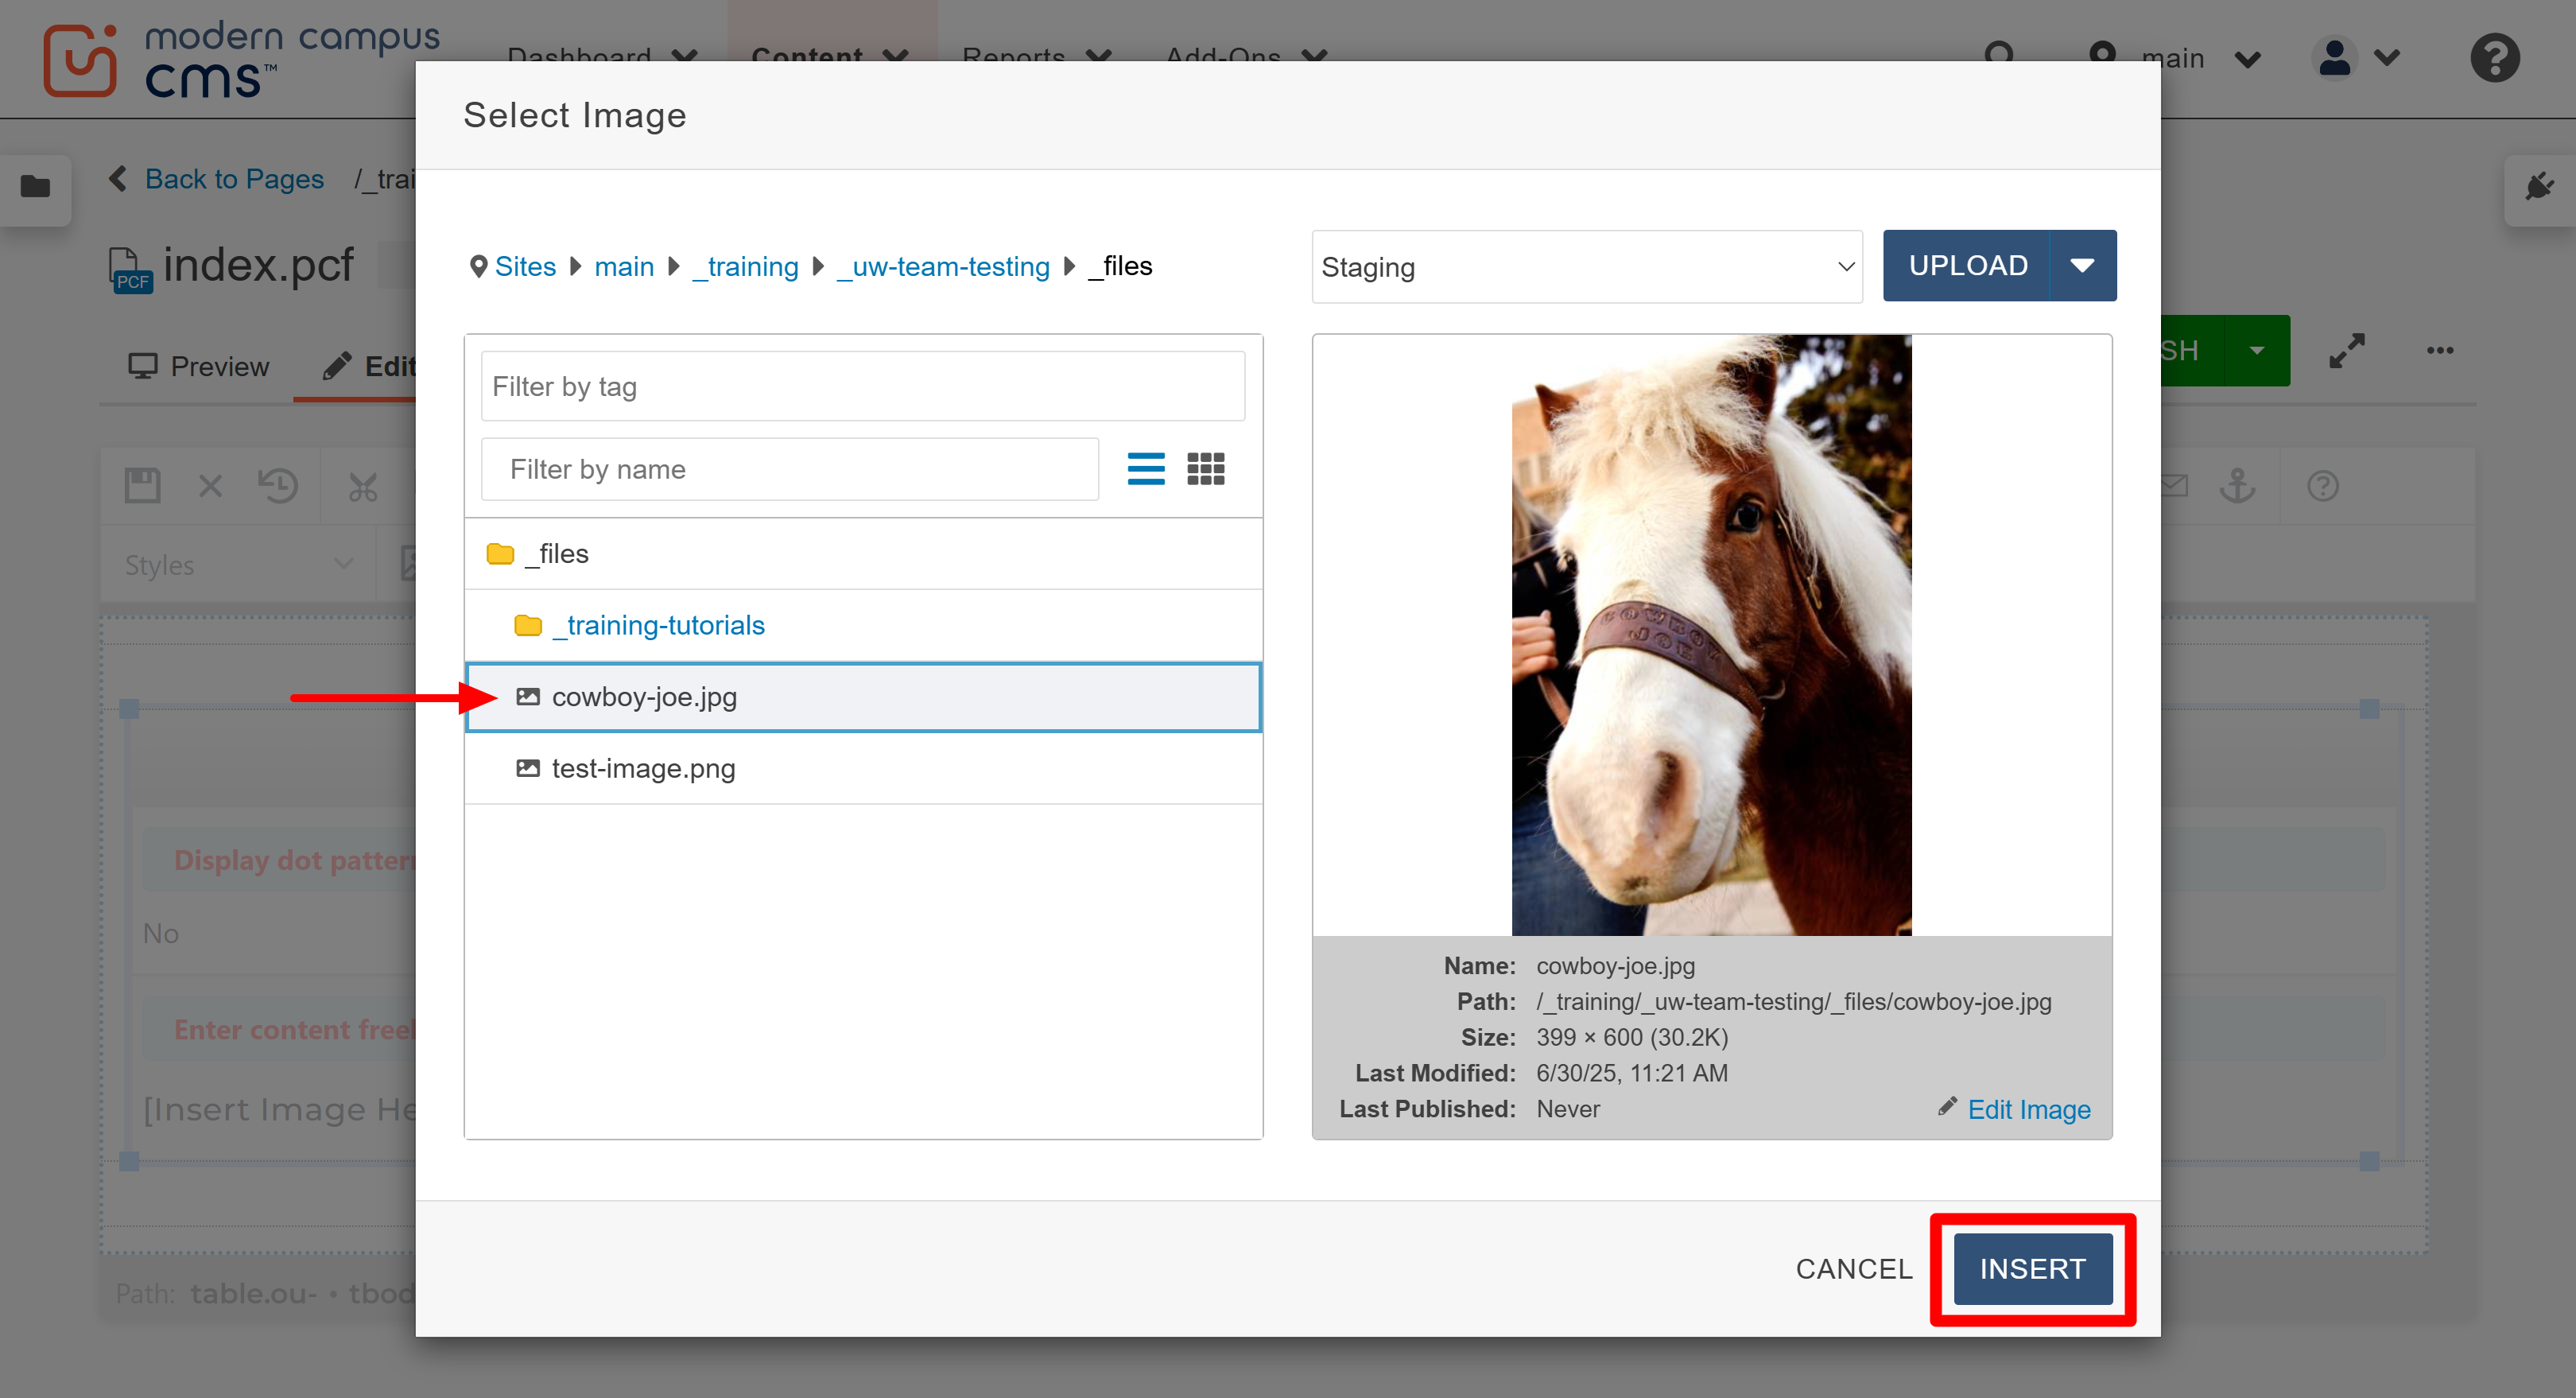
Once the Select Image window is displayed, locate and select the desired image in the file browser list. Then, select the Insert button.
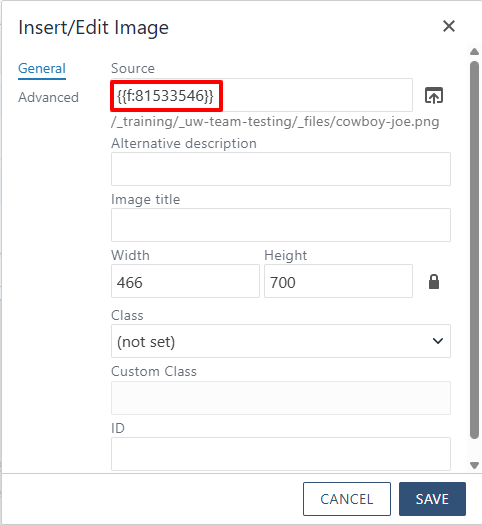
After the Insert button has been selected, you will be taken back to the Insert/Edit Image window and the unique image ID (dependency tag) number for the image file will now appear in the source field.
In the Insert/Edit Image window, type a description in the Alternative description field. All images are required to have alternative text, or "alt text," which briefly describes its content or purpose in order for your page to be accessible to all page visitors. Review our web accessibility resources for alt text assistance.
Note: In the Insert/Edit window, you can also adjust the size the image will appear on the page. You can only decrease the size, though. Do not increase the size here or your image will appear pixelated. Always leave the lock icon to the right of the height field locked to ensure you do not stretch or distort the image. Review our editing images guide for more information about changing image sizes.
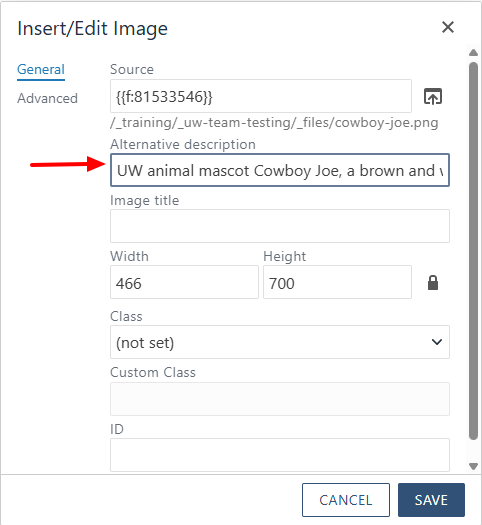
Select the "SAVE" button when ready to insert the image.

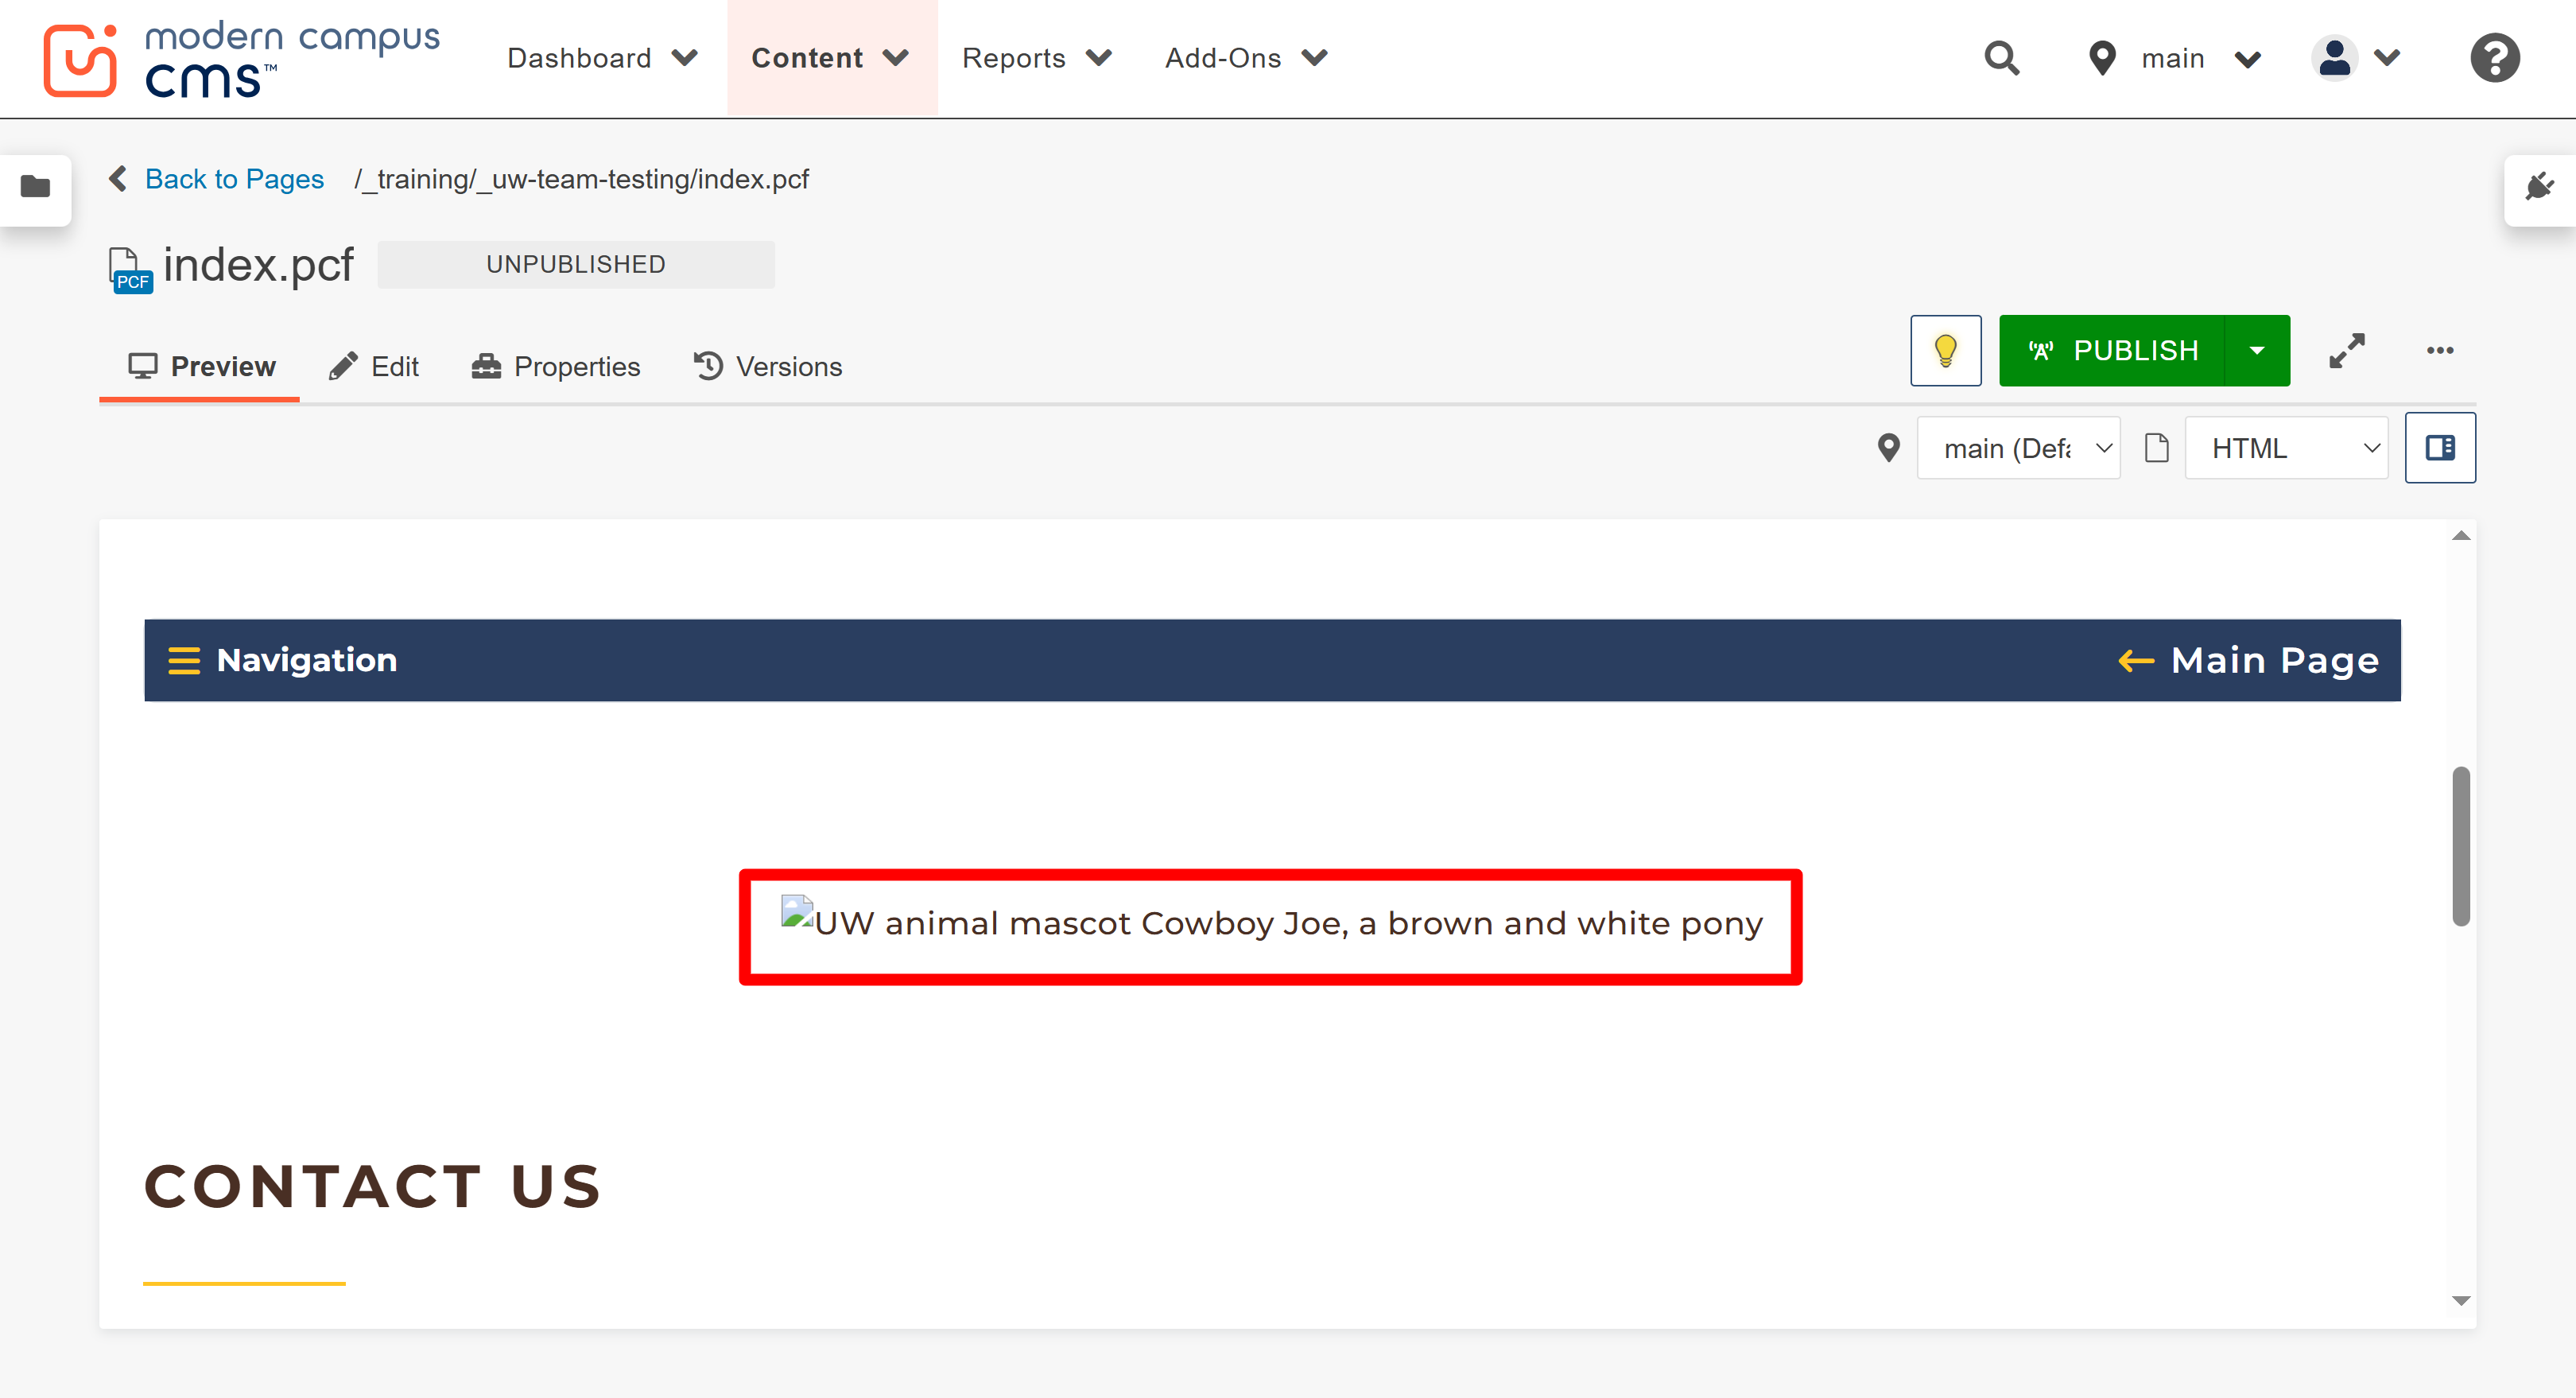
The image has now been inserted into the selected content region. Save your edits and view the page in the Preview tab to see how it will appear when published.
Note: If your image appears in the preview tab like the one below, with only a small broken image icon and the alt text showing, this means that the image wasn't published. Review the uploading an image guide for more information about properly uploading and publishing images.
The University of Wyoming has earned its Research Level 1 (R1) status from the Carnegie Classification of Institutions of Higher Education, placing Wyoming's only four-year university with the top research universities in the United States.