
Important Tips for Creating a Form
Submission Versions
Every time a form is changed, it must be relaunched in the module which will create a new version (always within the same form). This will also create a new version of form submissions. Your submissions will always be saved in the same form, but each new version will always have its own set of submissions.
Set Your Access
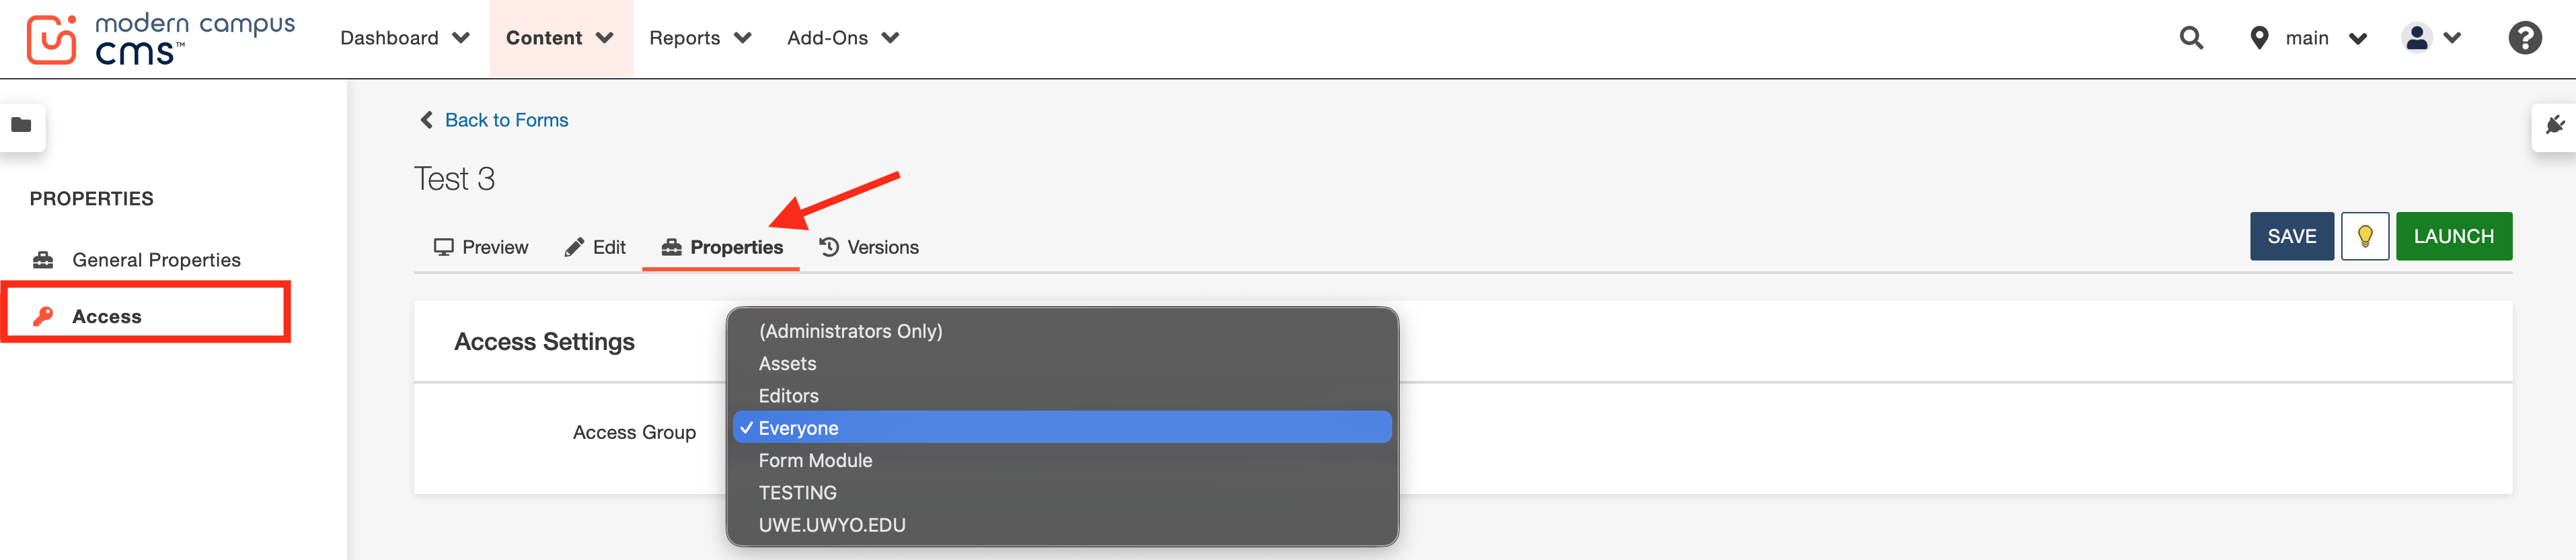
Form access must be set by the site editor inside Properties of the form. Be sure to select your site's access group to ensure your form cannot be edited by other users.
File Upload Limits
Forms contain the ability to allow visitors to upload a file in their submission. These files are limited to 5 MB. For this reason, accepting large files (such as video file submissions or PowerPoint presentations) should be avoided. A maximum of five (5) file upload fields can be added to your form.
Form Creation Video Tutorial
Creating a form in the Form Module is a simple user experience with "drag and drop" functionality to create your data fields. This tutorial contains some important features and tips for successful form creation.
Form Styling CSS Starter File Link
By default, any form that is created will not contain the standard UW website formatting and site editors will need to add our CSS starter file via a URL inside Form Settings. This will create a style to match the same fonts and colors that you see on all other pages within the CMS. Administrators will periodically review all forms to ensure this styling is added.
Use this URL inside Form Settings under the CSS Style field:
https://www.uwyo.edu/_resources/css/forms-starter.css

Step-By-Step Instructions - Creating a Form
Let's cover the steps for creating a form and then placing it inside a page. We strongly encourage you to follow along with the forms video tutorial when building your first form.

From the CMS dashboard, go to Content > Forms in the dropdown menu at the top of the screen.

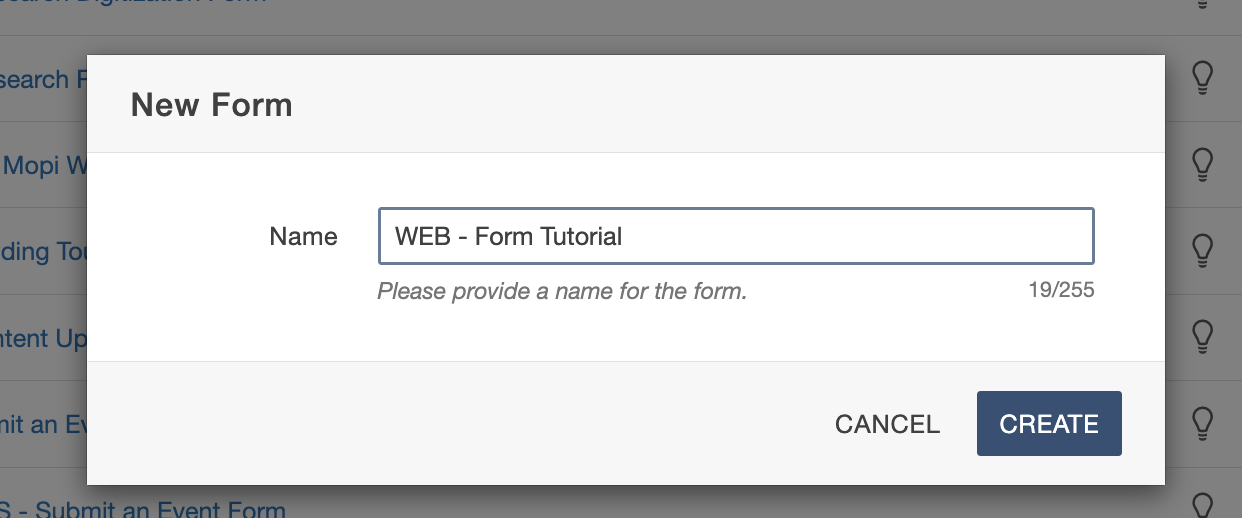
Then, click New, give your form a unique name using the SITE NAME - Form Name naming convention, and select Create to open the form builder.

Open the Properties tab and select Access. Choose the correct access group for your site so the form is connected to the right editing permissions. Site editors will only see the access groups they already have permission to use.
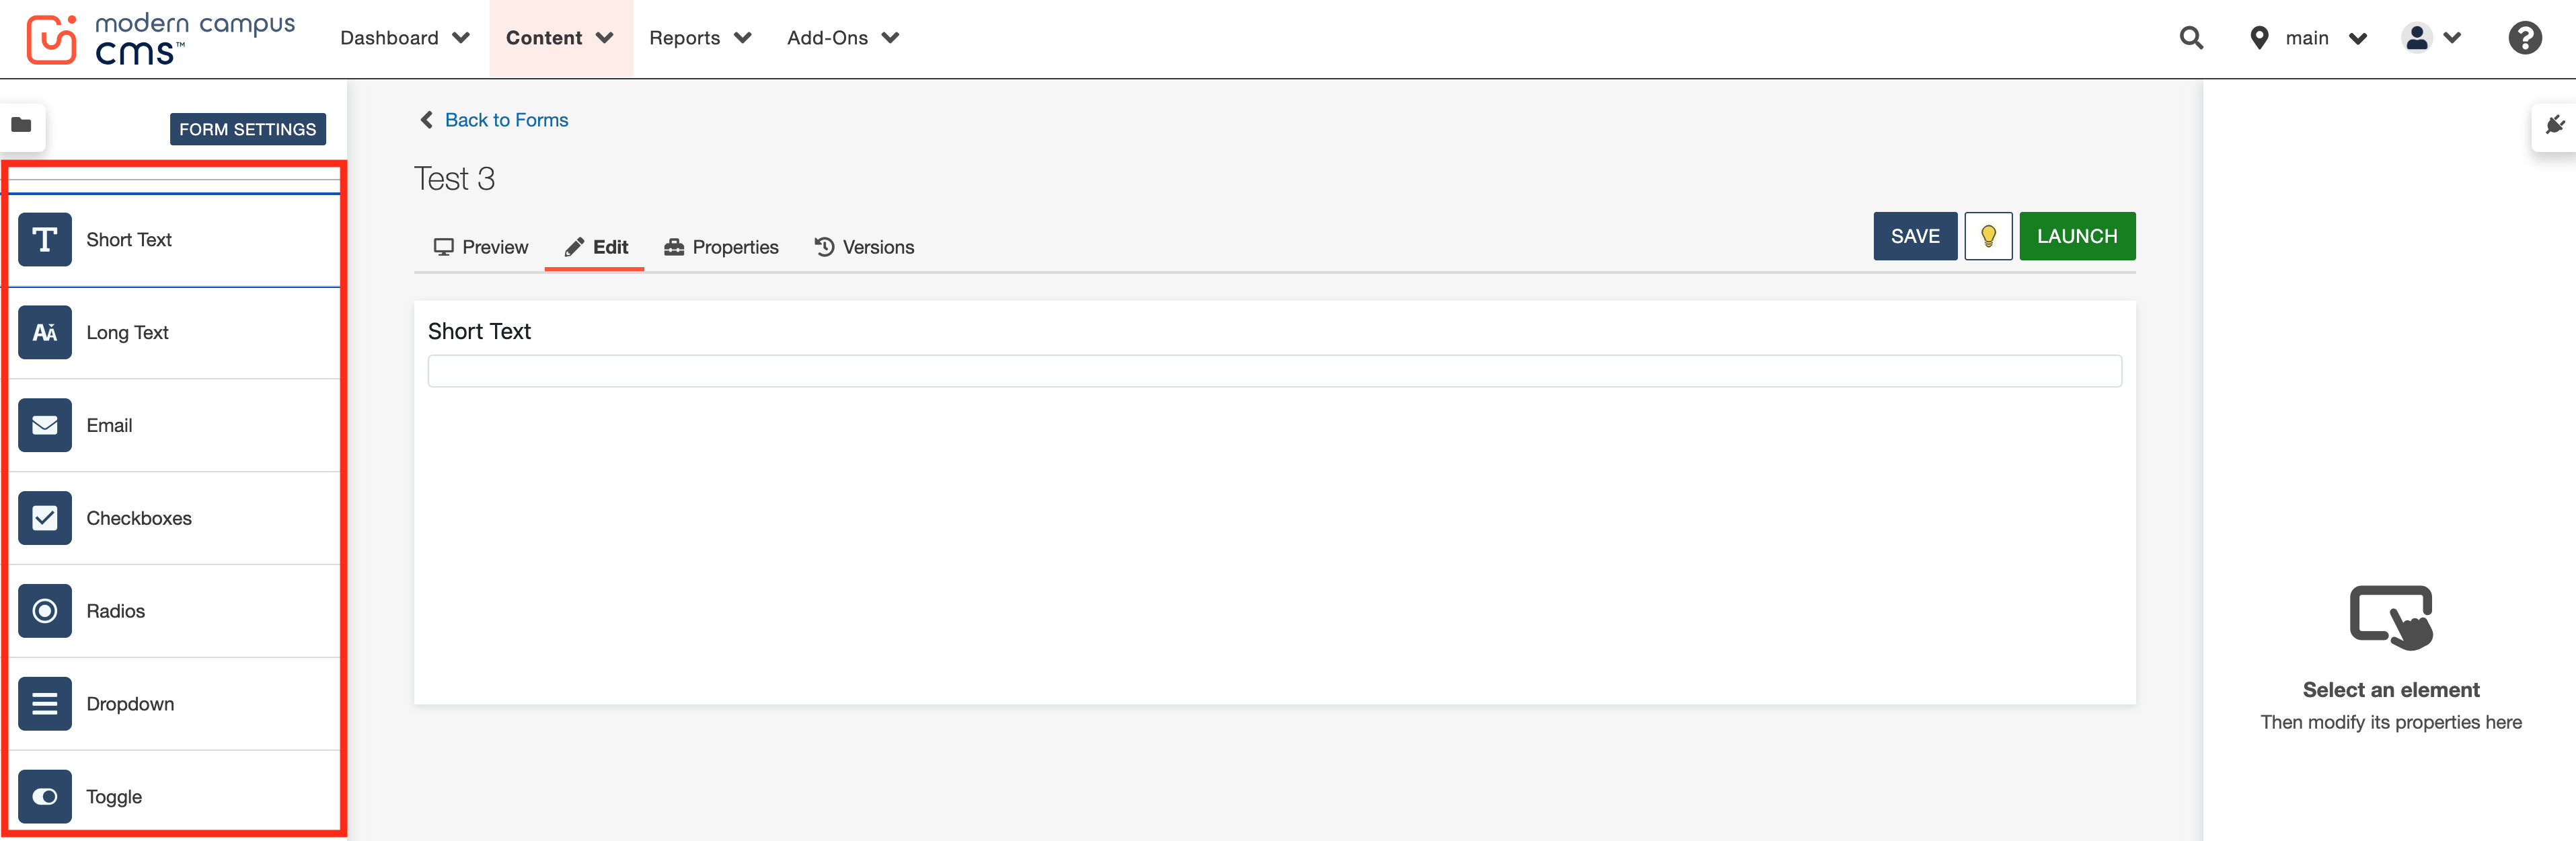
Drag and drop the fields you need into the builder. Make sure the blue "Insert Here" line is visible before placing or moving elements.
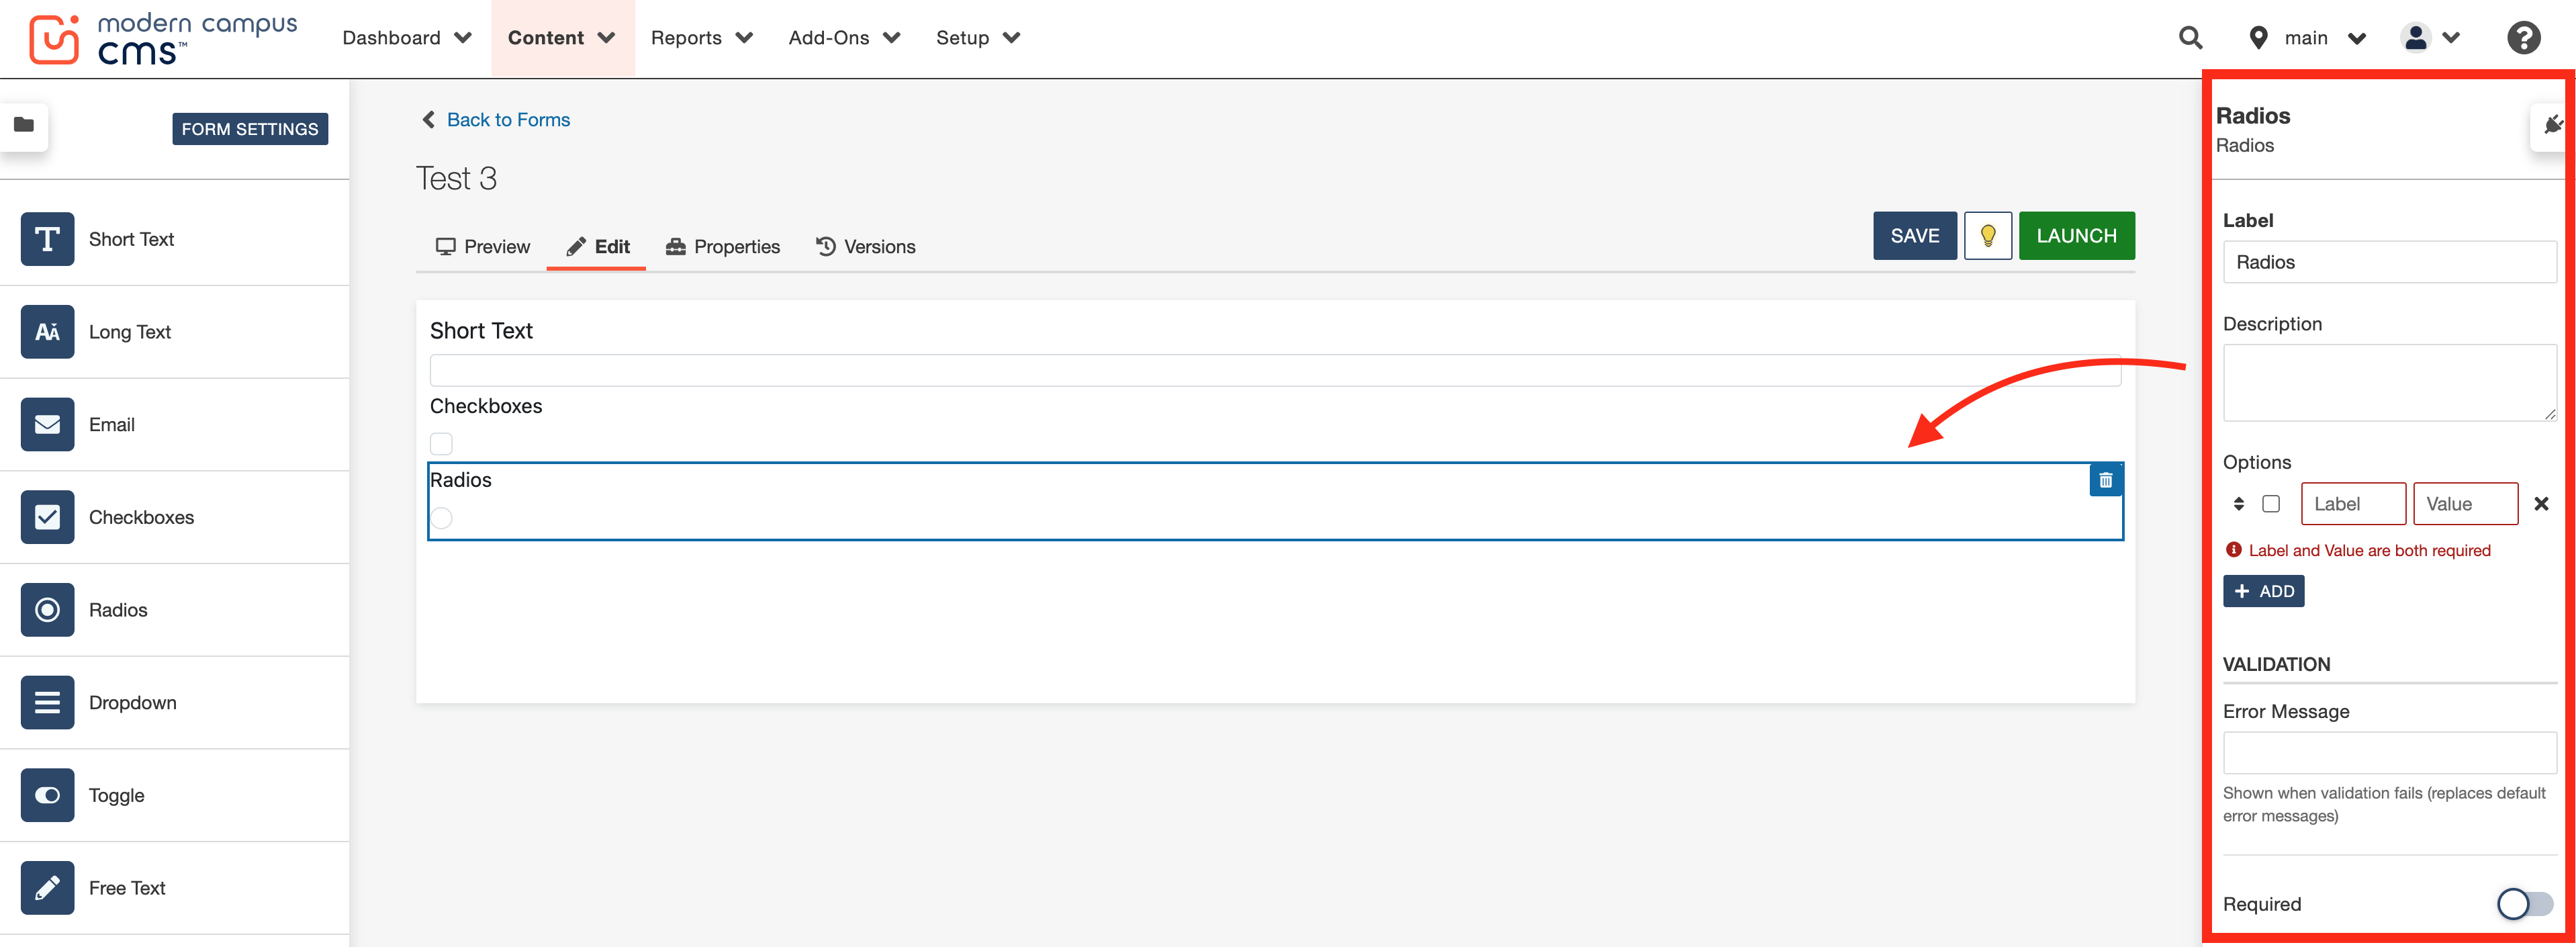
Click directly on any form element to edit its settings inside the panel that appears on the right-hands side of the screen. Add clear labels, helpful descriptions and mark fields as required when needed.
Adjust settings for items like placeholders, default values, check boxes and file uploads. For file upload fields, include helpful guidance such as allowed file types, file size limits and error messages.
Remember: CMS forms can only accept up to 5 MB file, so avoid video or large file submissions.
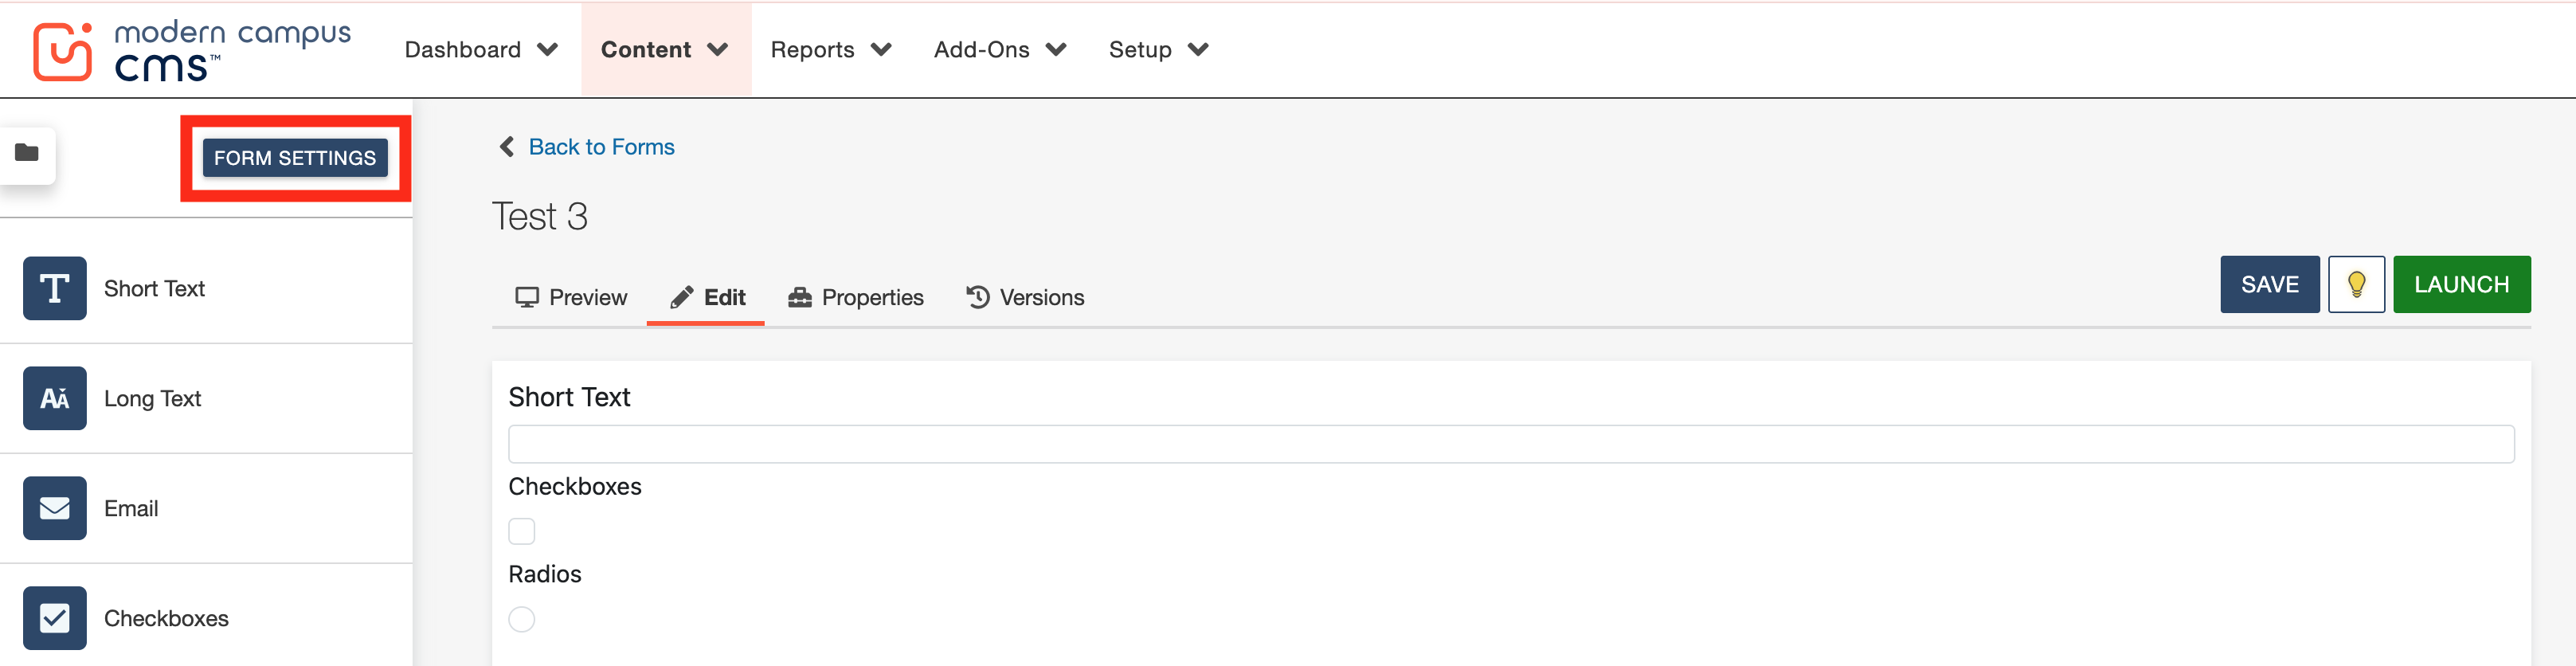
In the top left of the form module, select Form Settings.
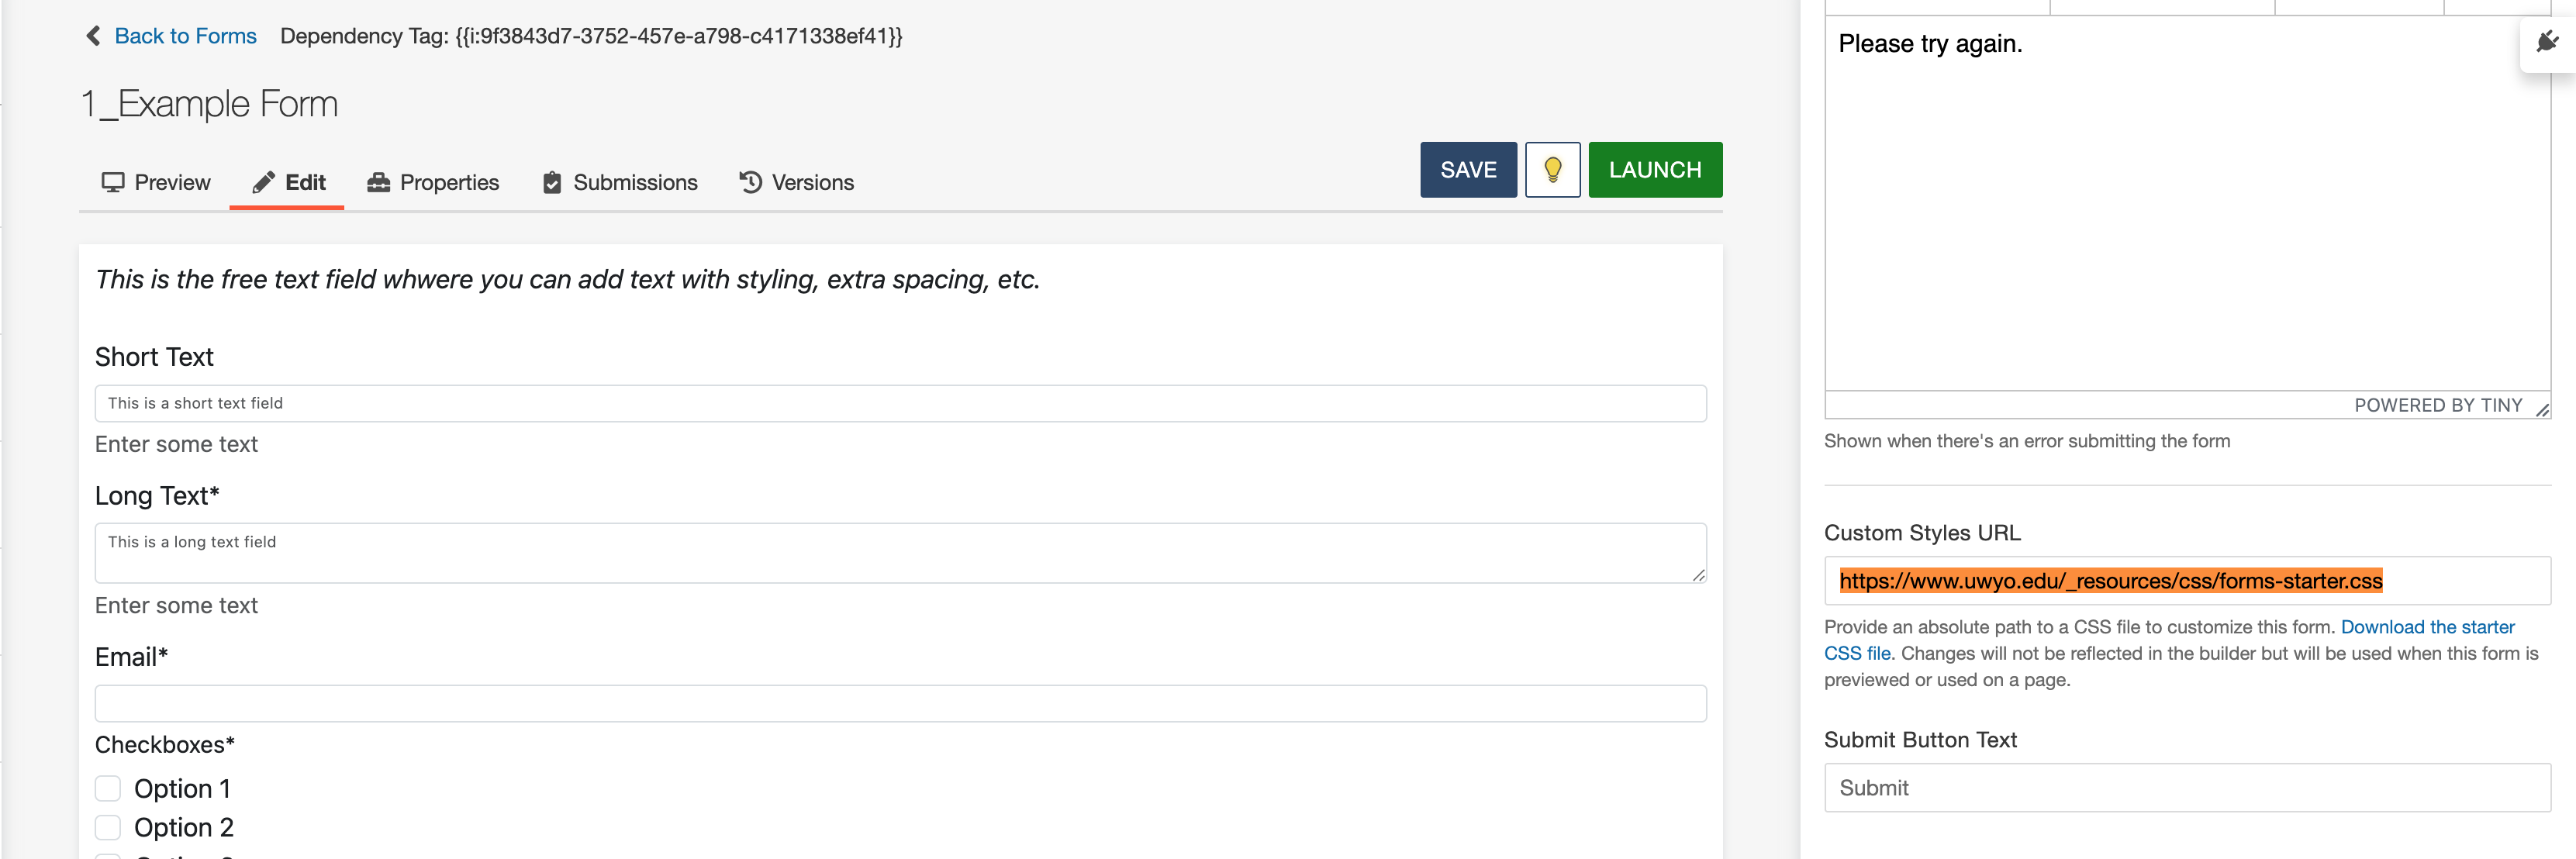
Custom Style URL
Be sure to the add the https://www.uwyo.edu/_resources/css/forms-starter.css custom style starter file URL to match your form to other UW pages.
Do not click the "Download the starter CSS file"—this is not the same file and will serve no purpose to you.
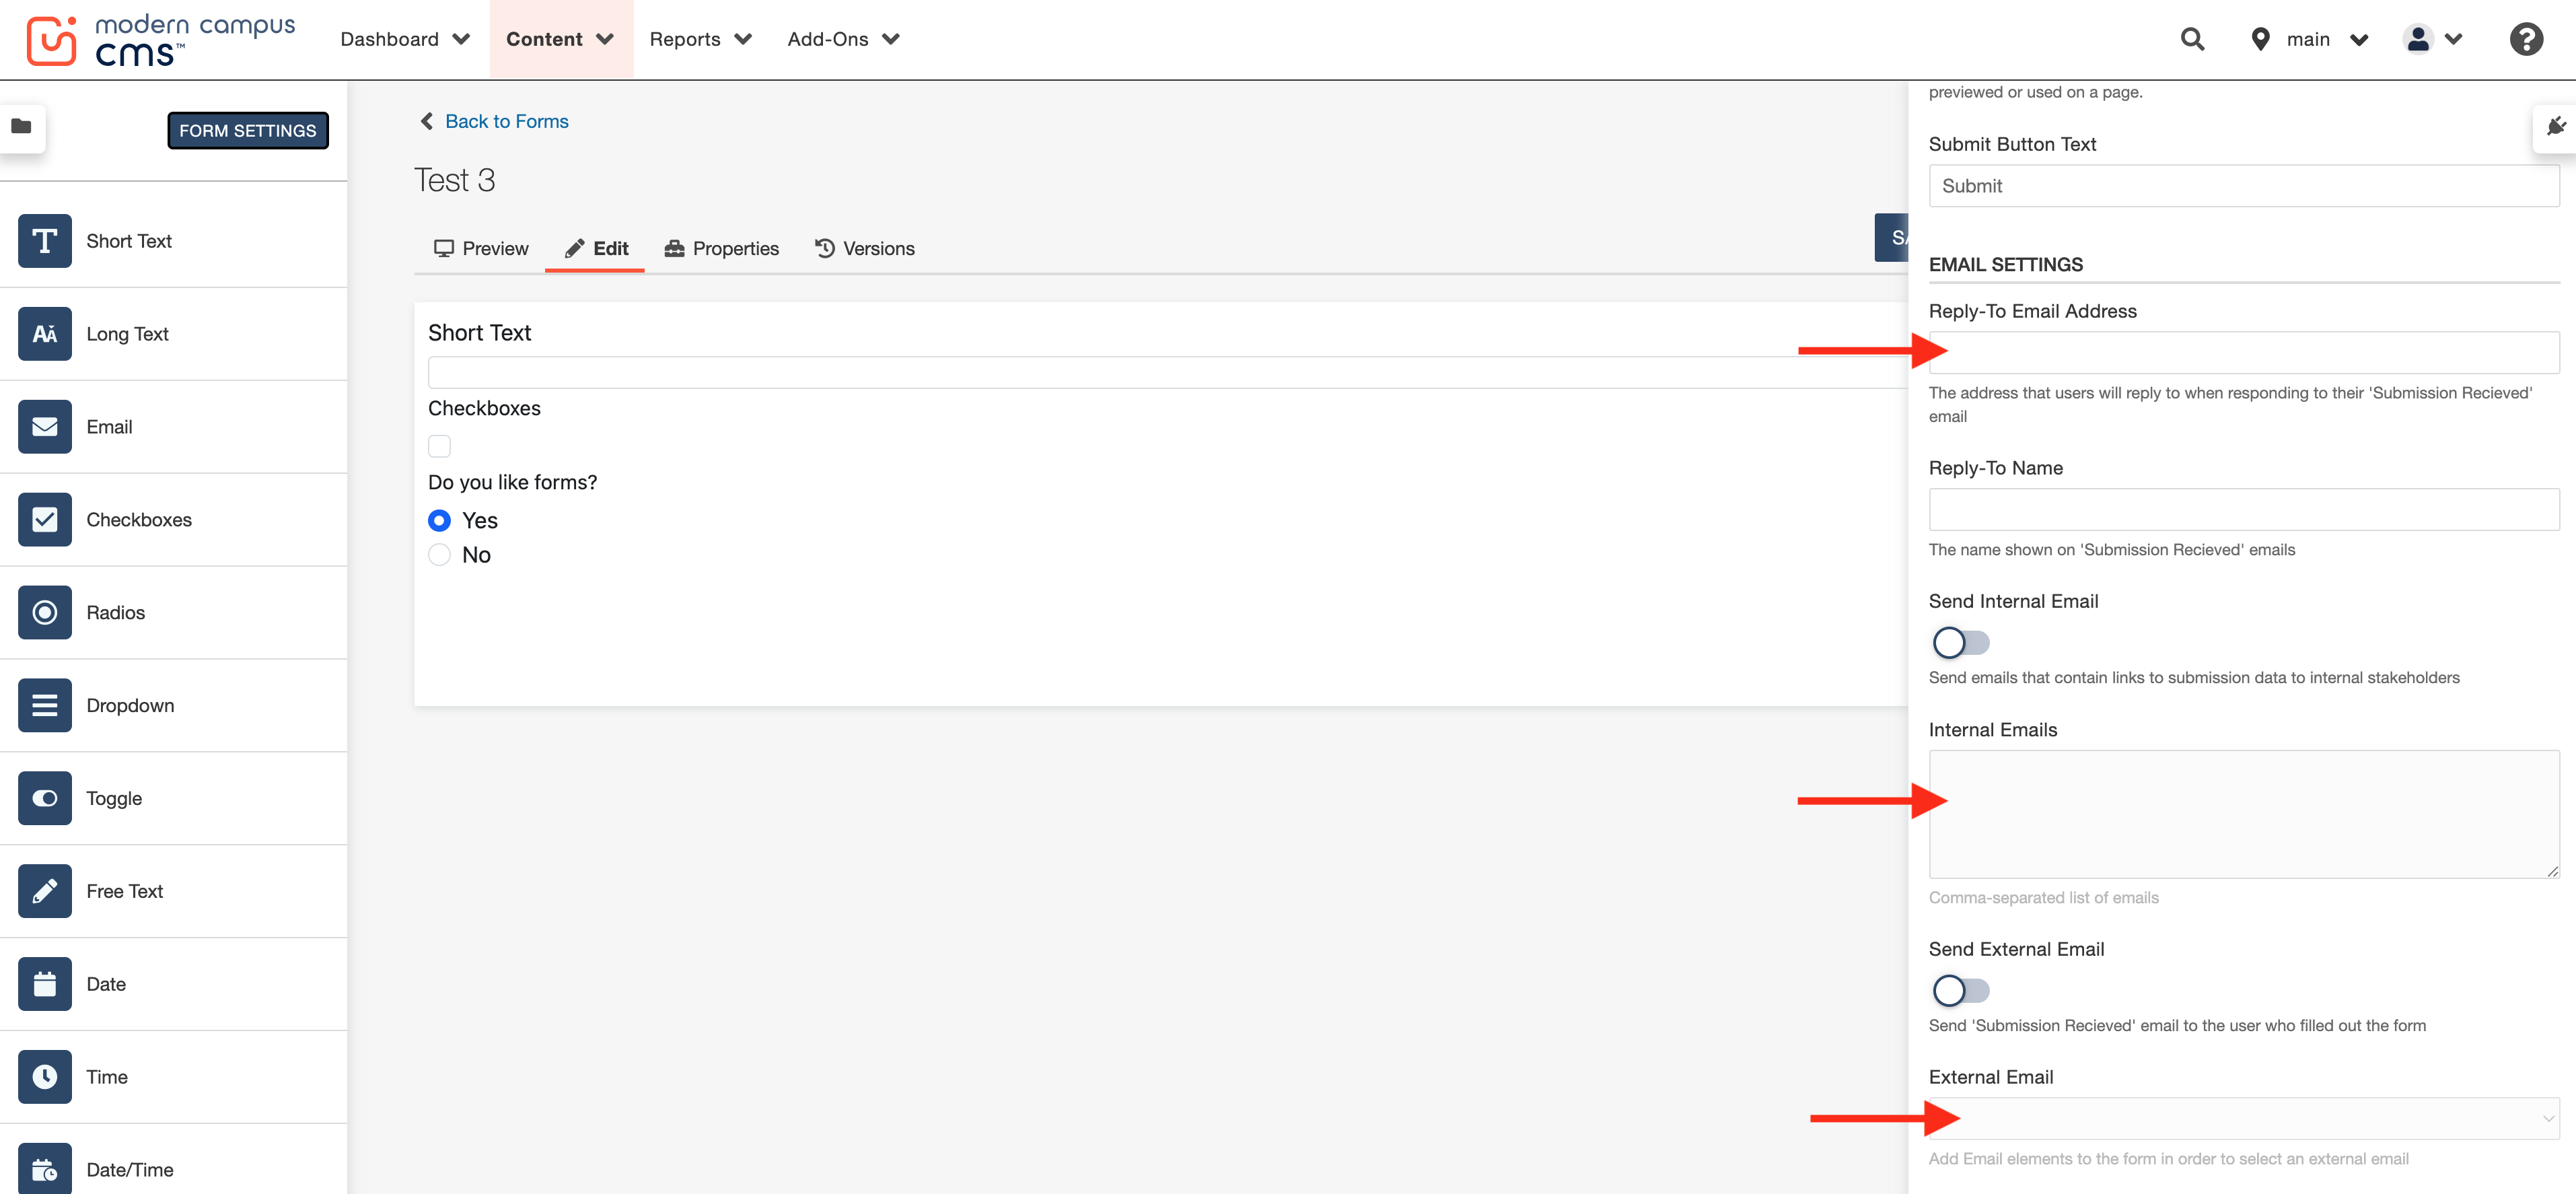
Submissions Settings
Choose what happens after submission, such as showing a success message or redirecting to another page. Then complete the email settings, including reply-to information, internal notifications and external confirmation emails if needed.
Important Note: An external confirmation email can only be selected if an Email field is added to the form.
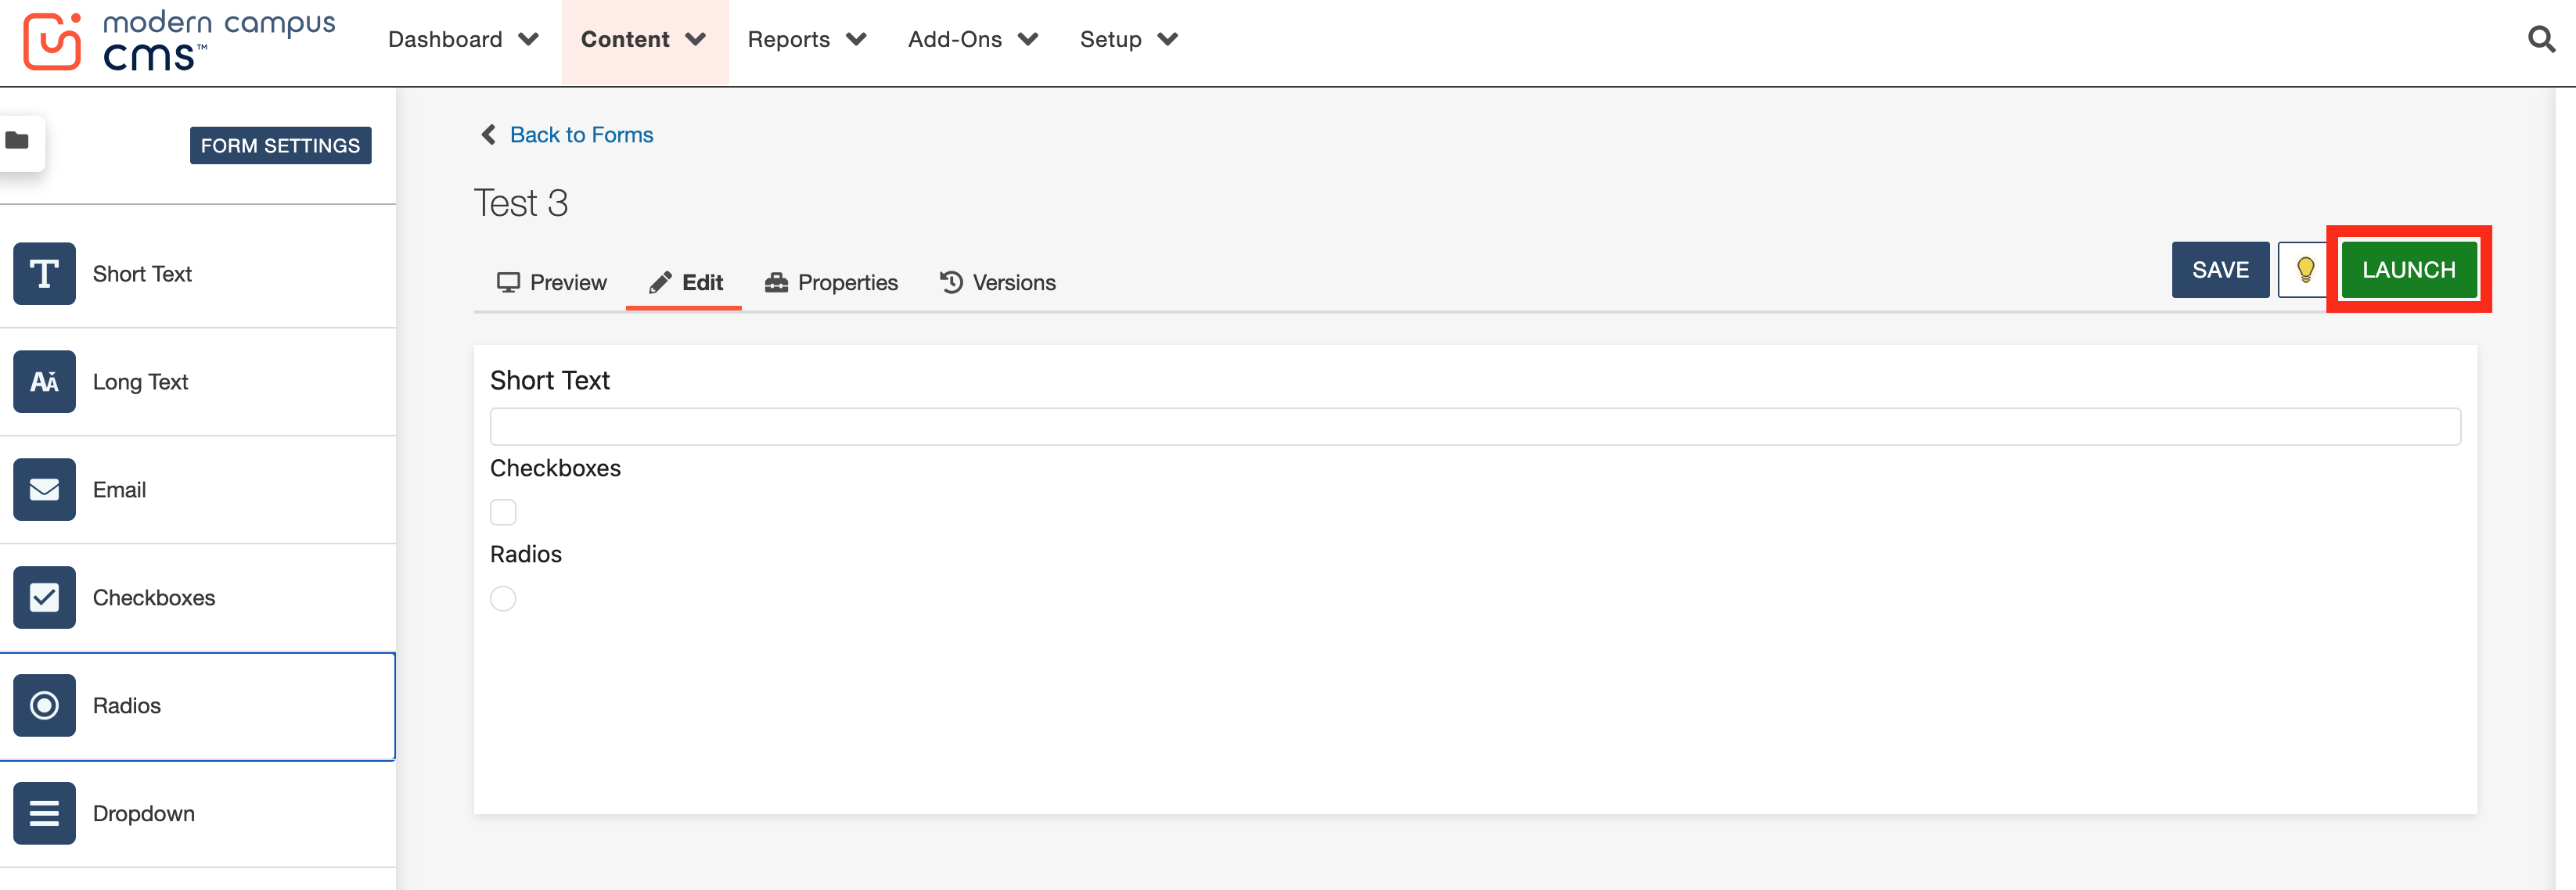
After making changes to form fields or settings, save your work and select the green Launch button. If your are editing a previously built form, this updates the live version that will be used on your page.
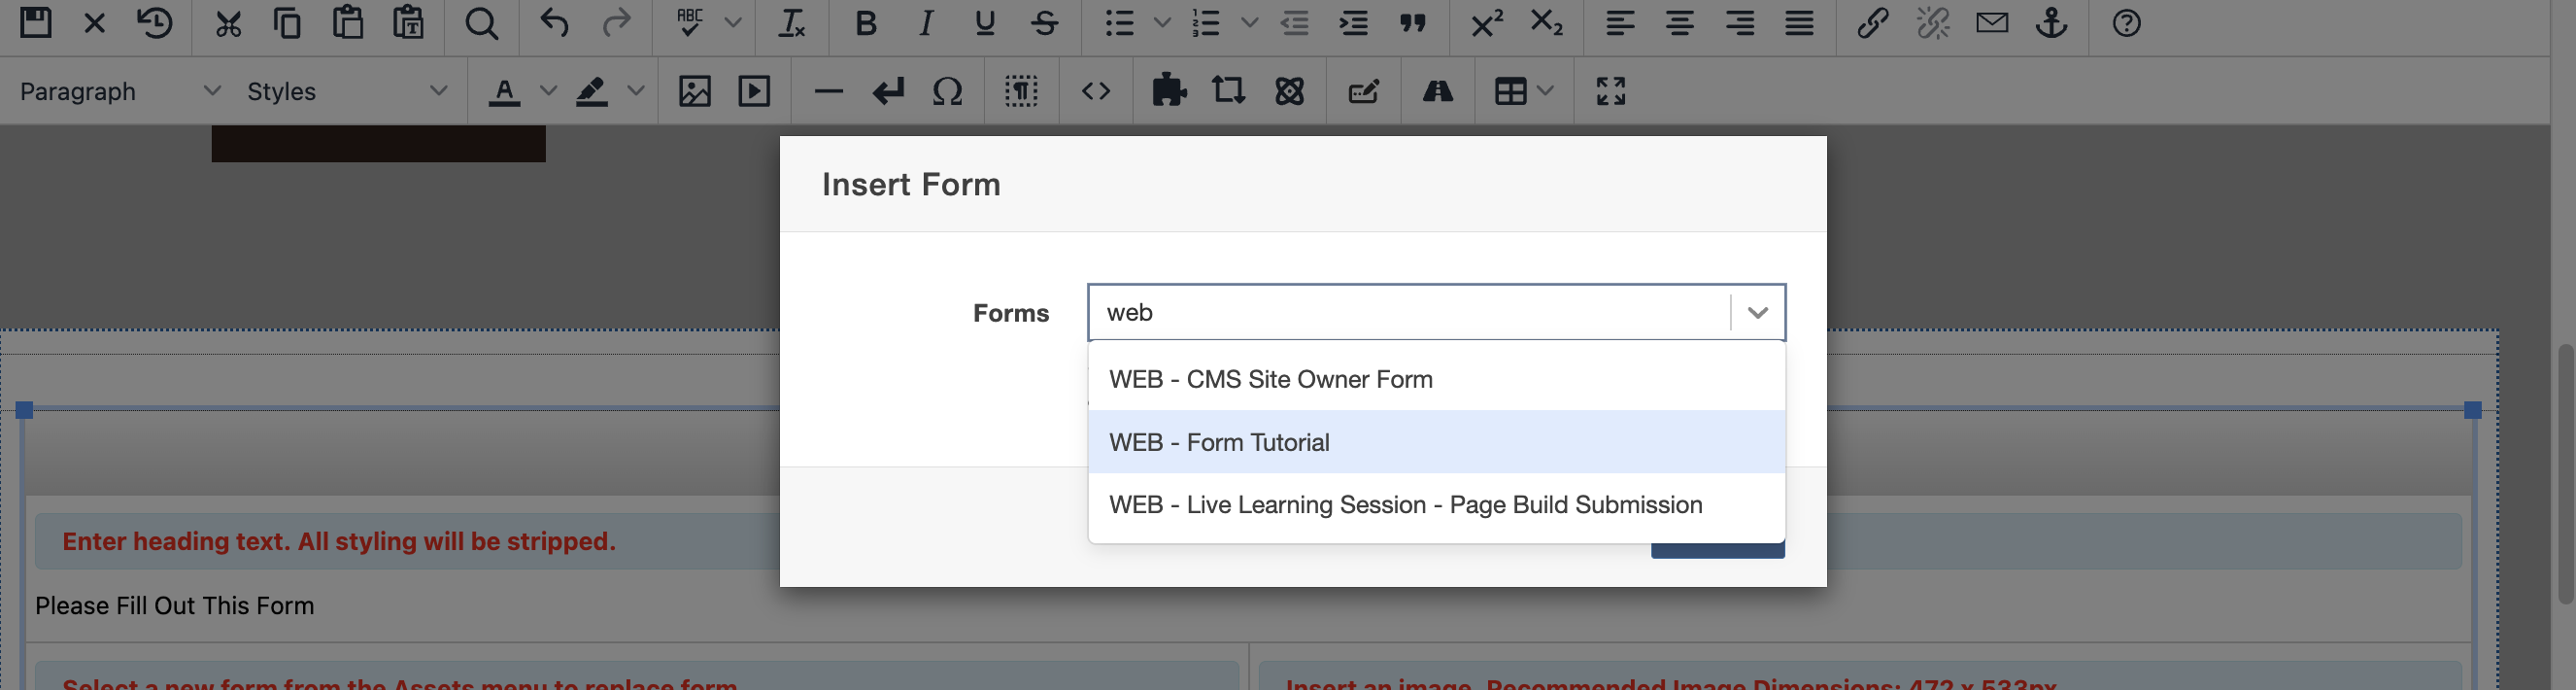
Open the page where you want the form to appear, place your cursor in the editable content area, and use the Insert Form icon (denoted as a pencil inside a rectangle icon) inside the WYSIWYG toolbar.
![]()
Tip: If you need a new form page, try using the Form template which is pre-formatted to display your forms in an attractive, simple layout.
You will then be prompted to select your form. Save and publish the page and test the form in Dev first. You can return to your form and review submissions later under Content > Forms > Submissions.
Submission Access
As part of Modern Campus's transition from legacy Form Assets to the new Forms Module, form submissions are now managed directly within the CMS. This change was designed to provide a more centralized and secure approach to form management, including recommended security practices for protecting submitted data.
As a result, users who need to review form submissions must have CMS access and appropriate permissions. We understand that this differs from the previous Form Assets experience and may impact existing workflows for some departments.
Modern Campus has indicated that they are exploring enhancements to improve the experience for users who only need access to form submissions, while continuing to prioritize secure handling of submission data.
We are actively working toward a solution that will better address this gap. In the meantime, you can submit a ticket and one of our administrators will be happy to export and send those submissions to you directly. It is worth noting as well that any site editors already assigned to your department's directory will also have the ability to view and export form submissions on your behalf.
*IMPORTANT: Forms cannot be recovered once they have been deleted. Due to this, it
is important to follow these steps in order prior to form deletion*
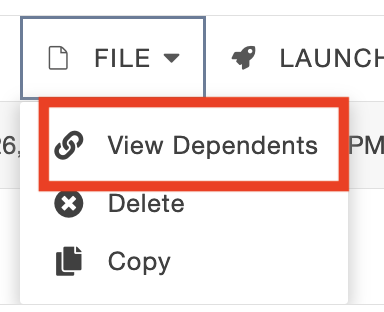
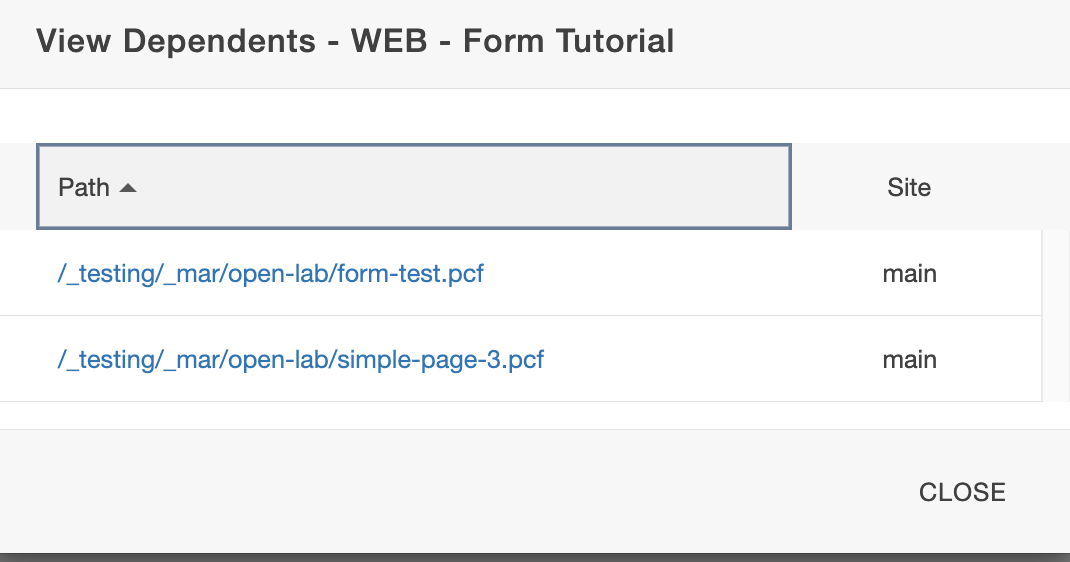
- Locate the form and select File > View Dependents
- Open up each page where the form is linked and remove it from the page(s). Make sure
to save and publish page(s) to Production and Dev.
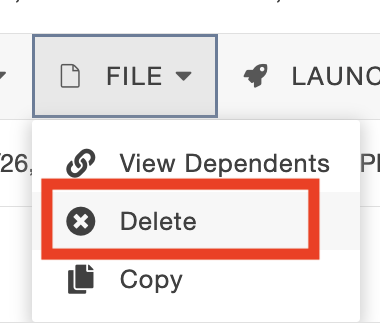
- Once it is confirmed the form is not linked to any pages. Navigate back to the form
module page and select File > Delete. Remember, this cannot be undone and forms will not be able to be recovered once deleted.
The University of Wyoming has earned its Research Level 1 (R1) status from the Carnegie Classification of Institutions of Higher Education, placing Wyoming's only four-year university with the top research universities in the United States.